20 Best Tips

Wonder Crate Subscription Box – Sparking Curiosity in Kids

Our family received access to the Wonder Crate Bill Gates subscription box in exchange for our honest review, and I was compensated for my time writing the review. All opinions are our honest thoughts and we have been using the program during our school time. Please see our disclosure policy.

Learning through literature is one of my favorite ways for our kids to gain knowledge. When we can tie-in fun activities that go hand-in-hand with our reading and deepen our understanding on a topic – well, that connection can be priceless.

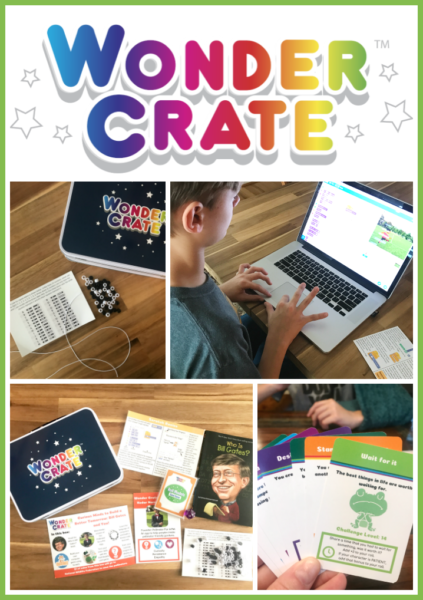
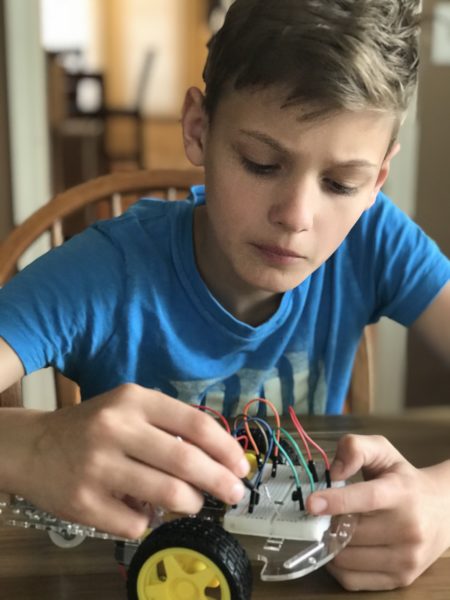
The past two weeks Kaleb has been working through a new subscription box called Wonder Crate, based on inspirational role models and providing activities that will spark curiosity in kids. We received Curious Minds to Build a Better Tomorrow: Bill Gates and You! 

Each Wonder Crate is based on three core areas – 

  1. A BOOK to Inspire – each Crate includes a book from the Who Is book series.
  2. Activities to Empower – fun activities to spark curiosity and connect children to their own possibilities.
  3. Ways to GIVE BACK – a portion of sales from each box goes to a child that is making a difference.


What’s Included in Wonder Crate

Wonder Crate is targeted toward kids that are 7-11 years old. Our youngest son is 12 (6th grade), but his current reading level is right on target for this program. EachWonder Crate includes the following: 

  • Who Was book to introduce kids to brave, forward-thinking role models.
  • Fun activities to spark curiosity and connect children to their own possibilities.
  • Stories of kids their own age that are making a difference.
  • A collectible “Roll Models” card game to make inner exploration FUN.
  • A subscriber email with additional resources and links to videos for families.

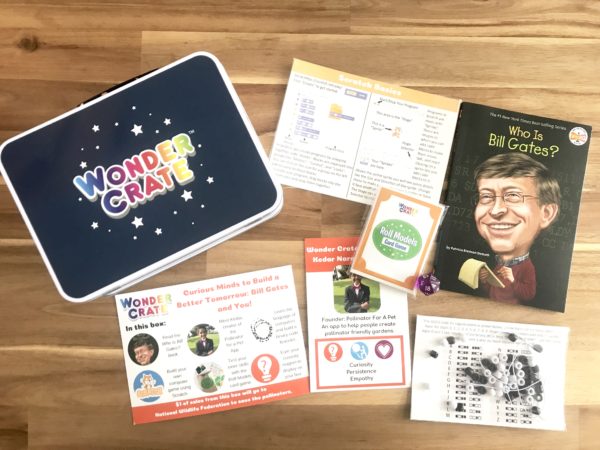
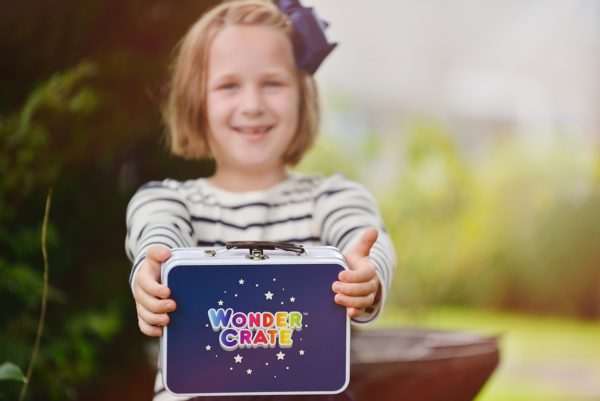
The first month of the subscription program also includes a metal carrying case and fun decorations for your Wonder Crate. 


Our Thoughts on Wonder Crate

I am a huge fan of the Who Is / Was series, and we have read through several of the books with our kids. For those that are struggling readers, they are a perfect length and not too overwhelming, but chocked full of great information on influential leaders in our world, both past and present. 

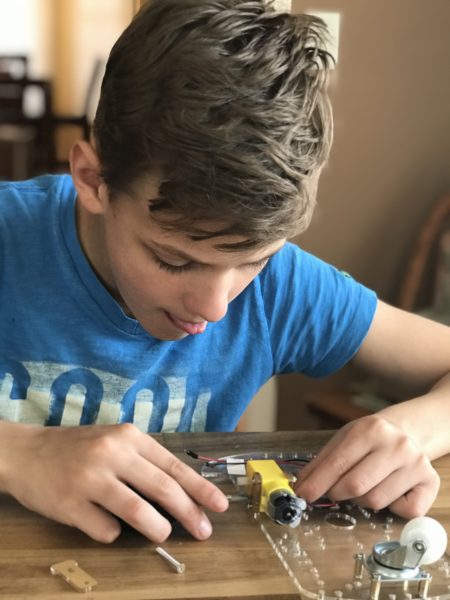
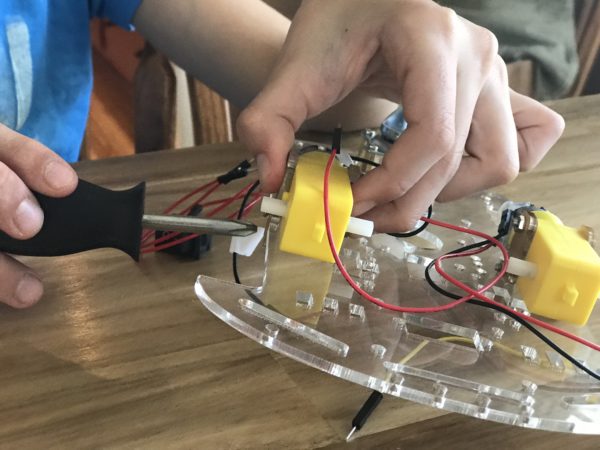
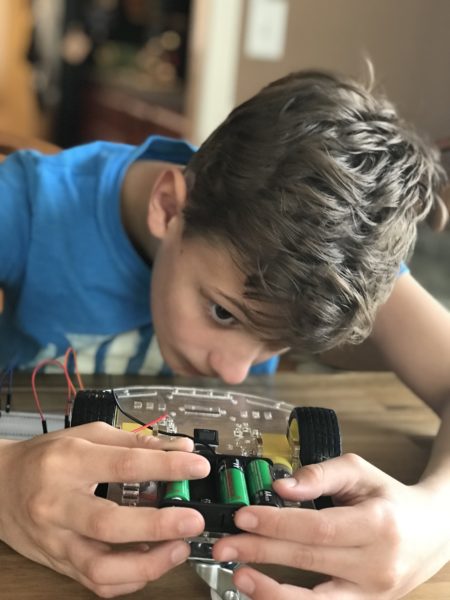
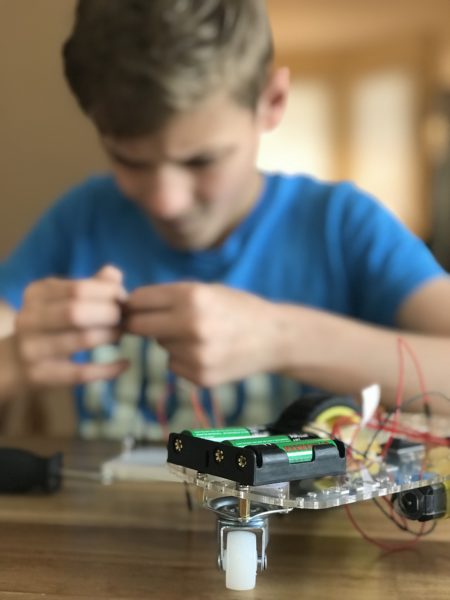
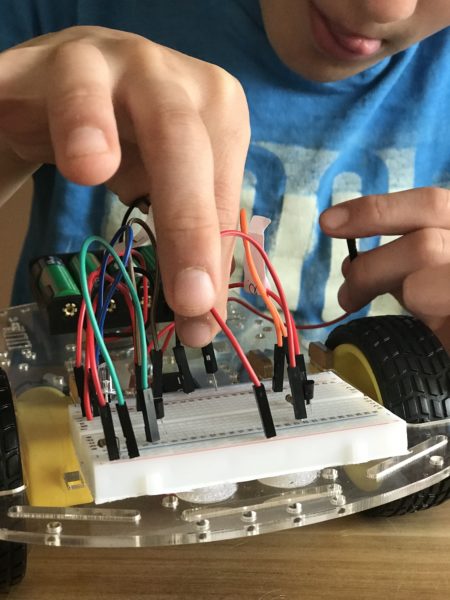
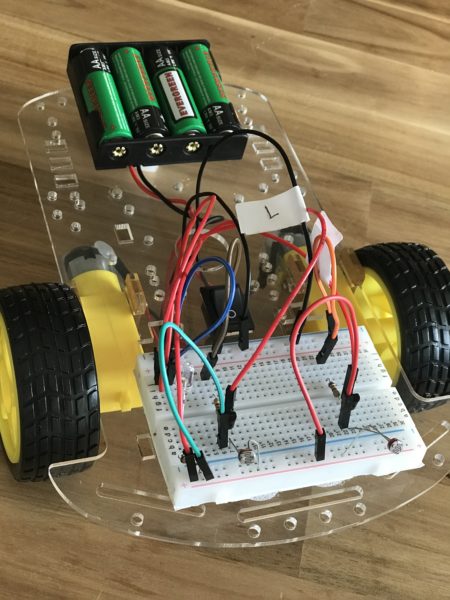
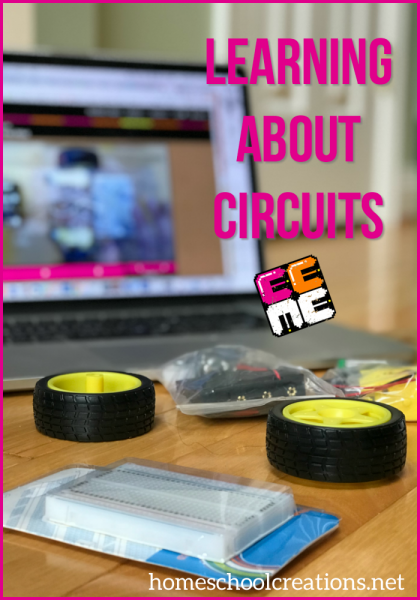
The first step for us was reading through the Who Is Bill Gates book that came in our Wonder Crate. Since we were learning about the life of Bill Gates, our activities focused on coding and computer activities: creating a binary code bracelet, creating our own games using scratch, the roll models game, and learning about the young inventor of the month who has created his own app.

The scratch activities were some of Kaleb’s favorite activities (mine too). Wonder Crate provided three step-by-step scratch programs for us to create from simple animation to an interactive game. 

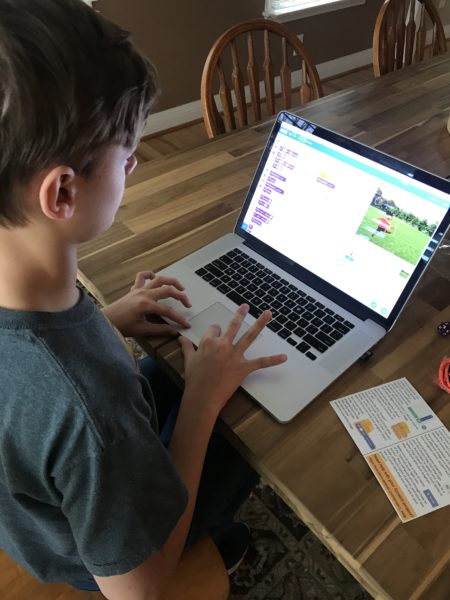
Kaleb started with the simple animation scratch activity, and this is one that turned into a more extended activity for us. He used the card to create the animation and then decided to mix it up a little more by changing the background and having his character kick a ball into a goal. From there we added in an additional character and had them kick the ball back and forth as well as had the activity “reset” when we pushed a specific key on the keyboard. (I’ll admit that I was really having fun with this one too!)

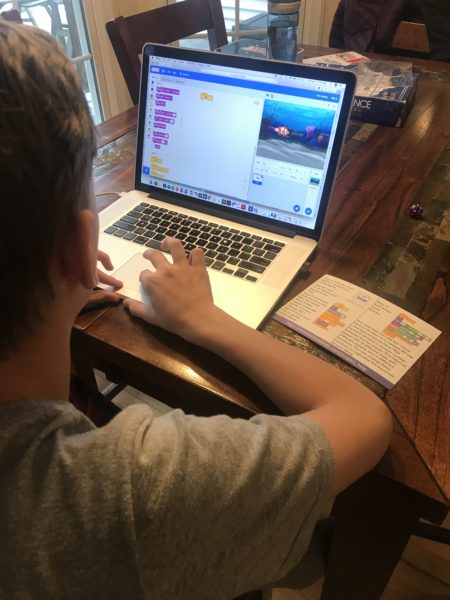
The second scratch activity we worked on showed us step-by-step how to create an aquarium and animate fish to randomly swim across the screen. Kaleb learned how to add sound and change “costumes” on the fish, filling his aquarium with fish of various sizes.

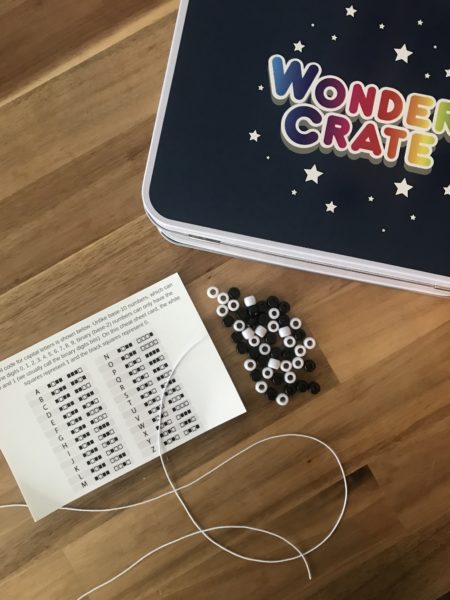
Our crate also included an activity (and video link) to learn about binary code. Instead of spelling out his entire name, he chose his initials and made a smaller bracelet. 

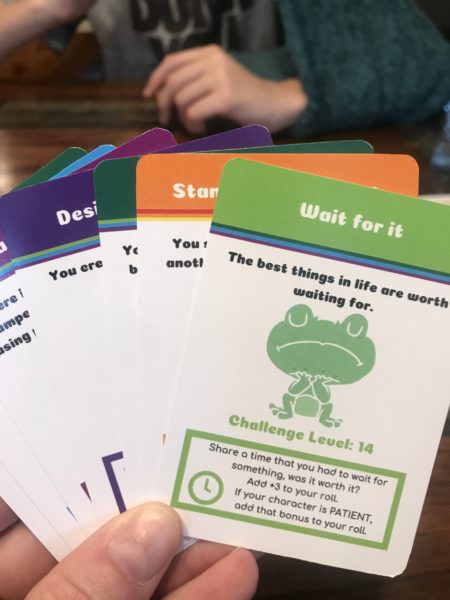
Each Wonder Crate comes with the Roll Models game that isn’t quite as much about “winning” as it is about being more aware about our actions. Players roll a multi-sided die (many more than 6!), draws a card from the pile, and answers the challenge question. 

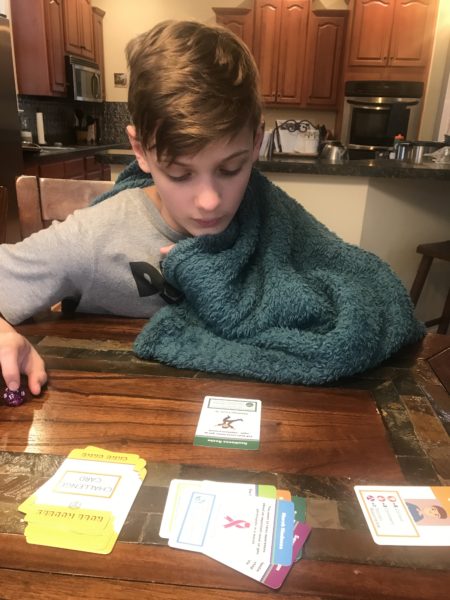
Each of the questions requires a little thinking and the opportunity for kids to share a real life experience and tie-in their learning. It’s a great opportunity for conversation and encouragement. Kids can earn points based on their answers, but we didn’t keep score – the conversation was better. 

Overall some of the activities were easy enough for Kaleb to complete on his own, but a few required a little more assistance from me (the scratch activities online, for example). Younger kids would likely need a little more assistance in working through their Crate, but truthfully I had just as much fun as Kaleb working through our Wonder Crate – and may have worked on one of my own animations when he was done.

Subscribe to Wonder Crate

Wonder Crate offers single crates, or a monthly subscription option of 1, 3, 6, or 12 months. Choose the option that works best for your family and your Wonder Crate will be on the way to your home! Bundled options offer additional savings if you choose to prepay. 

If your family is interested in adding Wonder Crate to your homeschool time, be sure to use the coupon code HOMESCHOOL and get 15% off a 3,6 or 12 month subscription. Please note – if you would like the Bill Gates Wonder Crate, orders must be placed by February 15, 2019.

Single boxes and tees are also available in their store https://www.wondercratekids.com/shop/all/


Typesy: Homeschool Typing Program Review

Our family received access to the Typesy homeschool program in exchange for our honest review, and I was compensated for my time writing the review. All opinions are our honest thoughts and we have been using the program during our school time. Please see our disclosure policy.

Maybe some of you are too young to remember this, but there was a point in time when a daily typing class involved big, ol’ clunky typewriters that didn’t have a delete key. And the noise of a room filled with the typewriters might drive you out of your mind. 

Thanks to those classes though, I was able to learn keyboarding and memorize the various keys on the keyboard. However, I will say that laptops these days are SO MUCH EASIER (and quieter). 

This past December we added an extra subject to our daily school time with our 6th and 8th grade boys: typing using the Typsey for homeschool. Both of the boys aren’t very fond of actual handwriting, so keyboarding will definitely be essential in the upcoming years.

Yes, our kids are using a keyboard of sorts when they text, but it’s not the same thing when it comes to using a laptop. They could hunt and peck, but it is much easier to have a firm understanding and establish muscle memory for each of the keys on the keyboard.

Bottom line – I am so thankful to have this product available to use with our kids. It is quick and easy to get started, very thorough in teaching accurate skills, and well-organized – a huge help for homeschool moms. And bonus? Your purchase of Typsey is good for FIVE YEARS!!

What Mom’s Need to Know About Typsey…

  • Use it anywhere – all information is stored in the cloud. No program to download or take space on your computers. Use it anywhere, anytime!

“Typesy stores everything in the cloud and all your computers automatically stay in sync. You get unlimited installs on all your Windows, Mac, iPad and Chomebook devices. Start training on one device, and continue right where you left off on the next. Students can log in on any device, anywhere, and anytime. And they instantly access the same account, results, and course progress.”


  • Can be used by multiple children – Each program allows various uses (there are different levels available). The program is tailored for each child as they progress through the program, adapting to their individual needs, providing tips and additional practice as needed.


  • Video training – units include step-by-step video teaching, effective exercises, and fun games. This is one area that is very helpful as well, as proper hand positioning is demonstrated, and the keyboard strokes are explained, an added bonus for visual learners.


  • Detailed reports can be run for each child, and include options for progress in multiple areas. One of the things I love is you can set word per minute (wpm) goals for each child and also accuracy goals. 


  • Includes 117 lessons and 17 games to help children learn, practice, and master various typing skills. Lessons are broken into different units that focus on specific areas of the keyboard: home row, top row, bottom row, shift keys, punctuations, numbers, and symbols.  
  • Ad-free typing – the entire site is 100% ad free. No distractions and clicks over to other sites, but lots of fun


  • Fun games and incentives – children are offered rewards for working toward and achieving their goals. They can also build their own avatar look-alike, earn points – and learn at the same time. 

Our Thoughts on Typesy

The boys have been using Typesy four times a week for about 15-20 minutes each day. The goals have been great for Kaleb, giving him incentives to work toward and maintain (he is a goal-driven kid). The games are also a fun addition to the lessons and continue the learning (sneaky). 

We added the program in just after our Thanksgiving break and will continue to use it the remainder of this year (and beyond). It is also a great “break” between subjects for the boys – even though Typsey is a definite part of our homeschool lessons (wink). The games and short lessons make it a great addition to our year. 

As a mom, I love that I can schedule lessons, quickly see progress, choose different fonts, and even see the keyboard on the screen as a child works on lesson. It is truly an amazing program.  

Try Typesy in Your Homeschool

It only takes a few minutes to get started on touch typing keyboarding with Typesy. They have several different plans from small family, large family, or even co-op! Typesy to get started with the best homeschool keyboarding program today! Don’t forget, your purchase of Typsey is good for FIVE YEARS!! That’s an amazing deal for a program that doesn’t need to be stored on your computer.

Win Typesy for Your Family! 

Typesy has generously offered one (1) Typesy Homeschool Keyboarding Curriculum to THREE (3) of our readers. Follow the instructions in the Rafflecopter widget below to enter to win! The giveaway is open until midnight on Thursday, January 10, 2019. 

a Rafflecopter giveaway

LIFEPAC – History and Geography Review

Alpha Omega is a blog sponsor and we received this product free for the purpose of reviewing it. All opinions expressed are my personal, honest opinions. You can read my full disclosure policy for more details.

This year we had a little switch up in one of our curriculum choices. The vendor halls at conventions are always a place I love to browse and get a hands-on look at various companies and their products. I’ll admit that Alpha Omega isn’t typically a booth I visit – we’re in our thirteenth year of homeschooling and many of the pieces we use are already on our shelves. 

With our oldest three moving on to high school classes and using their own texts, our group history time has ended, and Kaleb, our sixth grader, needed something that would fit his learning style a little better. 

Enter Alpha Omega’s LIFEPAC History and Geography units.

For the few days at a homeschool convention this past spring, I reviewed the program, talked (a lot) to one of the representatives at the booth, and went home to talk with Kaleb about it. A short while later I was asked if I would be interested in reviewing LIFEPAC and decided we would love to give it a try.

A Little about LIFEPAC History and Geography


LIFEPAC History & Geography develops students’ understanding of and appreciation for God’s activity as seen in the record of man and his relationships. The LIFEPAC History & Geography worktext-based curriculum targets this goal by focusing on six major themes: Geography (World and American), History (World, American, and Religious), Government, Citizenship, Economics, and Social Sciences.

Our Thoughts on LIFEPAC History & Geography

As soon as our LIFEPAC arrived, Kaleb and I sat down to go through the set so he could get a good grasp on how the upcoming year looked. One thing we both love is the way each set is broken up into ten individual units to go through over the course of the year. For our boy who struggles with being overwhelmed by a lot of text, the breakdown into smaller chunks was right away a huge plus

Kaleb’s reading struggles were one of the primary reasons that I personally wanted to make the switch to LIFEPACs. I knew he would enjoy the format (he is a fill-in-the-blank kind of boy), but being able to break the reading up into smaller daily bites with a visible end is definitely something that encourages him to keep going. 

Each unit and sections within the unit begin with clear objectives and vocabulary words for kids to focus on throughout their reading. These have been handy for us to refer back to through the reading and review times. Download a sample of the History & Geography LIFEPACs here

The text is broken up into segments that are followed up with various forms of review activities (fill in the blank questions, true/false answers, multiple choice, etc…) so children can see what they are learning. Each LIFEPAC unit is broken up into smaller sections. Each section then has a short self-test to review all that has been studied.

Once the individual LIFEPAC is completed, there is an overall test for that unit (see the video for further explanation). The test is included in the center of each unit and can be removed prior to children starting. 

All LIFEPACs are full of color and while I know I’ve mentioned it before, we love the “grab and go” aspect of this curriculum. Because the text is broken up into smaller books, it’s easy to pull the one we are working with and not worry about grabbing a huge textbook. 

The smaller units allow for a feeling of accomplishment as one is completed, giving both Kaleb and myself an added bump of encouragement. We are currently ten weeks through our school year and already working through unit 5 – ahead of schedule! 

Although he hasn’t been working through the reading on his own yet (we typically trade off reading paragraphs), the format would be great for kids that can work more independently: they could read the text and answer questions on their own. Personally I enjoy reading the text along with Kaleb and making sure he is understanding everything (and let’s face it, sometimes there are words I can’t even pronounce!). :) 

Over the years, we have only used a few pieces of curriculum that are not reusable (or reproducible), so while the workbook layout is a bit of a switch for us, right now the convenience of the program is definitely a plus and one we are planning to continue using. 

What Mom’s Need to Know…

  • Teacher’s Guide – The teacher’s guide provides an overview on how the LIFEPACs are laid out, along with additional teaching tips and extensions for each unit, answers to all of the unit questions, and alternate unit tests. Give yourself 10-15 minutes to read through the first section and get a handle on the set.
  • No experience needed – All of the answers are provided in the teacher’s guide in addition to helpful discussion questions, tips, and lesson plan layouts. It’s truly an “open and go” curriculum. 
  • Scope and Sequence – Alpha Omega provides LIFEPACs in a variety of subject areas, and each LIFEPAC shares the scope and sequence for that specific subject.
  • Christian Worldview – Text is written from a Christian worldview.

Start Learning With LIFEPAC

Visit Alpha Omega (aop.com) to learn more about LIFEPAC and other curriculum options offered. Recommended ages for the LIFEPACS begin in kindergarten and extend through high school – choose the level that best fits your child’s learning.

Don’t forget to download the sample of the History & Geography LIFEPACs here for full information on what is covered at each level.

Teaching Textbooks 3.0 Online Version

Eight years ago we made a mid-year math switch and started using Teaching Textbooks. It’s been a decision we haven’t regretted and love to this day, especially now that they have added a *new* feature – online subscriptions! 

While I am typically a “have the book and disks in front of me” kind of mom, the new online feature became a necessary component for us this past year. Our oldest needed a new laptop, and we purchased a Chromebook for her. No CD-Rom. For a bit, we were having her work on a laptop here at home, but that quickly became an issue because she couldn’t bring that laptop back and forth to her classes at the community college with her – and the laptop was also falling apart (literally). 

She started getting behind her math schedule which frustrated her. Needless to say, when we found out Teaching Textbooks was scheduling the release of their 3.0 online version, we were rather excited! 

Here’s the thing: version 3.0 has all the great qualities Teaching Textbooks is known for, but now has the added features of being online, accessible from any wifi, and yearly subscriptions! It’s the best of everything rolled up into a convenient format. There’s more too, but that’s just a quick look.

Why We (Already) Love Teaching Textbooks

We already love Teaching Textbooks as our math program. Hands-down it is one of the best curriculum choices we’ve made in our eleven years of homeschooling. We’ve been using their programs for a little almost eight years now, and that alone should speak volumes. Here are a few reasons why we love it so much.

  • The lessons are all taught via the program, meaning you as a mom get a break! Each lesson has an instructor who walks kids through the concept being taught, works through sample problems, and then kids work on daily problems.
  • Each lesson is self-graded. There is no grading needed by mom or dad. Period. The lessons automatically let kids know if they were correct and score the overall lessons and tests. 
  • Extra chances have been huge for our kids! When we first started the program, it was one of the things that helped make math FUN for the girls and not frustrating. If they made a mistake, they could take a second chance and try again to get the problem correct. 
  • Lessons can also be “re-set” if kids are really struggling with a concept. You can delete answers to single problems or all of the problems in a lesson and give kids a do-over. 
  • Print gradebooks anytime.  Maybe I’m not the only one who struggles to keep up-to-date records on subjects, but Teaching Textbooks grades it all for me, and gradebooks can be printed off at any time. 
  • The program provides constant review. Once a topic is taught it is reviewed in subsequent lessons. One additional helpful feature is problems reference what lesson a concept was learned, so kids can flip back to the lesson and review if needed.

Features to Love in 3.0

In addition to the above, the Teaching Textbook 3.0 online versions offers even more! 

  1. ANYWHERE access. If you have internet access, you can work on math. The kids may not be as thrilled to hear this, but it is a great feature. 
  2. No disks or books to carry around. My boys are famous for causing covers to magically disappear from books. The 3.0 version has an ebook that can be viewed in a different browser window or even printed off if you choose. One thing I love about this: I can pull up my browser and flip back to a specific lesson we may need to review a concept on while working on a problem on one of the kid’s computers. More than one person can be logged into the account at a time. 
  3. Grade storage. We won’t talk about how many computer issues we’ve had over the years and how many hard drives I have in a drawer (for real).  With the 3.0 version, Teaching Textbooks stores your grades for you, even after your subscription is over. You don’t have to worry about where that grade book disappeared to. They’ve got you covered. 
  4. The programs work on MAC, Windows, and Chromebooks. Tablets and phones can be used as well with the Puffin browser (3rd party browser, support limited). For our family, the Chromebook aspect has been HUGE this year and having the 3.0 version has been a lifesaver! 
  5. You can “pause” your subscription – each subscription lasts for 12 months (per student, per course). Each subscription also allows for 90 days’ worth of pause time. You may activate the pause any time you choose, but you must use at least 7 days of pause time before unpausing. 
  6. No more disks to lose/scratch. While our girls kept things all neat and tidy, the boys have been a little harder on their curriculum. With online subscriptions, we don’t have to worry about losing a disk (or having that excuse!) and not being able to complete a lesson
  7. BETTER PRICING – Whether you have one child or eight, the subscription prices are lower than purchasing the physical products AND if you have a larger family (up to 8), their is a price cap of $199.08. The more kiddos you have – the lower the cost!! Read more about the Teaching Textbook family plan here.

p.s. if you still want to use the textbooks and CD-ROMs, you can still purchase those. :)

Try Teaching Textbooks 3.0 for FREE

If you’d like to test out the 3.0 version, you can start a Free Trial of the complete program, up through Lesson 15. The trial includes lectures, solution, eBook, and grading on each of the products. If you decide to purchase the full version, everything transfers over for you! Learn more HERE. 

Not sure where to start? Download and print a placement test online. 

Win a Subscription to Teaching Textbooks 3.0

We’ll be sharing more of a step-by-step through a lesson with Teaching Textbooks 3.0, but want to get you all a bit excited about this new release – AND offer a giveaway to go along for ONE FREE SUBSCRIPTION (any level) to Teaching Textbook’s new 3.0 version. The Rafflecopter widget below will give you instructions below, and includes the option of the free trial as well. :) Because it is an online platform – everyone can enter, provided they are 18 years of age or older. Giveaway ends Monday, July 30th at midnight EST. 

a Rafflecopter giveaway

Building a Robot with EEME

EEME is a blog sponsor and we received this product free for the purpose of reviewing it. All opinions expressed are my personal, honest opinions. You can read my full disclosure policy for more details. 

Recently we shared Kaleb’s work on building Q the robot from EEME. Before getting to the finished (and fun!!) part of watching his robot move around, there were steps of learning about circuits, how motors work, and so much more. 

In short, a little bit of patience. 

The finished project though – so much fun to shut the blinds in the house, whip out the flashlight, and guide Q around the house! Especially when you see all your hard work pay off.

Q the Robot is a project kit that guides your child through the process of building a 3-wheeled robot who follows light. He is the first in a series of robotics projects from EEME – and there is no coding required to get started! Once completed, Q follows light around using two sensors, or photo resistors. When light is shined directly onto the sensors, Q turns to follow the light. 

Building our Robot

Using the FREE online lessons (anyone can view these!), Kaleb learned first about all the components that go into building this particular robot: breadboards and how circuits are completed, making the motors turn in different directions, powering the robot, photoresistors,  and finally had a chance to start building the actual robot. 


If you don’t know a thing about electronics, don’t worry. There are step-by-step videos that will walk your child (and you) through the process, and that includes explaining all the various parts and exactly what they do. 

We initially broke the video lessons for Q the Robot into three segments and over the course of three/four days: lessons 1-10, 11-20, and 21-35. Each of the 35 videos range in length, but average time each day was between half an hour to  45 minutes, taking us a little over two hours to complete the entire project. 

Our first step toward finishing Q was learning about photo resistors. The battery back was temporarily hooked up again with one of the motors to see how the circuit was completed and would function. You can see the photo resistor just to the right of Kaleb’s left hand. Later there will be two that will help “guide” the robot based on the light that shines on each resistor.

After learning about the photo resistors, Kaleb was finally able to pull out the main platform and start assembling the body for Q (lesson #26). 

The back of Q features a single caster that allows the robot to pivot or wiggle back and forth as it moves. 

The next steps (#27-28) may have caused a little more frustration for Kaleb. In assembling the motors and attaching them to the platform, it was a little trickier for him (he kept dropping one of the screws and missing the hole). 

Can I tell you what I loved at this part though? His utter concentration, shown by the tongue that stayed half stuck out of his mouth for the remainder of the building process. 

He was able to finally get both motors attached and labeled either right or left. The labeling is important for the turning of the wheels that are still to be added. 

The power switch and battery pack were the next to be added. We used some velcro dots (provided) to attach the battery pack to the platform – super quick and easy. 

At this point, Q the Robot was beginning to take shape nicely. While Q waited patiently, Kaleb completed a little more wiring. 

And finally the breadboard was mounted to robot body… 

motors were wired correctly (in complete concentration as you can see)…

And Q the Robot was finished! 

The best part though, after all this hard work, was seeing Q in action and having Kaleb explain some of it. Click to watch the video above (you can also visit and watch on YouTube). 


What Mom’s Need to Know…

  • Everything’s included – parts, wires, batteries are included in all every kit
  • No experience needed – our online lessons to mentor, guide, and teach your kid (seriously, this is a lovely thing)
  • Safety first – no soldering required, low voltage projects (the mom in me rejoices)

Meanwhile, kids are learning solid concepts and being challenged by building projects using REAL components. They may make mistakes, but in doing so, they learn to review and discover what they can do to make it better and work correctly. 

Perfect for ages 10+

Time Required: 1-2.5 hours

Parental involvement: varies based on child

Start Learning With EEME

There are 3 ways to learn with EEME – FREE online lessons, their robotics kit series, and their electronics kit series.

  1. For free online lessons – families create a free account with EEME and use their web browser to interactively build and learn about electronics circuits.

2. Robotics series – The first kit of the series, Q the Robot, is a project where your child builds a 3-wheeled light-following autonomous robot. The online lessons associated with Q teach how robotics circuitry works.

You can purchase Q here.

3. Electronics series – electronics kits are purchased as electronics kit monthly subscriptions. A new bite-sized kit ships every month complete with all the electronic components needed to build a new project.

Each month’s project builds on the previous month’s knowledge and interactive quizzes, questions reinforce kids’ understanding of the why’s and the how’s. 

Learn more about the electronics monthly subscriptions here.


Be sure to check out the first half of our Q the Robot project, and be sure to take a look around the EEME site. If you have kids in the 7-10 range, they have a monthly subscription option where each project focuses on a different electronic concept, but otherwise – go for Q!

Past EEME Projects

We’ve worked on several other projects from EEME. If you’re interested in learning more about their monthly subscription program, be sure to check out the below posts for more information:

Our Favorite Homeschool Writing Curriculum

There was a time period many years ago where both of our girls hated writing. All the joy, fun, and creativity had been sucked out of that subject thanks to me and the belief that writing could only be done one way (thank.you.very.much), and there was no wiggle room allowed.

(I was desperately wrong, in case you were wondering).

Many of us get caught up in the ‘right way’ to teach something (or maybe that’s just me), and in the process we often forget that learning should be fun and something our kids desire to do. When the creativity literally shriveled up in our girls, it was a moment when I realized we needed to stop and bring the life back into a subject that was dry, dry, dry – and make it fun!

Enter WriteShop…

We picked up a set of holiday StoryBuilder cards from WriteShop before one Christmas break and suddenly, based on three little prompts, the writing floodgates opened and stories began to pour out of our girls. Notebooks were filled (and kept going and going) in just a short timeframe. The love for writing returned.

Ironically, we already had one level of WriteShop on our shelf, but I had put it aside for something else (hello, shiny). We pulled that book back off the shelf, ordered additional levels, and haven’t looked back since! WriteShop has become the writing program of choice for our children, and one that I wholeheartedly recommend to other families.

A Solid Writing Base

writeshop-features-1and2-b

This year, Laurianna (11th grade) has been taking dual credit English classes at our community college that require a lot of detailed writing assignments. I’ll admit that at first I was nervous – would she be able to handle the requirements? 

In her sixth and seventh grade years, she completed both WriteShop I and WriteShop II and went on to work through three years of a high school literature program in which I based the writing rubrics off our time with WriteShop – and you all, she has been SO prepared! The foundation those two years gave her were truly the core of her writing.

Not only did the WriteShop I and II programs prepare her, they prepared me as a teacher to truly instruct her in the writing process (from essays to research papers), evaluate her work, and offer constructive feedback. As I mentioned before, the grading rubrics were highly instrumental in our high school literature program as well and helped in various co-op classes when needing to provide instruction and guidance to those students.

Really truly, the one thing that I keep repeating to my high school lit classes – being able to write a strong paper is one of the most important things in education. Choosing words carefully, writing a persuasive argument, proper spelling – writing is a part of almost every facet of our lives!

A few words written poorly can make all the difference, and I want our kids to have a strong writing background, which I know they will thanks to WriteShop.

I’ll also admit that the teacher’s guides in the WriteShop 1 and WriteShop 2 levels have greatly spoiled me. The grading rubrics and instructions are very clear – such a huge help to a busy homeschool mom, and the step-by-step program is easy to follow for both students and teachers.

Something for EVERY Grade Level

While I’ve shared much of our love for the WriteShop I & II programs, they truly have a writing program or tool for every grade level, and it’s never too late to jump in and start. Our younger children are also using their programs (Junior and now WriteShop I), and we have worked through all the levels of their programs in recent years. We really love it that much!

From grades K through high school, there is truly something for each of the children in your home to use. 


FREE Writing Prompts

WriteShop

Don’t miss their FREE writing prompts either! These are a fantastic way to get a peek into the WriteShop programs – and get hooked as our family did! From elementary through high school, there are mini-lessons, story prompts, word prompts, and programs to encourage and help even the most reluctant writers! Here are a few reviews that’s I’ve written in the past:

Writing doesn’t have to be another chore you add to your homeschool day. It can be fun and productive – and inspire your family to creative writing for years to come.