20 Best Tips

Fun Hands-on Learning with Tinker Crate

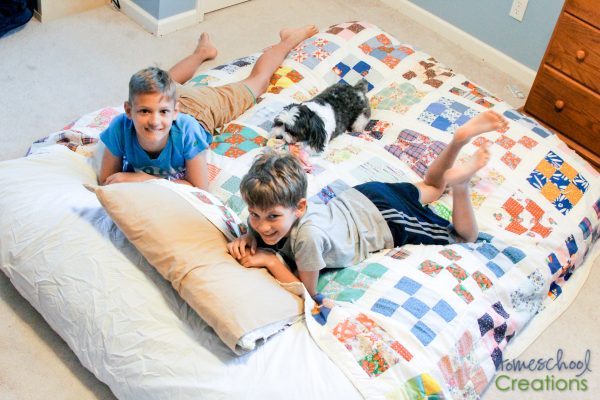
It’s officially summer. And for our home that means that we’re spending a lot of time outside, at the pool, and have scaled back a bit from the lesson plans. 

However, that doesn’t mean that the homeschool learning stops during the summer. In fact, it’s the time that I especially try to provide hands-on learning opportunities to ward off the summer slump. 

Our boys are especially excited when they have things to build. Me, I’m excited when the lesson plans are already put together and I don’t have to do any prep. Tinker Crate offers the perfect fit for our family – a kit that includes everything we need (no shopping for me), detailed direction, and the chance for our kids to work on STEM projects and keep the learning going. 

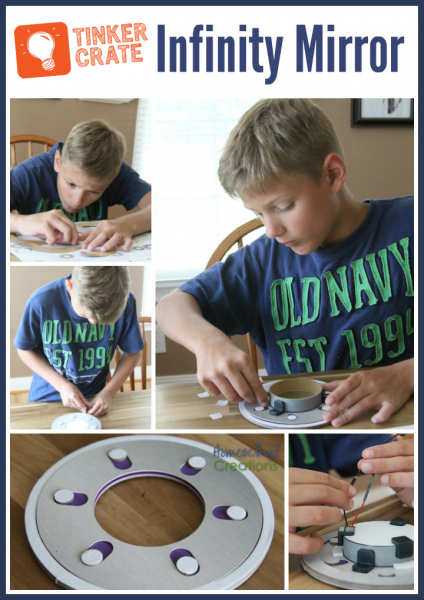
Homeschool Learning with the Infinity Mirror 

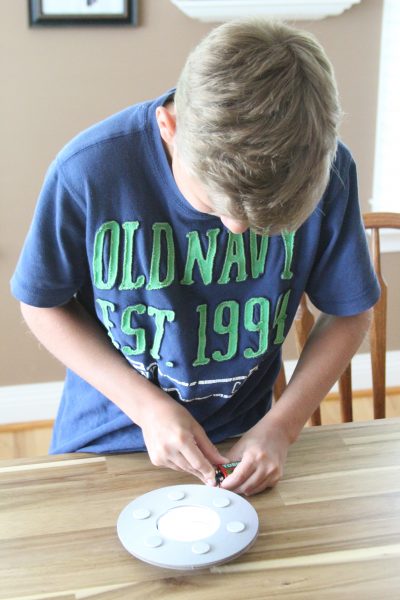
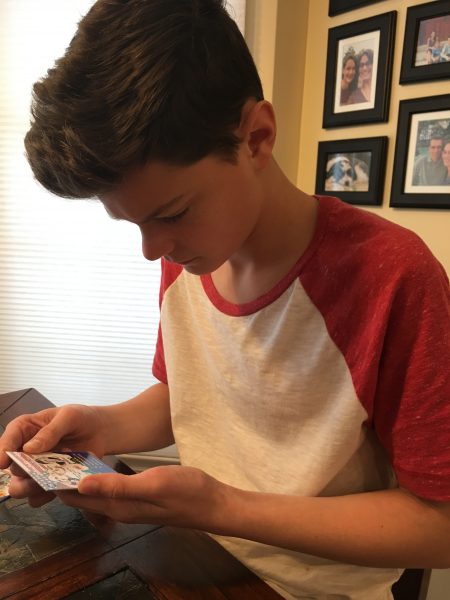
Kaleb and I recently worked on the Infinity Mirror crate and had a fun learning about double sided mirrors and illusions. Overall, the project took us about 20 minutes to put together (I did have to help him a little bit). 

Tinker Crates are recommended for ages 9-16+ (Kaleb is 10), but even though he was on the lower end of the age range, he was easily able to follow along with the directions. 

What’s Included in the Tinker Crate

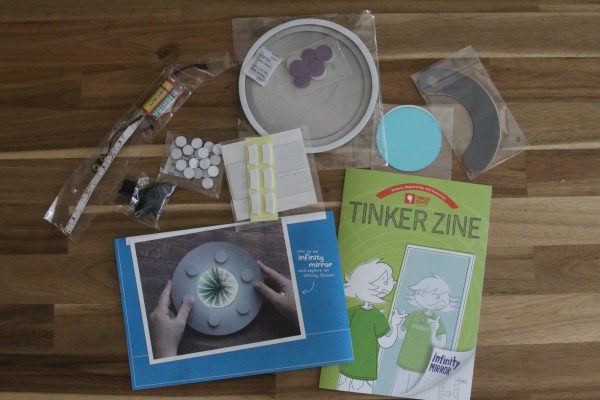
  • The full project – and all the materials you need to create
  • Your blueprint – how to put your project together
  • The Tinker Zine – more activities and learning opportunities
  • Links to video tutorials of all Tinker Crate projects

As a mom, I have to say that having EVERYTHING in the box is a huge help for me. There is nothing to cut out, trim, make “just right” – it is something we can literally pull out and start building. (This makes me happy!) I also love the terms they use to help kids get in the mode of tinkering – blueprints are still instructions, but they are setting the stage for the science and engineering that will happen!

Creating the Iris 

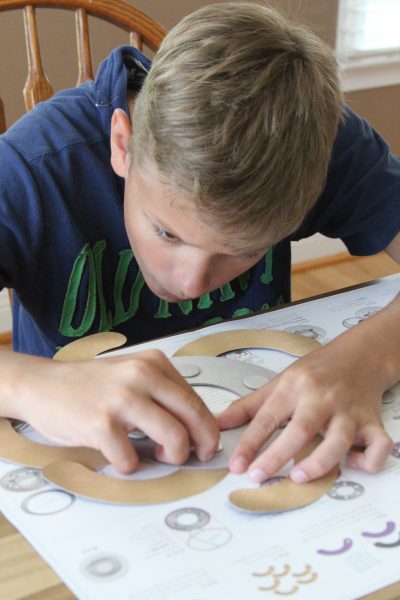
The first step in creating our infinity mirror was putting together the iris. This was one of the areas I had to help a little because it involved double sided sticky dots (and peeling the right layer off can be a little tricky at times). 

At first glance the iris doesn’t seem anything special – just a round circle, but it’s importance is shown once the second step of building the mirror is put into play. Basically, the iris will open/shut with a simple twist. 

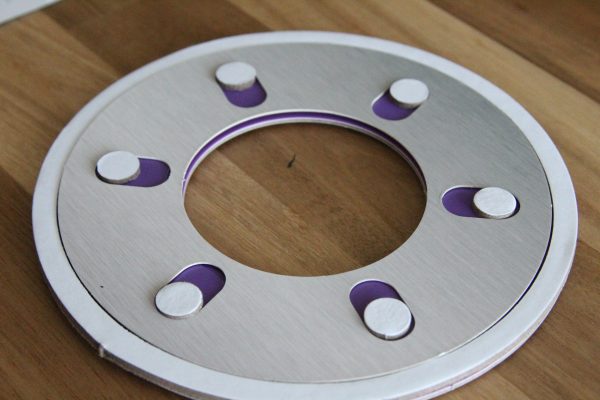
Our completed iris took us about 10 minutes to put together – not too bad. All of the templates were included and Kaleb was able to follow the directions easily (both picture and written directions). 
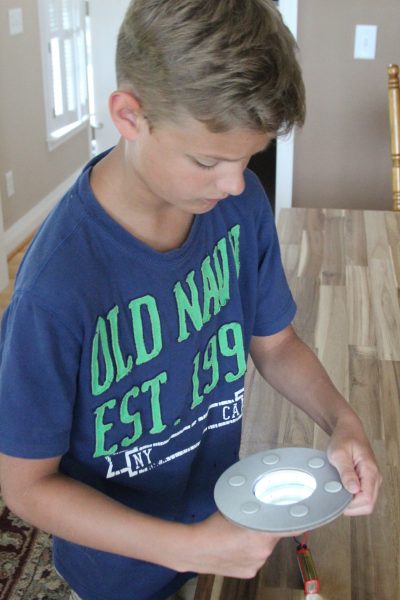
Building the Lens

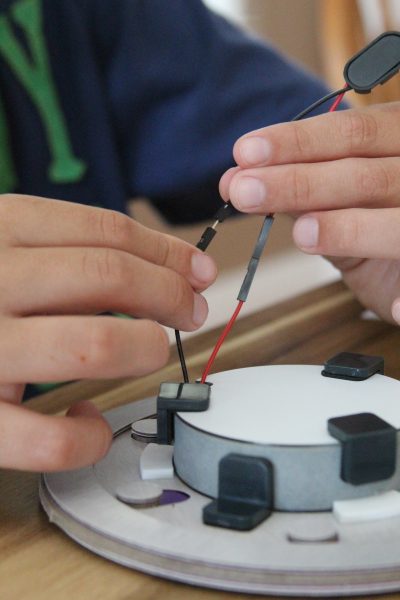
Once the lens was put together, we worked on the mirror component – and it was really interesting. One of the mirrors was a double-sided piece (allowing you to see through) and the bottom mirror (seen on top above) was a single sided mirror. 

Inside we had a component that we hooked up to a 9v battery and provided light inside when connected and the lens can be opened/closed by twisting the bottom section. With the lights lit, the two mirrors give the illusion that the inside of the lens is bottomless. 

When the light is off, the double sided mirror doesn’t allow any light through so you only see your reflection and nothing else, but when the light is on, the light is allowed through and the illusion begins. 

To give you a little peek, here is a 2 minute clip where we share our infinity mirror (feed readers can click here to see). 


A Little More About Tinker Crate (& Thoughts From Me)

Tinker Crate is one of the hands-on learning crates from KiwiCo and targeted toward ages 9-16+. They also offer crates for preschool age (Koala Crate), the Kiwi Crate (ages 5-8), and a Doodle Crate (ages 9-16+). Each of the various crates also focus on different aspects of learning: playing, art & design, science, and engineering.

The projects have all been reviewed by child development experts and are kid-approved. Crates come with free shipping and subscribers receive additional benefits, including bonus online content to extend the learning.

Learn more about the monthly subscription plans here.

Save 30% using code SHARE30 during checkout! 

A Beanbag Your Family Will LOVE!

In our home I’m not much for clutter, knick-knacks, or items that do not have a specific purpose (or dual purpose). If it’s something that will just take up space, it’s likely that item will find another home quickly.

More recently something was introduced into our home, and while it takes up a little more space, it has become so very well loved – dare I even say, coveted. Every time I turn around, it has moved because one of the kids has claimed it for the day or week. 

We have been thrilled to have a CordaRoy’s convertible bean bag in our house the last two months. Not only has it provided much comfort all over (it’s been dragged from the basement to the schoolroom and everywhere in between), but it serves a dual purpose – a queen-sized guest bed! It may also hold a special place in my heart since it is the perfect place for a certain 10 year old and me to curl up and read together. 

You all – the people who put this beanbag together are genius. It has been such a wonderful addition to our house and I have been telling everyone how much I love it, especially because you can use it in multiple ways. 

Before we received our CordaRoy’s bean bag, we had purchased a trundle bed to slide under our boys bed when friends came over. Let’s just say, the next morning I found the kiddo sleeping on the floor because the trundle was so uncomfortable. To be fair, we invited this same boy over again to test out our convertible bean bag – he was thrilled to test it out and LOVED it. :) 

Needless to say, that trundle bed is now considered taking up unneeded space and is leaving the house. We have a much better alternative with our bean bag! 

Here’s Why We Love Our CordaRoy’s

It can be used multiple ways – beanbag or bed. I mentioned that I’m not one for clutter. The fact that the bean bag is easy to move around the house and be used as a bean bag some days or opened up to make into a bed, makes it so worth it to us. Our kids are getting bigger, so having the queen-sized option is great, especially for visiting guests. We were able to use a standard set of queen sheets without any issue (bed side is 60 x 80 x 10”). Check out their size comparison chart for a visual: youth, full, queen, and king.

Additionally, there are multiple cover options. We have the charcoal chenille queen sleeper and the color blends in all over the house and is also a soft, plush fabric. Corduroy, velour, faux cowhide and other cover choices are also available. 

It is super comfortable.  Our kids don’t quite fight over the bean bag (other than they each want it in their own room), but this is a bean bag you just sink into and don’t want to get out of. Don’t worry adults – I promise you will be able to get up. Trust me. I’ve done it.

Packed full of memory foam, it envelops you and you will love it. We’ve recently switched to memory foam pillows and the comfort of both together is fabulous. There’s also another member of our house who loves it and won’t stay out – our pup, Addie. She’s rather hilarious in it, curling up whenever she has the chance.

It will LAST. We’ve had other beanbags in the past and hands-down this one feels different and doesn’t compact after a lot of sitting, jumping, or sleeping. Besides that, it has a LIFETIME Guarantee. This may seem insignificant, but after many a flat bean bag, this is a big deal for us. 

Setup is super-easy. When you want to convert the beanbag to a bed or vice versa, it will take only a few minutes (we may have timed ourselves at just over two minutes). One of the kids and I were easily able to do it together (their demo on folding it like a taco is very helpful). Take a quick 30 second peek at the video below to see how easy it is. 

A Special Discount for You!!

CordaRoy’s has offered my readers a 10% discount on any purchase they make. Use the code PXQU during checkout and you’ll save. 

Right now bean bags start at just $99 (youth size), so it’s the perfect time to shop. Additionally, any order over $250 receives free shipping – so double savings for you!

Truly you all – this is something your family (and friends) will use and enjoy for years and something our entire family recommends to yours. I am beyond thrilled with this beanbag and know you will be as well! 

Click HERE to learn more. 

Helping Children Build a Christian Worldview

One of the things that we want for each of our kids is to have a strong foundation and understanding of the Christian faith. Several years ago we were introduced to Apologia’s What We Believe series, and it was a perfect fit for our girls then and has been a great fit for Zachary this year as well, prompting some great talks along the way. The curriculum has quickly become a favorite and earned a permanent spot on our homeschool shelves.

Biblical Worldview Curriculum

What We Believe Apologia

There are four volumes in this worldview series, each one covering a different topic. 

  • Who is God (And Can I Really Know Him?) introduces the concept of worldview while laying the foundational truths upon which the evangelical Christian worldview is built.
  • Who Am I (And What Am I Doing Here?) focuses on having a Biblical (and healthy!!) self-image and understanding how God sees them *Laurianna’s favorite
  • Who is My Neighbor (And Why Does He Need Me?) encourages kids to be a blessing to those around them – at home, in their community – and understand how they have gifts that can be used to help others.
  • What On Earth Can I Do helps children understand what it means to be stewards of all the blessings we have from God and how we can put him first in all that we do.

Each of the books in the series has a hardcover textbook, notebooking journal (or junior version), coloring book, and an audio CD available and can be purchased individually. The textbook is non-consumable, so you only need to purchase additional notebooking journals for the next child to use the book (samples of the books are available from the Apologia website).

The hardcover textbooks – they are STURDY. In the video below you can see ours, and it’s been through three of our kids and another family also borrowed it one year when we weren’t using it.

How We’ve Used the Series

image

The books in the What We Believe series are written in a style that our kids enjoy. Each includes fun stories, go-along activities, and notebooking pages to work on with each lesson. Because the books are written at a fifth to sixth grade level, we waited until our kids were in the fifth grade so they could work more independently on each level.

We have chosen to work through three lessons each week using the notebooking journal. When we have our weekly meeting, we review the lessons and talk about the topics covered over the past week. In addition to the main text, we also work through the go-along notebooking journal and complete the questions and activities. The journals are something that I am holding on to, because I love re-reading the kids thoughts and answers and seeing their hearts (just makes me smile).

The main textbook does have a lesson plan guide in it, so if you have a kiddo like ours that isn’t keen on writing, you may want to skip the journal. This past year we still used the journal as a guide for Zachary and he did “complete” the assignments, but typically it was verbally with me during his 1:1 time. 

Although the books are recommended for ages 6 to 14, we personally like the 5th to 7th grade range for starting the series (if working independently). For our girls that meant that they took more time to answer the questions (rather than coming up with simple answers) and really ‘dig in’ to the study – which is exactly what we want! As Zachary has gone through the series, he and I discuss thing without as much writing on his part (since he isn’t as keen on writing by hand). 

Here’s a little look into the first book in the series. 

There are junior journaling notebooks for younger children as well if you choose to work through the series as a family and have children younger than 5th grade. This would be a great family Bible study and one that you could revisit and ‘cycle’ through since there are four books in the series. 

What I Love About the Series

What We Believe series from Apologia - Biblical worldview curriculum

The books in this series are so much more than a quick read – they delve deep into topics and will grow with our kids. The topics are things that we WANT our kids to be learning about – things like serving others, and at times I honestly struggle with how to adequately teach our kids these topics. There are other times when the kids hear something I’ve been saying for a long time, but from another perspective, and it “clicks” with them. 

This series provides a biblical wordview – or perspective – and provides parents with a framework to teach their children in a conversational style. Whether you read the books outloud or get together a few times a week to discuss the topics, your kids will learn and explore topics in depth with you. 

The journals are full-color and a fabulous hands-on tool. I mentioned that some of our children loved them and for others we’ve used them as a guide. Either way they are a great resource as well. For families that use the notebooking approach, these will be a perfect fit!

Find Out More

Visit Apologia.com to learn more about the What We Believe series. Recommended ages for the series are 6 to 14 (younger ages may require more adult assistance).

Be sure to visit Apologia’s Serving Others Pinterest board as well for go-along ideas. 

Are You a Ladybug – Ivy Kids Kit

A little friend and I have been having some fun with the recent Ivy Kids kit for April based on the book Are You a Ladybug. (Can I tell you how much I really miss this kindergarten/first grade age?? Don’t get me wrong – I love the ages my kids are now, but there’s just something about picture books and the simple painting and creating that I absolutely adore. 

Literature-based learning is really one of my favorite things to do with kids. Over the years we have read so many books together and extended the learning between the covers of the books with so many hands-on activities. Ivy Kids puts all of that wonderful-ness into a box, gathers all the supplies you will need, writes the lesson plans for the activities, and you and your children do the fun stuff together. What’s not to love about that? 

Unboxing Our Ivy Kids Literature Kit


For those of you who aren’t familiar, the above video gives you a peek into what is in an Ivy Kids box and how they are put together. 

Our Ladybug Fun

Katelyn was more than excited to see the box of goodies I brought over to use with her, and over the next few weeks we are going to explore the rest of the box together, but I wanted to give you a quick look at some of the fun things we did together already. 

We worked on number identification and covered the numbers we turned over until all the spots were on the ladybug. The number cards that come with the kit – all perforated for easy take-apart (win!). 


Our favorite activity so far has been recreating the life cycle stages of the ladybug. We used modeling clay to create our own bugs (these were all made by Katelyn, age 6). 

We also read the book together and worked on odd and even number identification. Overall, reading the book and completing three activities today took us about 50 minutes – working on those teeny, tiny eggs from the ladybug took some concentration and time!  There are still ten more activities for us to work on together, and we’ll spend time doing that later this week. 

Here’s what the contents of the entire box hold: 

  • The book Are your a Ladybug by Judy Allen and Tudor Humphries
  • Read along Bookmark: Use to assist with reading comprehension.
  • Realistic Life Cycle Figures: Learn more about the 4 stages of a ladybug’s life by exploring the realistic figures.
  • Ladybug Life Cycle: Match each figure to the corresponding stage of the life cycle. Use the realistic life cycle figures as models for an observational drawing. 
  • Clay Model of the Ladybug Life Cycle: Use the colorful clay to make models of each of the 4 stages of the life cycle: eggs, larva, pupa, and adult ladybug. 
  • Ladybug box: Use paints to decorate a cute and functional ladybug box.
  • Ladybug Painted Rocks: Use paints to create beautiful ladybug rocks.These adorable rocks can be used as paper weights, shelf decorations, or additions to your garden.
  • My Ladybug Garden: Grow your own garden and attract ladybugs with easy to grow forget-me-not seeds. Decorate your planter with ladybugs and painted rocks.
  • Ladybug Spots: Roll and Cover: Roll the dice, find the number on the ladybug board, and cover it with a black pom-pom.  
  • Ladybug Paper Plate Craft: Create your own ladybug by placing the stickers onto the plate. Then find a nice spot to hang your ladybug.
  • Ways to Make 5 : Place different numbers of pom-poms on each side of the ladybug to make a total of 5 spots on the ladybug. How many many ways can you make 5 spots on the ladybug? 
  • Ways to Make 10: Place different numbers of pom-poms on each side of the ladybug to make a total of 10 spots on the ladybug. How many many ways can you make 10 spots on the ladybug? 
  • Catch the Aphids: Catch as many aphids as you can with the ladybug racers! Name the letter and letter sound on each aphid you catch! How many can you get?
  • Ladybug Race: Pull-back the ladybugs and then watch them go! Use the number cards to measure the distance that each ladybug traveled.
  • Odd or Even Spots on a Ladybug: Investigate whether a number is odd or even by dividing it equally between the two sides of a ladybug.
  • Ladybug Frame: Add your favorite photo to this ladybug frame and decorate. 

Check Out Ivy Kids Kits for Your Family

New subscribers to Ivy Kids can save 20% using the code IVY20. Free shipping is always available for orders over $60. Don’t forget that the kits are personalized for your child, so if you have more than one child to work on the kit with, you can add on a sibling kit for $5 more! 

Have you used Ivy Kids before? I’d love to hear your favorite book! 


Learning the U.S. Presidents – Brainbox Memory Game

How much information do you think you could remember in just 10 seconds? 

Hint: If you brain is 43 years old and living with four children, the answer may be less than you think. 

Recently (when I was pulled into the abyss that is Amazon), I came across Brainbox’s U. S. Presidents game, a memory challenge game for kids (and parents) to learn about the U. S. Presidents and also work on memory and observation skills. It quickly made its way into our Amazon cart and then home. Since making its debut, the kids have been pulling out the cards and learning fun tidbits and facts about our country’s leaders (a definite win!). 

Playing the U.S. Presidents Game

The game is SUPER simple – pretty much three steps: study, remember, and answer a question to win. 

Pick a card from the box, flip over the ten-second timer, and take 10 seconds to review the facts and images on the front of the card.

TRY TO REMEMBER IT ALL! You will be tested…good luck parents.

Roll the die and have someone ask you a question from the six on the back of the card, based on the number you roll. Questions range from years served in office, political party, state born in, nicknames, vice-presidents, to questions about the graphics on the card. 

Collect your cards – the first one to ten wins. If you miss a question, your card goes back in the box for someone else to grab later. 

All of the cards are printed on heavy-duty cards (thicker than typical cardstock and near impossible to bend). There are 44 presidents included in the deck (Trump hasn’t been included yet since the game was published prior to his term). Each card does have little details that will help you as you try to remember (color coding based on presidential party, etc.). 

The set also includes 10 additional cards that cover the presidential parties as well as various landmarks and items specific to US History. A 10 second egg timer and die are also in the box. 

Skills Brainbox US Presidents Works On: 

There are a few things that U. S. Presidents has been great in working on with the kids (and me too!)

  • Thinking strategically – while we do want to learn the facts, you need to figure out picture clues and other strategies (like the color coding) to help you ‘scan’ faster.
  • Memory recall – kids have only a short amount of time to read over the card and commit things to memory. Sometimes something seems like it might be insignificant, but flip the card over and you may be asked how many birds were on the front. You never know what will be asked! 

Recommended Ages:

The game is recommended for ages 8+, but some of that may depend on your child’s reading ability and may result in adjustments. Our youngest isn’t a strong reader and he would not be able to gather enough info in the 10 seconds, so we either allow him additional time to look at the card or someone reads the card to him to help out. 

We haven’t kept a running score of our  games, but the kids have been pulling out cards at the breakfast table in the morning and going over facts in addition to the time the boys and I sit down together and play a few times a week. All of our kids (ages 10 to 16) have enjoyed playing this together and the 10 year old is the most competitive in the bunch! It’s been great seeing them each work on their recall and figure out different ways to remember things.

This game may be new to you (as it was to us), but I love hearing about different games, especially when there is an added learning twist in the game.

Have you ever played U. S. Presidents before?

Do you have a game recommendation for our family to try next?


Honestly, we LOVE the game and the kids have asked if we can get a few of the other ones in the set. Here are the ones that will be joining our home over the next few months: 


A few freebies to go along with President learning…

If you like these resources, you may also enjoy the president’s day handwriting pages, a free download! They are not specific to president’s day and include quotes from several presidents to use as copywork. 

The U.S. President Fact Files are another FREE printable that feature coloring images of all 45 U.S. Presidents along with room to write down important facts about each president. 

A Reason for Science Level D Review

Educents is a blog sponsor and we received this product free for the purpose of reviewing it. All opinions expressed are my personal, honest opinions. You can read my full disclosure policy for more details. 

A Reason for Science - a homeschool science program review from Homeschool Creations

This year I thought we would try something different for science. Instead of using a curriculum of any type, I pulled a bunch of science experiment books off our shelves and marked various activities to do with Kaleb over the course of the year. No real aim or direction, other than keep the 4th grade science lover in our home busy with fun projects. 

It seemed like a fabulous idea, but there’s one thing that continues to be a hangup of mine: preparation (aka gathering) of materials. While I am fabulous at earmarking pages and having the overall idea of what to implement, sometimes I neglect to remember the inconvenience of finding every single item needed for the activities (and with science it can sometimes be a little more tricky). Translated, that meant that up until December we did a whopping TWO experiments of the ones I had a planned and the books just sat there staring at me. And Kaleb kept asking when we would do more. 

Because science is something that makes Kaleb LIGHT UP like crazy and gets him motivated, I did a little digging in December and we decided to use A Reason for Science (Level D) from Educents with him for the second half of the school year. Complete with a teacher’s manual, student book, and a shoebox full of go-along supplies, there may have been some excitement from both of us when the box arrived. If there is anything I know about myself at this point in homeschooling, the easier I can make it for myself, the more likely it is to be accomplished. 

A Peek Inside A Reason for Science

We were able to immediately begin using the program the day after we received our box (I took a quick look through the teacher guidebook to get my bearings). Since then we have been working through the lessons and I would love to share a few of our thoughts and what we are enjoying about the program. While this has been a bit of a shift from the traditional textbook approach of other science programs we have used, I am loving the focus on having Kaleb actively learning and understanding concepts as he works through the various processes.  It’s slightly more informal, but in a structured way – if that makes sense!

Reason for Science D - Homeschool Science-36

Each level of A Reason For Science® Homeschool Pack includes a materials kit, a student worktext, and a teacher guidebook and is designed to teach a variety of concepts over the course of the year: basic life, earth, and physical science. 

Reason for Science D - Homeschool Science-13

The lesson pages are broken down in the teacher guidebook showing the category of science covered, lesson focus, objective, materials needed from the kit (and home), any safety concerns, and what to do. Images of the pages in the student worktext are given as well, along with possible answers to questions, as well as additional learning ideas and a full walkthrough with teacher insights. For me personally it took a little bit of getting used to the format (since we have used different programs in the past), but it is overall very simple to implement. 

Reason for Science D - Homeschool Science-32

We jumped right in with the first lesson – seed germination – and had to wait for our first results since it obviously required a little patience while the plants began to grow. During the week, while we waited, we worked through the questions in the student worktext, and kept an eye out for any developments in our seeds. 

Reason for Science D - Homeschool Science-29

Meanwhile, we moved on to the next lesson and talked about animal classification – snakes (a line from Indiana Jones may be going through my mind now). This lesson had a hands-on coloring and creating project – snake puppets. We talked about venomous and n0n-venomous snakes and used bulb syringes (along with one of my hubby’s socks) to show how a snake’s venom works.  

Reason for Science D - Homeschool Science-17 

Lessons also include an extended teaching section if the topic is one your child enjoys and wants to go deeper into a specific area of learning.

In the last few weeks we have worked through five lessons, but the average pace for the program would be one lesson a week – very easy to fit into the schedule and also extend learning throughout the week as well. Other than the above, here are a few additional things to love:

Reason for Science D - Homeschool Science-60

  • materials kit – hands down one of the best parts of the curriculum. So far we have had to provide very little (a sock, water, and a paper towel) – and the less I have to do, the easier it makes it to start a lesson!
  • minimal prep work – open the teacher’s guidebook and look at the materials required, pull them out of the box, and start
  • variety of lessons and topics covered in short/succinct manner, but with plenty of means for the student to learn 
  • student worktext is also full color, making it very visually appealing (teacher’s guidebook is a black/white version)
  • Scripture is added at the end of each lesson (a little food for thought) and journal space as well
  • discussion questions are a part of each lesson in the student worktext, allowing lesson review
  • lesson quiz/wrap-up is also included at the back of the teacher’s guidebook (optional)


One reader recently emailed asking how this has compared to other science programs we have used in the past. The short answer is –  a bit. :) The longer answer is we have used programs that were more scripted from start to finish (teacher says ___ and student answer would be ____). In comparison, A Reason for Science has more wiggle room and while information is provided for learning, the focus is more on the student arriving at their own conclusions through the learning process. A Reason for Science also (so far) has been a bit more hands-on for us. The full-color student text also is very visually appealing – which I love! 

10% off Educents Coupon!

Educents is offering my readers a discount code until January 31, 2017. 

Save 10% SITEWIDE with promo code STOCKUP at checkout!
Purchase A Reason for Science here!


Are You Familiar with Educents?

homeschool_ad300x250Educents is an online marketplace where you can find  affordable educational products. They provide daily deals to students, parents and educators by working with established educational suppliers. Whether it is a science kit, curriculum pack, books or art supplies, they make sure that Educents has the lowest price – helping more than 300,000 teachers, homeschoolers, and parents gain access to affordable educational materials.

Click here to browse and discover all affordable deals at Educents.