20 Best Tips

EEME Project DIY Display – Review

EEME Project DIY Display review {%{% Homeschool Creations

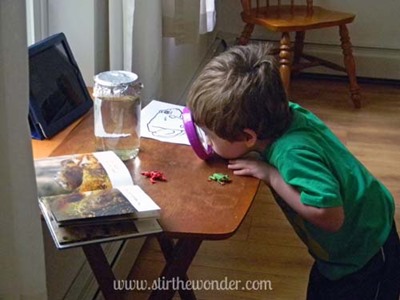
Zachary has been having far too much fun getting his fingers working on electronic projects from EEME. After working on the Project Genius Light recently, he was more than ready to jump into a new project and see what he could create with circuitry! When that little brown box showed up, it was immediately on his desk and he was ready to start! He is definitely our build and create boy, and any STEM project something he is more than happy to focus on (if only we could bottle that attention for other subjects too – grins).

EEME has been blog sponsor for the last several months and sent us the Project DIY Display (ages 7-12) to work on together. When I say ‘together’ that roughly translates to me observing Zachary as he creates the project himself and explains the different concepts to me. It has been the perfect ‘hands-off’ for me, but opportunity to watch him learn.

Project DIY Display

Project DIY Display from EEME {%{% Homeschool Creations-11

The DIY Display project focuses on segmented LEDs. Remember the scoreboards way back in the day (maybe I’m dating myself talking about our high school scoreboard)? In this project, kids learn how to wire their own switch panel and make numbers display on a mini board. Project build time is approximately 1.5 to 2.5 hours and 38 short lessons or modules.

Project DIY Display from EEME {%{% Homeschool Creations-16

We used the iPad this time to work through the free instructional videos and Zachary took a little over 1.5 hours to complete this project. He’s not one to get up and leave it alone, so once he started, he was on a mission to get it finished and working.

Project DIY Display from EEME {%{% Homeschool Creations-14

Compared to his last EEME project, I was able to sit back this time and observe while Zachary worked. If he had any questions or needed help with something, he just asked. At one point he needed a wire stripped (he may have broken one), so I helped with that and he was back working in just a few minutes.

Project DIY Display from EEME {%{% Homeschool Creations-5

He answered comprehension questions in between the short instructional clips – a huge help to see how much kids are understanding. Some of the questions he answered verbally rather than typing in his longer answers.

Inside an EEME Kit

EEME six project set

Unfortunately Zachary was well into building his kit before I realized that we didn’t have a picture of what came in it this time! However, each of the EEME project kits contains all of the components needed to build the monthly project.

Our first kit (or the first month in the subscription) contained a project kit with all the base pieces need to build that project. Future projects are built using those components as well:  a baseplate, breadboard, and a battery pack. These pieces are reusable. Our kit for the DIY Display included additional components that were necessary to complete this specific project. All curriculum is online and your children can watch and re-watch the videos at anytime.

Projects build in difficulty and are geared for children ages 7-12.  If you have an electronics lover in your home, this is a great monthly subscription plan to teach them more about LED’s, resistors, transistors, capcitors, and much more! If those words are all foreign to you, don’t worry – EEME explains everything in the lessons and you don’t have to be a whiz at electronics for your children to succeed in building and understanding!

If you don’t want to wait for the once a month shipment, you can take advantage of their 6 month project bundle HERE and receive free shipping as well.

How the DIY Display Works

Here’s a quick little peek at our completed Project DIY Display from EEME. It’s a short clip, but shows it in action…

Finished the switch panel from @projecteeme – here’s a quick peek at how it works. Depending on which number is flipped on the switch panel, Zachary can make different numbers light up. This project used the base from our Project Genius activity last month. #projecteeme #Homeschool #hsscience #science

Posted by Homeschool Creations on Tuesday, 15 September 2015

Feed readers can watch the video here.

When each switch is toggled on, there is a closed circuit allowing current to flow from one end of the battery to the other end. When toggled off, the circuit is opened and the segment is turned off (or the current cannot flow). Each of the switches is wired so you can toggle them on and off with other switches to create different numbers.

What You’ll LOVE About EEME

Project DIY Display from EEME  Homeschool Creations

Aside from the fact that all the supplies are included in each of the EEME project kits, the video curriculum is well put together and explain the building process in detail. Each of the videos is between 2 – 10 minutes long. In addition:

  • videos explain the step-by-step process AND the principles involved (how/why something works) – a huge help for parents who don’t know the answers themselves (cough)
  • shorter videos help those with limited attention spans
  • comprehension questions ensure kids are understanding what you are doing
  • videos can be stopped/paused if needed during the process
  • the videos are free to watch – check them out here and get a peek!

We have honestly LOVED these projects from EEME. It has been the perfect fit for Zachary to work on independently. The projects would be wonderful extensions to current curriculum or even as after school learning – or even make a great gift! We’ve learned so much working through two projects already.

There are different purchase options available, including a basic monthly subscription, individual projects, and a 6 month Project Set. They have different purchase options, but we’ve completed the first two projects so far from the basic subscription basic subscription.  You can find more information on the EEME website, or follow them on Facebook, Pinterest, Instagram, or Twitter.

Win a Project Light Link from EEME

Project Light Link from EEME giveaway {%{% Homeschool Creations

EEME has offered Project Light Link as a giveaway to THREE of my readers! Project Light Link is the best way to get acquainted with EEME’s hands-on building and learning experience. This giveaway is open to US readers only and will be open through Wednesday, October 14th at midnight. Use the Rafflecopter widget below to enter!

a Rafflecopter giveaway


But I’d love to know – what age is the child you would like to use EEME with and learn about electronics? Leave a comment below!

EEME Project Genius Light Review

Helping our kids have a deep understanding of what the science, technological, electronics, and math (STEM) principals are behind various technology is so important in life! If you are one that isn’t familiar with circuitry, but have a child who is – read on, because your children will LOVE the projects and lessons we’ve been covering recently.

Project Genius Light Review from EEME

Zachary is our hands-on, loves to learn about electronics kid. He is constantly trying to figure out how things work, sometimes to the detriment of things in our household. Note: That doesn’t mean I’m always happy when he tries to ‘fix, aka mangle’ something.

The Project Genius Light from EEME

EEME offered us the chance to work on the Project Genius Light (for kids ages 7-12), an LED circuit board that teaches kids about electronics in a meaningful and engaging way. Can you guess who was excited about helping out? From the moment the box arrived in our house, Zachary was ready to start.

Here’s a look at the Genius Light project:

With the Genius Light project, you will assemble a simple LED circuit system that does the smart thing – lights up when it is dark and dims when it is light. (30 lessons)

Your family will learn about:
– LED light bulbs
– Resistors
– Photoresistors
– Breadboards
– Project build time: 1.5 – 2.5 hours

Project Genius Light from EEME-4

I’ll be honest and tell you – I was a little hesitant on pulling it out for Zachary though and put it off to the side for a bit because I didn’t want him to get started and then forget about it or get distracted. But then I forgot and the box got pushed aside until he found it and held the box in front of me every day until I opened up the laptop to have him watch the free instructional videos and let him work on the project.

Project Genius Light from EEME-18

Although he wanted to work on it by himself, I hung around in case he needed any help. Sometimes he can get ahead of himself and want to do the lessons out of order. For the most part, I tried to stay out of what he was doing and he quickly figured out that the lessons are in an order for a reason. As he began going through the lessons and tried to skip ahead, he went back and picked up where he should have followed along.

Project Genius Light from EEME-21

In between the short video clips on the projects, there were comprehension questions to answer so I was able to see how much Zachary was understanding. Rather than having him try to type in the longer answers, he gave me an oral answer (we were watching via the iPad and it was much harder to type answers on for him).


RSS Feed subscribers can click here to watch the video

Overall, the videos, lessons, and building took us a little over an hour to complete (allotted time is 1.5 to 2.5 hours). Above is a video clip of Zachary explaining one of the circuits he built and why/how it worked. I may have learned a few new terms and things about circuits in the process!

What is in an EEME project kit?

Each of the EEME project kits contains all of the components needed to build the monthly project. The first month you receive a project kit with all of the base pieces you will need to build future projects on, including a baseplate, breadboard, and a battery pack. These pieces are reusable. All curriculum is online and your children can watch and re-watch the videos at anytime.

Projects build in difficulty and on what children are learning and are geared for children ages 7-12. And psst – they have a 100% satisfaction guarantee. If you have an electronics lover in your home, this is a great monthly subscription plan to teach them more about LED’s, resistors, transistors, capcitors, and much more! If those words are all foreign to you, don’t worry – they explain everything and you may learn a thing or two before your child is done.

EEME six project set

If you don’t want to wait for the once a month shipment, you can take advantage of their 6 month project bundle HERE and receive free shipping as well.

What I Love About EEME

The videos from the EEME project kits are well put together and explain the building process well. Each of the videos is between 2 – 10 minutes long. In addition:

  • videos explain the step-by-step process AND the principles involved (how/why something works)
  • the shorter videos help those with limited attention spans
  • comprehension questions ensure kids are understanding what you are doing
  • you can stop/pause a project if needed during the process
  • the videos are free to watch – you can check them out here
  • if the words LED, resistor, transistor, and capcitor are foreign to you, don’t worry – they do all the teaching!


    Try a FREE Project from EEME.co

FREE LED Light Circuit Offer from EEME

EEME has a FREE LED light circuit introductory offer for readers of Homeschool Creations. Build an LED light circuit and learn how it works with Project Light Link and the online curriculum. The project comes with everything you need to start building – batteries, wires, etc… This is normally $14.95, and all you have to pay is s/h for the project. Click HERE to get your FREE kit from EEME.

Win a Project Genius Light from EEME

2015_07_27__genius_light (1)

EEME has offered a Project Genius Light as a giveaway to one of my readers (a $49.95 value)! This giveaway is open to US readers only and will be open through Wednesday, August 12th at midnight. EEME is hosting this giveaway, so click below to enter!

But I’d love to know – what age is the child you would like to use EEME with and learn about electronics? Leave a comment below!

Homeschool Creations: EEME Project Genius Light Giveaway

Science Learning Ideas – Preschool and Kindergarten Community

Homeschool Preschool: Preschool and Kindergarten Community linkup at Homeschool Creations

Hands-on science makes learning SO much more fun for kids (and moms and dads too!). This year we’re hoping to fit in at least one fun experiment each week. If you’re looking for a few ideas to do with your kids, try some of these…

science water fountain color exploration

Explore color mixing and create a water fountain with this tutorial from A Little Pinch of Perfect.

Create a learning center to explore the life cycle of a frog. Stir the Wonder shares their science table and hands-on learning ideas.

Reinforcing-Science-Concepts_thumb

Kids learn best through repetition and Planet Smarty Pants shares some ways to reinforce science concepts with our kids with practical application and simple questions we can ask to continue learning.

science baking soda science

Glitter and ice cubes were two major ingredients in some toddler science activities that Welcome to Mommyhood shared – and then the kiddos got busy adding and trying even more!

Have a fun science activity to share? Be sure to link up your learning fun this week!

Follow the PreK and Kindergarten Community Pinterest Board

Preschool Pinterest Board

Each week I am  pinning many of your links onto the Preschool and Kindergarten Community Pinterest Board. I’m a visual person, so having pictures to help me remember posts is super helpful. Be sure to jump over and follow the board – and find some fun ideas at the same time!

Were You Featured in the Preschool & Kindergarten Community?

If you were featured in one of the weekly posts, feel free to grab the button coding below and display it on your site!

Homeschool Preschool


Link Up with the Preschool and Kindergarten Community!

Share what you are doing with your kids! Please link your exact blog post to the Mr. Linky below and link back here too! Grab a button for your post and be sure to take a minute to visit the person who linked up before you.

Bird Nature Study Printables – Learning About Birds

Bird Nature Study Printables from Homeschool Creations


With spring in full swing in our area, the birds are headed to our feeder and making their presence known! It has been so exciting to see a few new varieties of birds as well, including a woodpecker, some wrens, and even goldfinches. This week we’re wrapping up our homeschool science programs and heading outdoors for some hands-on and up-close learning about birds. I am so excited about it and of course had to make some printables to go along with our learning. (And I may have a wee bit of a crush on the clip art too!)

The Bird Nature Study Printables set contains:

Bird Nature Study Printables sample

    • Nature walk counting sheet – mark a tally every time you see one of the birds on the sheet 
    • Feeder frenzy counting – mark a tally when you see a bird at your feede   
    • Bird scavenger hunt – for younger children, take this scavenger hunt sheet on a nature walk or when watching the feeder
    • Bird observation sheet – record data and information on a variety of birds. There is a blank one at the end for other species, but sheets are included for 12 varieties: robin, cardinal, goldfinch, wren, pigeon, oriole, hummingbird, woodpecker, nuthatch, blue jay, Eastern blue bird, and mockingbird
    • Label the parts of a bird   
    • Story writing prompt – write a short story using four of the words provided
    • Poem and coloring page based on a Mother Goose rhyme


Additional Learning Ideas and Inspiration

clip_image002

A few weeks ago a box of stickers from Tyndale’s  Faith That Sticks sticker line showed up on our doorstep. One of my favorites was the God’s Beautiful Birds sticker pack. The stickers feature nine different birds that are focused on in this nature study pack (along with a few others) and were a fun addition to our nature study.

We’ll be doing a few of the things below this week with our stickers. There are six sticker sheets in the set, so plenty to use for a few of the following ideas including:

· Using two sheets to create a matching game. Simply cut 18 3×3 squares of cardstock and put a sticker on each piece. Then have fun matching them up.

· Use the stickers as a guide and have your child sketch their own image of the bird. These stickers have some great colors that are eye-catching!

· Write a story using the stickers. Have your child write their own story picking 2 or 3 of the stickers or have them dictate one to you.

· Make some fun spring cards using the beautiful birds and let your child create a ‘scene’ to put the birds into!

· For older children, put each of the 9 stickers onto a 3×3 cardstock square and let them practice alphabetizing the birds.

· Make popsicle stick puppets with each of the bird stickers.

· Create a simple windsock and use the stickers to decorate. The stickers are light enough that they won’t add extra weight to the windsock.

· Make a fun bracelet with a few of the stickers and wear it on a nature walk. See what birds you find as you walk along!


Learning About Birds: Other Resources

Don’t miss these additional printables and helps for your bird nature study!


Our Favorite Books about Birds

What birds do you see frequently in your area?

Are there any that you get excited to see?


Insect Nature Study Printables from Homeschool Creations

If you like these printables, be sure to download our Insect Nature Study Printables as well! 

Making a Worm Jar at Home (and a Free Science Printable)

How to make a worm jar


What kid wouldn’t like the opportunity to bring a bunch of worms into the house? Especially when there is a little bit of science fun tied into it!


The purpose? To see how (and if) worms compost, dig tunnels and mix soils.

While I may not be as thrilled as the kids at the prospect of worms possibly being on the loose in the house, this is really a simple but fun science activity to do with the kids. (And don’t tell the kids, but I think it’s fascinating too!)

worm jar 1

How to Make a Worm Jar

If you’d like to try making your own worm jar at home, you’ll need to gather the following:

  • a quart size canning jar
  • a lid with holes in it
  • dirt/soil/hay/grass
  • worms
  • dark colored felt or paper

1. First, layer a few different types of dirt in the canning jar – rich soil from a garden (or potting soil), lighter sand, mulch and repeat the layers (soil, sand, mulch, soil, sand, etc…).

2. Once the jar is filled, have fun digging for worms outside! Add them to the top of the jar.

IMG_4448

3. Add some food for the worms to compost: teeny tiny chopped carrots, celery greens, chopped apples, etc.

4. Make sure the soil is slightly damp. Put the lid on the jar and and wrap it in a piece of dark felt or construction paper so the worms have darkness to work in. You may want to consider putting it inside a cabinet to give it a cool, dark place (just don’t forget about it!).

5. Every few days, for the next several weeks, continue to check on the worm jar and see how your underground friends are doing – and if they are actually working!

Worm Jar instructions and observation sheet


6. Use the simple worm jar science notebooking sheet to make predictions and observations on the worms’ activities.

Books for Learning About Worms


Fun Worm Facts

Here are a few things that we’ve had fun learning about worms:

  • The only place where earthworms don’t live are in the desert or where the ground is frozen.
  • Earthworm poop is called ‘castings’.
  • Worms have two layers of muscles ~ one that runs lengthwise and one that runs around, helping its body stretch and contract.
  • Worms have a coat of slimy mucus that helps them glide through the dirt.
  • Sunlight can kill a worm because they are sensitive to the UV radiation.
  • Worms are sensitive to temperature and touch.
  • Worms do not have ears, rather they ‘hear’ by sensing vibrations.

worm jar 2

Here is a peek at our jar after 3 days. Can you see one of our worm friends near the top of the jar? See how our soil is already mixing? We had to add a little water/moisture to the jar to help the worms out a bit.

After two weeks there were no obvious layers anymore. Our worms had been hard at work mixing and composting our soil. After we observed them, we took them back to our garden and let them do their work around our vegetables. :)

Additional Worm Learning Fun

image

Candy Science Experiment :: Smarties, Sweet Tarts, and Conversation Hearts

There may be an overload of Halloween candy still in our home. Add in the loot that is sure to come through for Valentine’s Day and that means it’s time for some candy science experiments! This week we had a little fun with sweet tarts, smarties, and threw in a few candy conversation hearts for fun.

Candy Science Experiment from homeschoolcreations.net

Quite truthfully, the kids {and I} felt the entire thing was a bit of a bust, BUT that doesn’t mean that it wasn’t fun. It was still fun to guess what might happen and wait to see if it did.

Experiment #1: Candy vs. Water

Candy Science Experiment from homeschoolcreations.net-15

For the first experiment we added one piece of each candy type to a glass of water. Predictions on this round ranged from the candy getting darker to having it lose it’s color, expand, or fall apart.

Candy Science Experiment from homeschoolcreations.net-19

Results: Only our conversation heart did much of anything. It did start breaking down a bit and ‘bleeding’ into the water around it. The smarties and the sweet tarts just hung out in the water and tempted the kids.  They did decide to eat the candy after we pulled it out of the water and it was a bit softer, but otherwise, no change.

Experiment #2: Candy vs. Vinegar

Candy Science Experiment from homeschoolcreations.net-22

Our second experiment was putting one piece of each candy in a glass of white vinegar. Predictions were that the candy would dissolve and/or break apart. We sat. We waited.

Results: Nada. Zilcho. A little bleeding from the conversation heart again, but otherwise no phenomenal changes or results. Shockingly, the kids didn’t want to eat this candy after it had been in the vinegar.

Experiment #3: Candy vs. Vinegar with Baking Soda

Candy Science Experiment from homeschoolcreations.net-25

For the third experiment we added a 1/2 teaspoon of baking soda to the white vinegar from the previous experiment. This is where it got a bit more exciting.

Before adding it, the kids made their predictions on what might happen: explosions and a break down of the candy were the answers.

Candy Science Experiment from homeschoolcreations.net-29

We also added a crushed piece of candy to each cup to see if that might make a difference and then added an extra 1/2 teaspoon of baking soda.

Results: The candy was visibly being ‘eaten’ by the mix. Lots of bubbles {and colorful}. The conversation heart again was the clear winner, turning the bubbles into pastel colors and also having all the pieces and the entire heart float to the top of the glass. The smarties and sweet tarts just sat at the bottom of the glass {boring, according to the kids}.

Experiment #4: Candy vs. Baking Soda

Candy Science Experiment from homeschoolcreations.net-31

For the last experiment, we used plain water and baking soda. Predictions were that not much exciting would happen. The candy was broken up for this round of the experiment as well.

Results: The sweet tarts and smarties did a whole lot of nothing. The conversation hearts decided to float to the top of the water.

Our Conclusions on the Experiments

  1. While we were disappointed in how little actually seemed to happen in the first two experiments, part of it could have been due to impatience {let’s try the next one and see if that does any different}. If results weren’t as instantaneous there was a strong desire to move on to the next part of the experiment.
  2. The fact that some of the candy was a bit older may also have have contributed to the semi-bust. The one candy that did seem to have the best results, the conversation hearts, were the newest in the batch.
  3. Baking soda and vinegar are always fun. Using both of them in the third experiment made all the kids want to make another volcano. The chemical reaction from those two ingredients is just always fun to watch.
  4. An experiment bust is dependent on what you were expecting. The kids were hoping for a wide range of results, including immediate disintegration and more ‘spectacular’ results. But just because something doesn’t happen, doesn’t mean the entire process was a bust {ooo – pretty sure there is a life lesson in there…}.

Have you tried any candy experiments lately, or one with Valentine candy? We’re curious if you had different results or a fun one to share with us? We’d love to hear it!

candy-experiments-mailing-cover-264x300

While we didn’t use it this go-round, I found the book Candy Experiments by Loralee Leavitt in my stash after the fact. Next time we’ll be pulling it out to try a few different experiments – hopefully with more exciting results!