20 Best Tips

Weekly Homeschool Planner ~ Edit AND Save It!

Homeschool-Planner-coiled.jpg
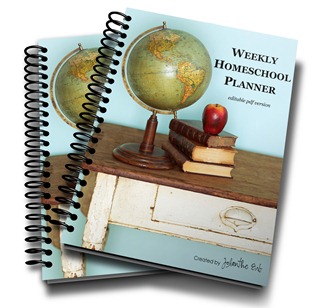
It’s finally done and I am SO very excited to share this updated version of my Weekly Homeschool Planner with you all!!

What’s so special about the new planner? Each of the pdf pages can be typed in, edited, and saved to your own computer every time you use it. Type lesson plans into the page and print them off or simply save them to your computer ~ the choice is up to you!

Edit plans any time and even save the planner to your computer to have a digital copy each year. Organize your school day, record your daily learning, track testing results and more! Personalize it to fit your family!

It is a homeschool planner you’ll use year after year.

Planner snapshot

Click on image for a peek inside!

The Weekly Homeschool Planner can be printed double-sided on 8 1/2” x 11” paper.  Here’s a little more detailed look at what the 138 page editable planner includes:

  • 12 blank months-at-a-glance
  • Daily attendance tracking
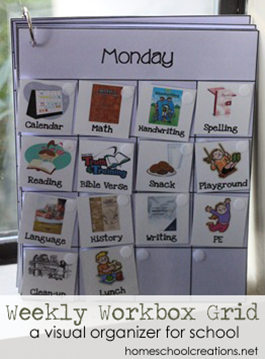
  • 40 weeks of weekly planning and journal sheets: each page can be customized to the subjects that your family studies and can be saved to your computer!
  • Yearly attendance tracking sheets
  • Yearly curriculum planning sheets
  • Yearly planning and evaluation sheets
  • Preschool planning sheets
  • Field trip/Event plan sheets
  • Important contacts info
  • Additional note space
  • Standardized testing and yearly assessment result tracking
  • Homeschooling requirement planning
  • Daily to-do lists
  • Main dish menu planner
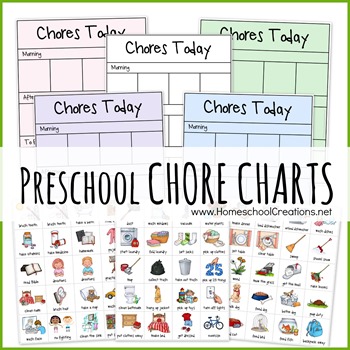
  • Customizable chore charts

If you use it and love it, be sure to join the Weekly Homeschool Planner affiliate program and share the planner with your friends.

Thank you all so much for your encouragement in putting this together!! :)

Jolanthe Signature affiliate button

Perfect Potluck ~ Organizing Meals for Groups Online

I know this isn’t technically homeschool related {grins}, but since I am LOVING the folks behind Take Them a Meal for their genius right now, I wanted to share it all with you.

If you haven’t used the Take Them a Meal site yet when planning and organizing meals for someone who has recently had a baby or been sick, you NEED to check out their site. It is a central spot for friends to sign up for a specific day to bring a meal to a person and list what they are bringing so that meals aren’t duplicated. Takethemameal.com is a FREE site that helps you organize meal deliveries to the family with just a few clicks of a button.  As the meal coordinator you can quickly create an online schedule sheet providing directions to the home along with other important information.

As of today, they have launched a sister-site called Perfect Potluck where a coordinator can create an online sign-up for group meals. I am SO excited to see this feature!! During these last two weeks our church has had to plan several memorial service meals and the emails going back/forth with over 70 people on the list was overwhelming. Having a central place where everyone can check in and not duplicate the items needed is wonderful.

To give you a quick idea of how it’s laid out, the coordinator can specify where/when the items need to be delivered and then those helping can sign up for a specific item. The coordinator enters the name of the item and how many need to be brought, and the appropriate number of item slots is listed.

image 

You can view an online sample of how the site works here.

Did I mention it is all FREE?? Really, you can go wrong with that! This is one of those sites that I wish had been around years ago ~ it’s definitely one that I will use over and over again in the future!

Jolanthe Signature affiliate button

Our Chore System & Chore Charts for Kids Printables

Chore system and chore chart printables - includes preschool grid and a look at how we pay out and divvy up chores - Homeschool Creations

Looking for chore charts for kids? Read along and I’ll be sharing some free printables for you all to use with your family!

We’ve had our new chore chart system in place for about a month now and so far it’s working well for us. In the past we have tried to use the chore system from Managers of Their Homes…but cards started getting lost, the younger ones had trouble getting them in and out of the pouches and overall it just didn’t work as well for us as I had envisioned.

I also want to explain a little bit of the ‘why’ behind our chore chart system and how we’re implementing it in our household. You may {or may not} agree with our reasoning…and that’s ok, but this has developed after a lot of talking and merging of different ideas.

The full page chore chart goes along with our Weekly Workbox System Grid and is the same size, so it fits as the top page of the set and hangs on the wall.

The Basics of the Chore Chart System

In life there are things that we do on a day-to-day basis that are unpaid and things that result {generally} in a paycheck. Rick mows the lawn, does upkeep on the house, takes out the trash…but other than a thanks from me, it’s an unpaid job. :) He has a paid job that involves him showing up to work on time, completing certain tasks, etc… Neither of us want our children growing up thinking that money is just handed to them.

We want our kids to develop a good work ethic and understand the balance between work and pay ~ if you don’t work, you don’t get paid. If you DO work, there are benefits to that. We also want them to learn how to budget their money and manage it before they are in their teens or 20s and don’t have a clue what to do.

The system that we’re using has two parts: expected chores and paid chores. The two sets go hand in hand though. The expected chores need to be done in order for the paid chores to get paid out. That means that no money is earned unless the basic chores are completed {and Mommy checks to make sure they are done!}.

There are certain things that we expect our kids to do around the house because they are members of the household ~ making of beds, picking up of rooms, etc… Those are the basic chores. Each of our kids has a set of 3 morning expected morning chores and 3 afternoon/evening chores.

Our chore charts are attached to our Weekly Workbox Grid and hang on the wall so the kids have easy access to them. They are laminated and have check boxes next to each of the chores so I can check off with a Sharpie when they have completed a chore {and remove the Sharpie marks later with nail polish remover}.

The last column is the “Today I Earned” column where we they can see how much they earned that day. Payday is Saturday and Sunday is a day of rest and no earning. :)

Workbox Grids Cards and Chores 2010-2011

Laurianna’s Chore Chart

Each of the kids has 3 additional chores a day that will earn them money. The money varies from child to child ~ the older they get and the more ‘responsible’ the chore is, they earn a little extra…but we’re still cheap!

They cannot earn the money unless they complete their daily chores {i.e. if they miss one of the daily chores, no cash even if they complete all of the ones they can earn on}. It might seem a little harsh, but the kids are quickly learning the importance of completing what has been put in front of them!


The Chores

Here’s a list of the daily/expected chores that we have for the kids on their charts. They obviously have other things they need to do during the day, but these are the key things we chose to focus on and they may change out if we are having difficulty with certain things being done. For example, oral hygiene is high on the list for a certain 5 year old….

Laurianna {age 9}: make bed/pick-up room, water plants, devotions, pick-up school stuff, clean up basement {family room}, shoes/jacket away, clean off dresser and under bed

McKenna {age 7}: same as above

Zachary {age 5}: make bed/pick-up room, brush teeth, devotions, pick-up school stuff, clean up basement/family room, shoes/jacket away, clean under bed

Kaleb {age 3}: make bed, pick-up room, devotions, wipe table/chairs, pick-up basement/family room, shoes/jacket away

The paid chores change daily, and again there are things that the kids are still expected to do {like put away their laundry}, but these are the extra paid chores by child.

Laurianna: Clean out bathroom sink, start load of laundry, vacuum basement and spare room, clean toilets, dust living room, and yardwork {25 cents a chore, max of 75 cents day}.

McKenna: Wash breakfast table, laundry from washer to dryer, vacuum bedroom, wash bathroom mirror, clean bathroom counters, and yardwork {20 cents a chore, max of 60 cents day}.

Zachary: Load the dishwasher, clothes out of dryer, clean out the van, vacuum bedroom, wash patio door, wash bathroom mirror/clean walls, and yardwork {15 cents a chore, max of 45 cents day}.

Kaleb: Help sort dirty clothes & help start laundry {with Laurianna}; vacuum living room & kitchen; empty bathroom trash; wash patio door; help with dishes; and yardwork {10 cents a chore, max of 30 cents day}.

Payday

Saturday is payday at our house because there aren’t any chores that earn money on Sunday. When we pay the kids for their chores, we also divide out the money that they have earned as follows: 20% giving {we want them to be generous from the start!}, 40% savings and 40% spending.

Rick and I are huge fans of Dave Ramsey and have led his Financial Peace class at our church several times because we have experienced first hand the importance of being debt free. We were deeply in debt {not including our house} to the tune of almost $65,000 around the time Zachary was born. We got serious about paying off that debt {gazelle intensity as Dave would say} and paid it all off in 19 months!

We made many dumb money mistakes over the years and really want to teach our children how to deal with money now while we can ~ so they don’t repeat the same mistakes that we made. If you are interested, I would highly recommend the book Total Money Makeover by Dave Ramsey. That was a bunny trail, but I think it’s important that you also understand a little more of the why behind what we do!


The Chore Charts

Obviously your house and chores may not line up with what we have listed, but if you’d like to use the grid that I made, you can download the blank chore chart templates, write in your chores and then laminate them to use. The Chore Chart printables have 5 pages, all the same format, just different colors ~ purple, pink, blue, green and white.


Preschool-Chore-Chart-example.jpg

For our youngest, I put together a different version. The preschool chore charts are a picture version of the chore chart.


Guidecraft School Library Cart ~ Review

image

When I taught in the school system, Guidecraft was a familiar name to me. My classroom had several products that we ordered out of their catalog, but my homeschool classroom hasn’t.

Until now!!image

Trying to keep all of the kids school supplies, books and whatnots in one location and then find room for all of my teaching books and manipulatives was getting a little tricky. We had shelves, drawers and baskets overflowing with all of our school gear…and truthfully it was beginning to drive me a little more than nuts. When things around me are scattered…I am too.

This gorgeous School Library Cart showed up on my doorstep one day from Guidecraft ~ IMG_5105and our UPS guy was nice to bring it inside for me. Trust me, this is one solid piece of furniture! It weighs over 40 pounds, so I opened the box when a friend of mine came over to visit and roped her into helping me put it together.


Overall, it was pretty easy to put together. The assembly instructions for the library cart were easy to follow and all done using pictures. At times, the wheels were a little tricky, but from start to finish we had it put together in about 45 minutes. It is definitely a two person job {ok, maybe one if my hubby would have put it together, but I was too impatient to wait for him to get home!}.

Aside from a screwdriver, we didn’t need any additional materials, but I would highly recommend using a socket wrench to tighten everything…otherwise, you’ll be turning the little wrench that comes in the kit for much longer. Besides, using a socket wrench is fun and makes a lovely little noise that makes you feel handy. :)

IMG_5119 IMG_5121

Laurianna was the official photographer since my hands were otherwise occupied, but here we are about 45 minutes into our endeavor with a successfully assembled library cart that was ready-to-use!

IMG_5131 IMG_5136


The library cart fits perfectly into the corner of our dining room and is going to be wonderful to use this year. I’ve organized it so that one side has all of my weekly teaching supplies on it {teacher’s manuals, extra books}.

IMG_6491IMG_6489  IMG_6492


On the other side each of the kids have space to put their books and extras. Instead of putting shelves on the end, we used some removable 3M hooks to hold the kids pencil cases so they can grab them quickly.  The bottom shelf holds our extra manipulatives, our spelling curriculum bin, reading bin and extra school supplies.

I love that it has wheels and we can move it around as needed during our school time. It takes up much less room that what we had previously {hooray!!} and there is still plenty of room to fill it up as we go through our school year ~ and trust me, we’ll use it!

…..THIS GIVEAWAY IS NOW CLOSED…..


This giveaway is open to US and Canadian residents only. Please be sure to leave a separate comment for each entry. The contest will be open until Tuesday, August 3rd at 8pm EST and a winner will be chosen using Random.org. {GIVEAWAY NOW CLOSED}

Jolanthe Signature affiliate button

The Weekly Grid Workbox System

Weekly-Workbox-Grid-visual-organizer-for-homeschool-copy.png

Last year we first started using workboxes and for the most part, we followed along the way it was supposed to go ~ except we used workfolders rather than workboxes. This year, after talking to the girls a bit, we revamped our system to make it work better for us. Ginger-Snap-Shots did this very thing last year with her girls with a little bit of a different twist.

This year, instead of using numbers for both the girls and Zachary, we’re switching to a more visual system. This way the kids can see what is expected of them each day. We also ditched the number strips because it was getting plain ol’ tedious for me to pull, switch, and sort the numbers everyday.

The Workbox Weekly Grid Layout

Our new workbox system will have the entire week laid out ahead of time. I have planned out what days we’ll be covering certain subjects and can lay out each child’s week in a short amount of time. Their new card system is closer to the size of an 8 1/2 x 11 sheet of paper and each day has it’s own sheet.

Here’s a peek at Laurianna’s Weekly Workbox Grid so you can get a visual of what I am describing:

Workbook Weekly Grid

If you look closely, you’ll notice that the velcro that attaches the workbox activity card is actually on the corner of the card {I used 3/8” sized velcro coins}. The front of each of the cards has another 3/8’” velcro dot in the top right corner. When the kids are done with that subject/activity, they can simply flip the card over {see the picture below}.

Workbox Weekly Grid example

Here’s a look at the entire week laid out as individual days. It is a lot of tags, BUT I don’t have to keep resticking them since they get flipped over. :) Friday is always skimpy since that’s the day that we have co-op and end up playing with friends.

Workbox Weekly Grid Cards

The cards for each day have all been put together on a jump ring and they hang on the wall from that ring. Each child has their own special color of the Weekly Workbox Grid {because you all know that I color-code my kids}. The first page of the workbox weekly grid is actually their chore and daily ‘to do’ list ~ click here to see our chore system. :)

Workbox Weekly Grid Storage

Using the Workfolders

We are still using the workfolders this year, and they will hold the worksheets and books that the kids are using for the entire week. Instead of having numbers on each folder this year, each page will have a subject card showing what should be in that pocket.

Here’s a little peek inside a folder to show you how we’re tying the workfolders into this system.

Workbox Workfolders

In the left pocket are Laurianna’s math cd-roms along with some scratch paper to do her math work. In the right hand pocket is her spelling progress chart. You can see a ‘Mom’s help’ tag on the pocket too ~ showing that she is going to need my help with this subject. Our folders have a total of 12 pockets, so the remaining pockets have subject tags for language, writing, history, science, Bible, handwriting, reading, etc…

Laurianna has been excited about this because she can actually work ahead in her school week if she would like to! If she wants to do three math lessons in one day, she can do that and then flip over those cards on the upcoming days.


Big and Bulky Items

Larger Workbox items

We’re still using the same system for ‘big and bulky’ items that we did last year. Each kiddo has their own special big bin on the bottom of Kaleb’s workbox station. He’ll use the top 8 bins and the bottom four are for bigger items like puzzles, leapsters, games, etc… I’ll explain more about Kaleb’s workboxes later in a preschool post.

Yes, it’s a lot of laminating on my part. And lots of tiny velcro dots. BUT in the long run, this is the system that the kids and I have talked about and will work best for us. Sometimes keeping my sanity is more important {grins}. Having the cards all in one place and not scattered over our table or everyone’s cards in a bucket helps me out immensely. Since our schedule doesn’t change much from week to week, I’m able to quickly flip cards and re-stock their workfolders in one sitting.

I’ve included some additional links for you all below to help you out if you are using workboxes or want to use a system similar to mine. :) If you have a question, please feel free to leave a comment with your email address so that I can answer you!! I’m sure I’ll be posting updates about our system to further answer questions, but this is it in a nutshell!

Workbox Resources

~ Workbox Weekly Grid ~ pdf download of the pages I put together for our kids including pink, purple, blue, green and white pages for Monday through Friday.

~ Jump rings – essentially these are key rings that open up easily so you can add to them. We use them in the top corner of our Weekly Grid so we can flip through the days easily.

~ Workbox Picture Activity Cards ~ Overall, there are a total of 32 picture cards, 24 minute cards, and 4 blank cards for you.

~ Preschool Number Cards ~ Number cards with some fun characters {if you are using the traditional workbox system}

~ Scotch laminator ~ this is the laminator I use and until July 31, 2010 there is a $20 rebate when you buy the laminator and a 50 pack of laminating pouches. I love mine so much I bought a spare {sad, but true}.

~ Workbox system using number strips and workfolders {our system last year}

~ Velcro in BULK. I purchased the 3/8” velcro dots from Textol Systems but have also found larger coins at even better prices from Feiner Supply {and they have free shipping this month!}

~ Lots of great workbox links, ideas and ways to adjust the workbox system.

 
Note: You might notice that some of our activity cards differ from the ones that are in my Workbox Picture Activity Cards pdf file because they are specific to our family ~ and are images that are not from Microsoft clip art. I have not included them because although we are using them for our family, they are not copyright free {First Language Lessons, Teaching Textbooks, Complete Writer, Awana, etc…}.

Organizing School Paperwork

Organizing-School-Paperwork-a-simple-folder-system-that-works.png

I know it’s practically the end of the year, so how about we consider this a suggestion for organizing schoolwork for next year, ok?

In reality, I lost the SD card that had these pictures on it and completely forgot that I was going to share the idea with you all until I found it the other day {ahem}.

I’ve used this system for the last few years and it has worked great for us so far. If you remember, our kids are color-coded {they each have their own ‘color’ that identifies things that belong to them}. All of our folders are stored in a wire bin and sorted so that I can quickly grab an upcoming {or completed} folder if I need to find something.

It’s a little extra work at the start of school for me, but I take a few hours, pull out all of the workbooks that we will be using for the year, rip out all of the pages and sort them for each kiddo. Truthfully, it saves me a lot of time in the long run since everything we need is divided up and ready to go for each week.

The Method to My Madness

I use six paper pocket folders per child and label the fronts of each folder ~ ones that are pretty cheap. I break the school year up into six 6-week segments {a total of 36 weeks}. The front of each folder is labeled with a name, grade, school year and the 6 week segment that it covers. For example, the front of one of the folders might read:

Weeks 31-36                         

Laurianna                           

3rd Grade {current grade}

2009-2010 {current school year}IMG_3096

I separate out the worksheets into six piles for the 6-week segments and then further divide them out into weekly piles. Since our writing curriculum {A Reason for Handwriting} is divided out into weekly lessons, it helps me keep track of the week that I’m sorting. Each week’s worth of lessons/worksheets is then paperclipped together {see below}.

IMG_3099

Each week includes our handwriting, math worksheets, writing pages, etc…basically anything that was ‘pre-packaged’ and able to be ripped out of a workbook. As we move through our school year, I keep everything that goes along with that six week segment in that specific folder.

IMG_3101

At the start of each 6 week segment, I put all of the papers on the left hand side of the folder. Each week’s worth of paperwork remains clipped together until we work on that week. If we add any paperwork during the week {spelling lesson, test, notebooking sheets, etc…} it is sorted into the pile for the week it was completed.

Completed papers are then moved to the right hand side of the folder. At the end of the week the schoolwork papers for that week are all paperclipped back together and moved to the back of the folder. When we’ve worked through a six week segment and the folder is full, the folders are put at the back of the wire bin and I pull out the next six week folder for each of the kids.

At the end of the year, all of our folders are put into a large rubbermaid tub that I keep with all of our school records.  If I need to sort through and find schoolwork for a particular child/particular year, it’s so much easier since I already have things color-coded and sorted out for me.

Make sense? Just wanted to share a little something that is working for us in organizing our school work. Let me know if you have any questions!


Answers to some of your questions

Cindy asked: What do with worksheets that are front and back that you need for another week?

Answer: I usually put it in the week that we complete it. :) I generally write down the page numbers of worksheets that we complete in my planner also, and my planner gets stored with all of our folders at the end of the year.

Allyson asked: I think we’ll probably want to reuse workbooks for a couple of children in order to save money. What would you suggest for that? Do you reuse any of your workbooks or do you purchase new ones even if you have a child that will use it the very next year?

Answer: We do reuse some of our workbooks, but there are some that I realized were just cheaper in the long run to buy and actually use ~ handwriting, etc… Several of the workbooks that I use {Complete Writer} are actually able to be photocopied too, so that’s what I do in that case. If it’s a worksheet that we slip into a page protector {Critical Thinking}, I just record the page number they completed in my planning book.