20 Best Tips

Exploration Education Advanced Physical Science Review

Exploration Education is a blog sponsor and we received this product free for the purpose of reviewing it.Ā AllĀ opinions expressed are my personal, honest opinions.Ā You can read myĀ fullĀ disclosure policyĀ for more details.Ā 

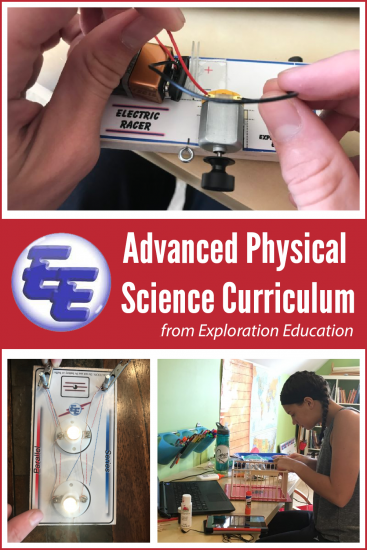
Taking a look back through our high school curriculum choices, there are very few programs that we have used consistently with all four of our children. There is one that definitely makes the cut though – every single time: Advanced Physical Science from Exploration Education.

We first heard of the program from a local friend and decided to use it in a small co-op setting for Laurianna’s physical science high school credit, way back in 2014. Since that time the company has made a few minor adjustments to the program, but the result is still an amazing, hands-on program that our children have loved and learned from! Next year our youngest will be starting his freshman year and we already have our box of material ready to go and plan to use it alongside a friend so our boys can enjoy the experiments and learning together.

About Exploration Education’s Advanced Physical Science

Featuring daily lessons broken down over thirty-six weeks, Exploration Education’s Advanced Physical Science class includes everything your family will need to earn a full high school credit. Rather than a dry curriculum, the program allows students to learn science concepts by using a hands-on and project-based approach: building, creating, and exploring through lab activities.

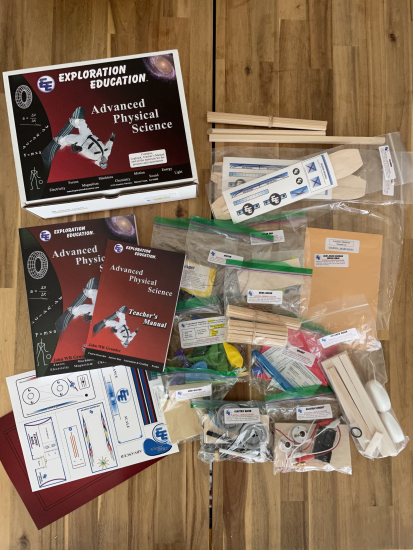
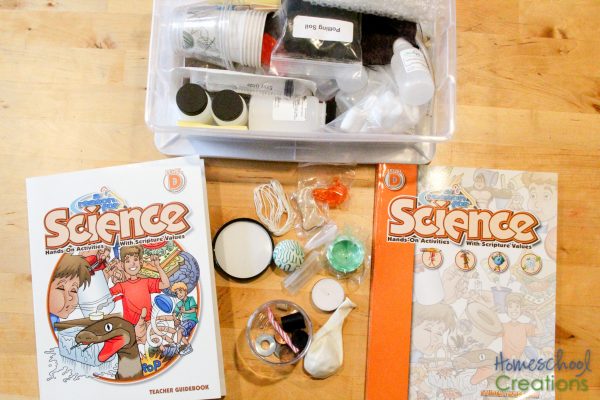
Each level of the program includes all the needed materials for the year (see a full list here).

  • Instructional MaterialsĀ — student logbook, teacher’s manual, online access to the interactive student text.
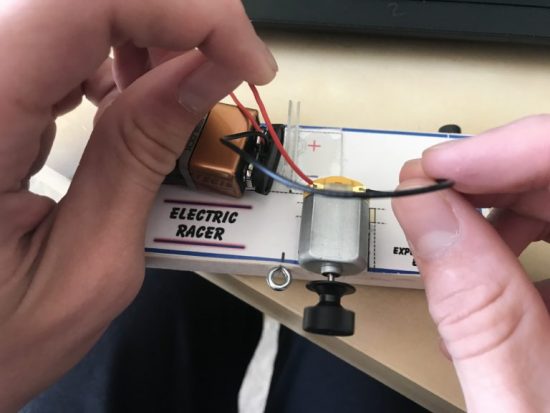
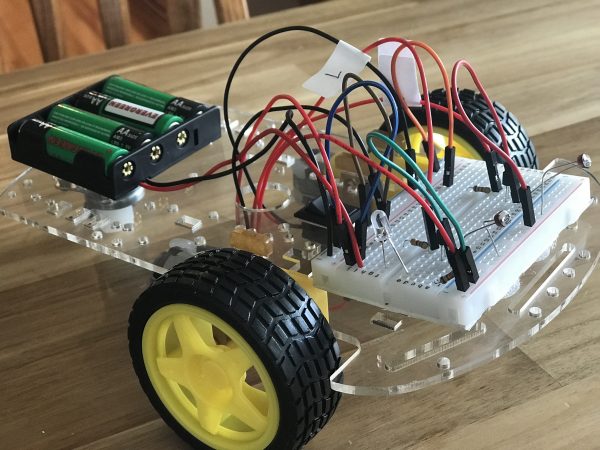
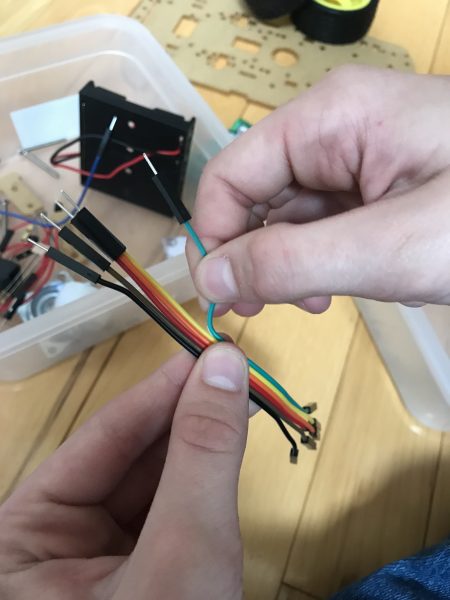
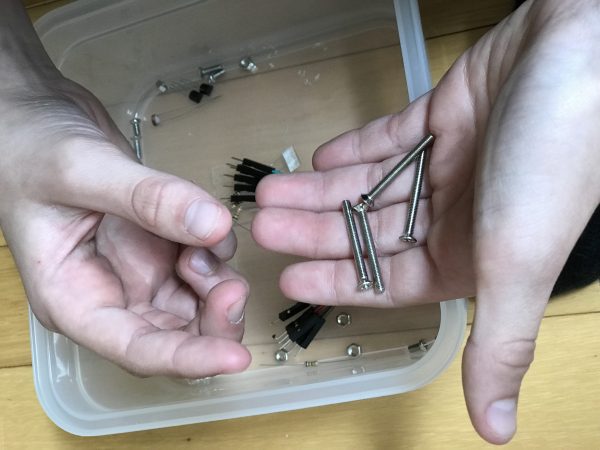
  • Project MaterialsĀ — motors, wood, solar panel, wire, bulbs, wheels, rubber bands, magnets, Alka-seltzer, etc.
  • Experiment MaterialsĀ — nails, paper clips, sandpaper, pH paper, string, balloons, wire, steel wool, etc.
  • Templates and StickerĀ PagesĀ — project templates, sticker pages, experiment supplements, etc.

Using the text and lab activities, students study forces, machines, motion, energy, electricity, magnetism, sound, light, density and buoyancy. Students will also study general chemistry concepts including the structure of matter, the periodic table, chemical bonds and reactions, mixtures and compounds and the chemistry of food and living systems. In addition, students will learn the fundamental physics concepts of the earth and solar system, thermodynamics, and fluid dynamics. Throughout this course, students discover the relationship between science and daily life. The students will gain a solid understanding of the scientific method and learn to write thorough and accurate lab write-ups.

course description of Advanced Physical Science
Watch a brief video overview here

Our Experiences with Advanced Physical Science

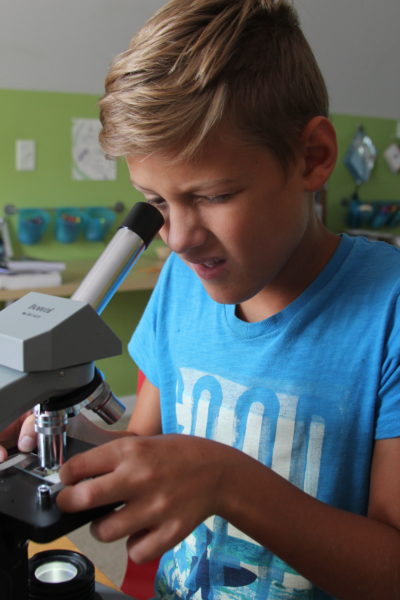
Advanced Physical Science from Exploration Education is the only science program we have consistently used in high school with our children, and I am so thankful to the mom who introduced us to the program so many years ago! Our three oldest have thoroughly enjoyed the program and projects, and we have so many fun memories over the years of the different labs we have worked on individually and with our friends.

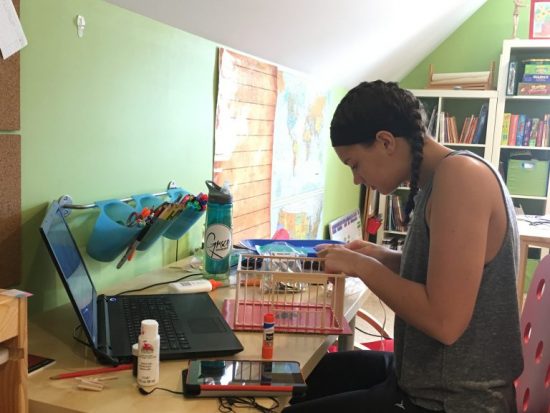
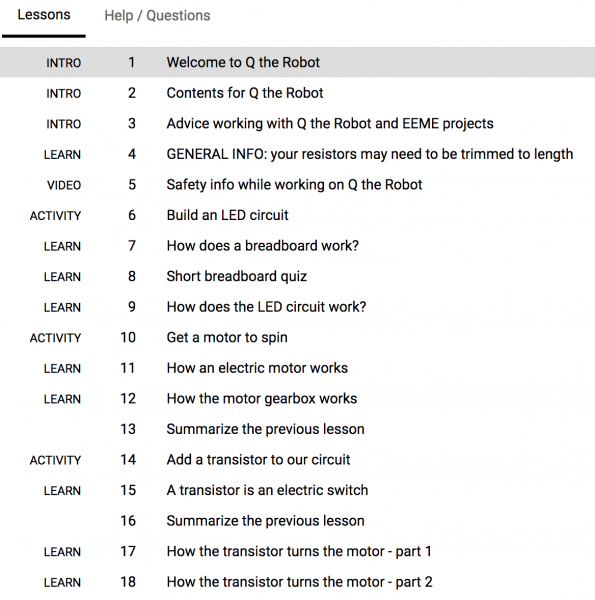
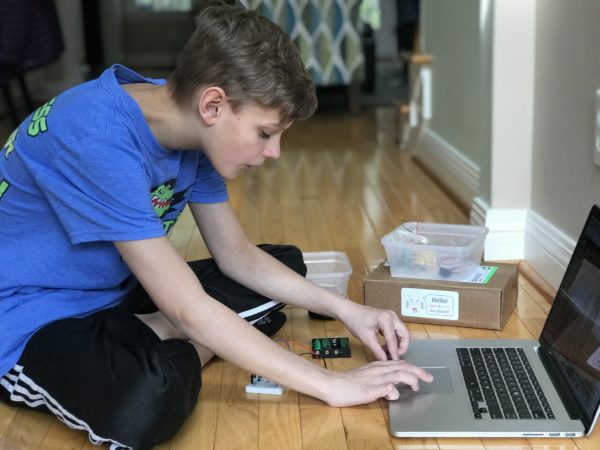
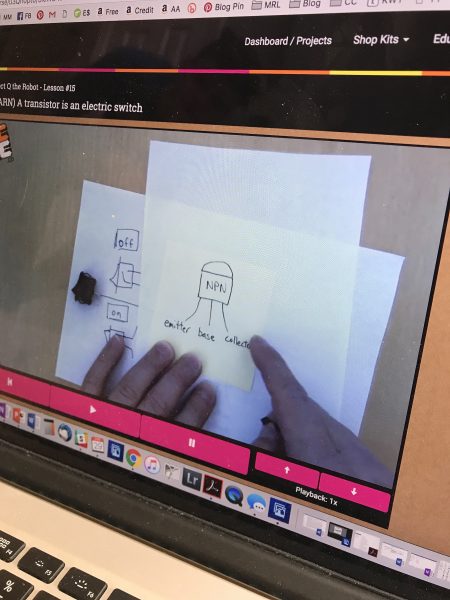
A typical week using Advanced Physical Science involves daily lessons with the first three lessons covering the overall concept for the week and the final two lessons going a little deeper and focusing on lab write-ups. The student text is online and interactive (when you first receive your program, you will register online and students will work through the lessons online).

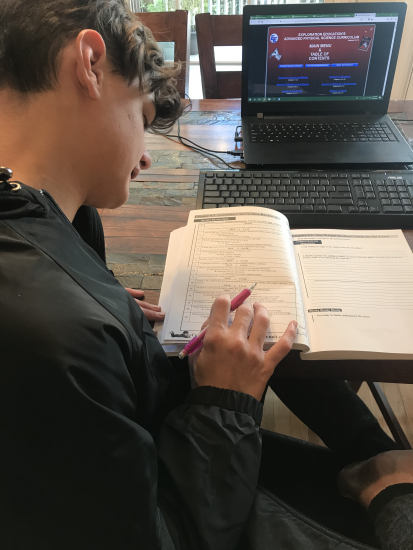
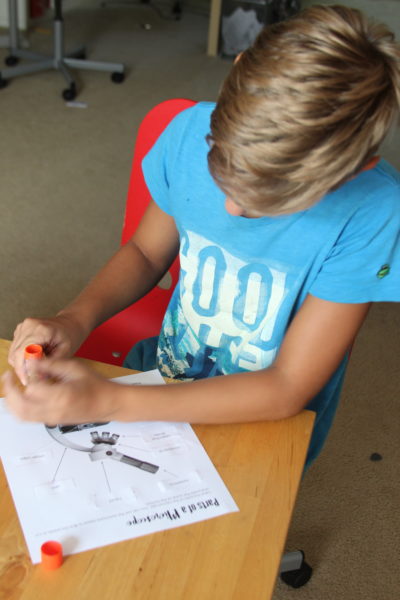
Students read the chapters on their computer and then answer questions on the computer and use their logbook to record their answers. Each of the 36 chapters are broken down into five lessons in the student logbooks (i.e. 1.1, 1.2, 1.3, 1.4, and 1.5) for students to complete and also use as review for quizzes and exams.

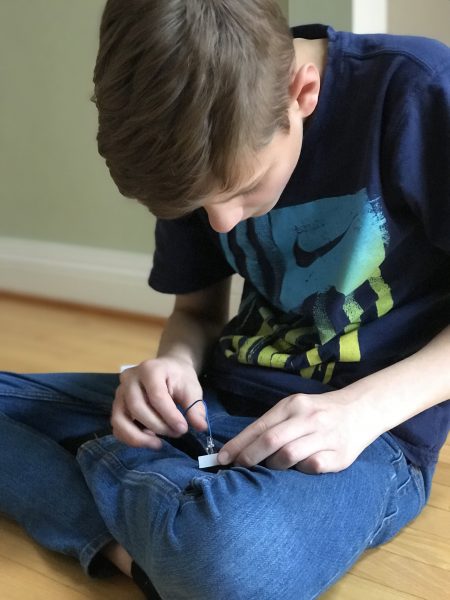
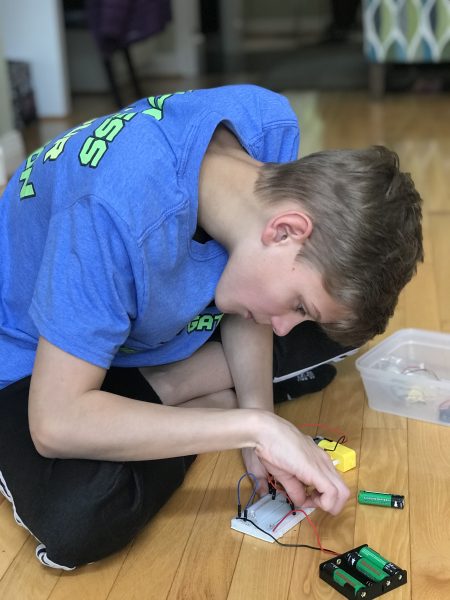
As a parent, I appreciate the variety the program offers: online and interactive text, the student workbooks to fill out, as well as the hands-on projects because it appeals to different learning styles, helping children remember and recall information by using these various methods. Our hands-on learners loved the building and creating, and lesson concepts were cemented into his mind because of this learning. The same child may have loved the steamboat project solely because it involved the use of matches.

With two of our children, we used the program as a part of a small co-op and it was a great fit. During the week we would study the lessons and work on experiments independently, and then once a week the co-op group would work on additional experiments and review the learning material together. Our co-op time was usually about an hour and a half or so ā€“ just enough to squeeze in a little more learning and review together if there were any experiments gone awry.

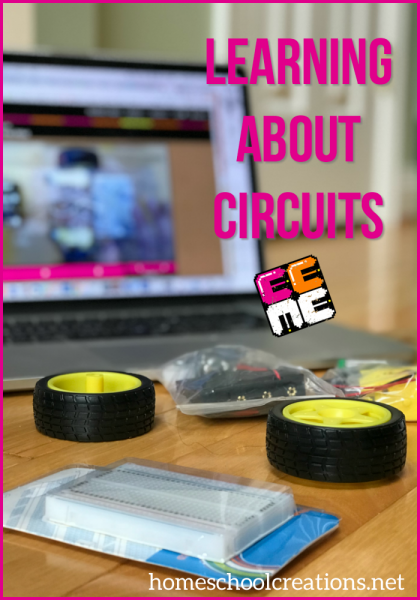
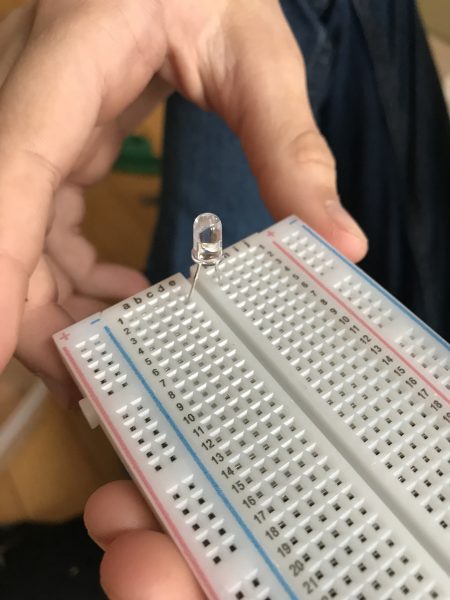
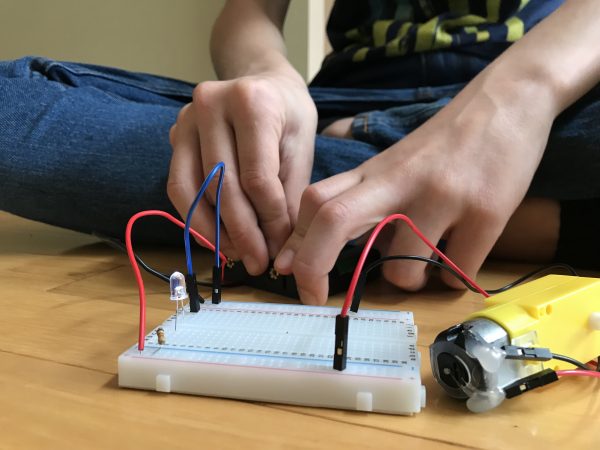
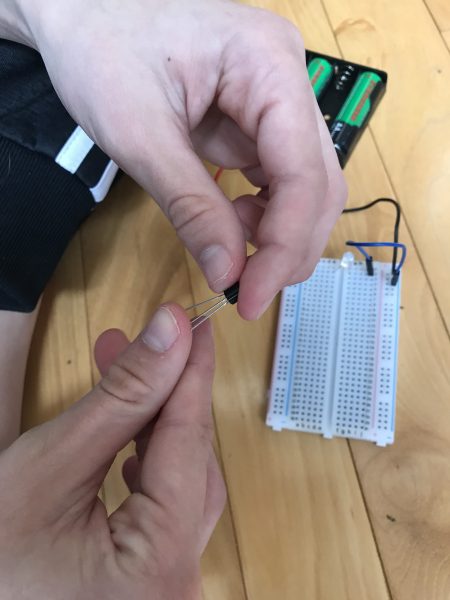
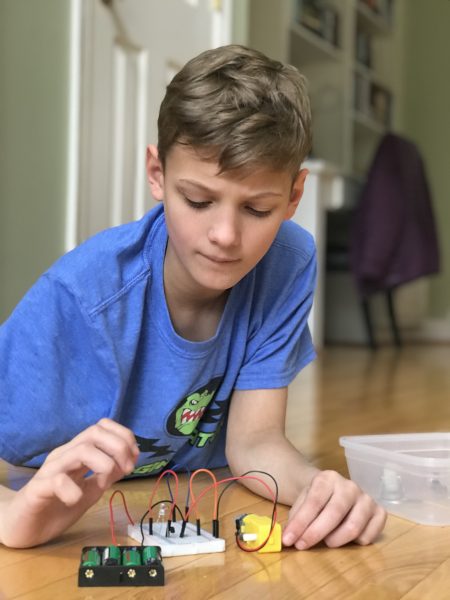
Personally, I love the way Advanced Physical Science incorporates so many different learning styles as it introduces science concepts. While some of the projects are more typical (completing a circuit, for example), the program includes a large amount of science projects and labs that you don’t typically see, such as the steamboat and the miniature house construction. These were some of our favorite projects because of that very fact.

What Moms Need to Know

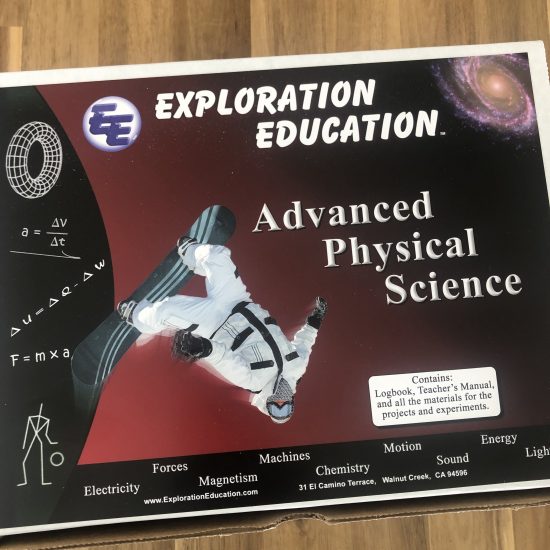
Having the entire curriculum packaged neatly in a box for you is definitely a huge plus to this program! Each of the activities is neatly packaged and labeled, ready to be pulled out and used with your children. Literally all you need is inside the box, so all you have to do is activate your online access to the interactive text and start learning.
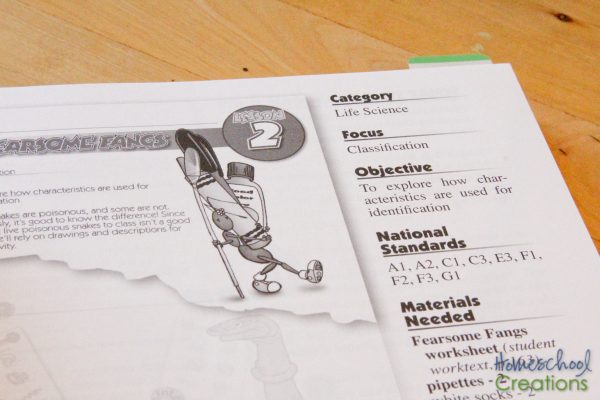
Teacherā€™s GuideĀ ā€“ Each program includes a teacher’s guide with detailed helps, including blank quarterly exams, answer keys, and a grading rubric. As with any program, I highly recommend reading through the manual prior to starting. There is also a short online overview for teachers to go through online with tips for users.

Time RequiredĀ ā€“ 36 weeks/5 lessons per week. Each lesson takes and average of 45 minutes to one hour. Also includes 40 lab hours.

Grading/Assessment: The teacher’s manual includes an area to record your student’s grades and progress. Throughout the course there are quizzes (vocabulary and section reviews) as well as quarterly exams. Grades are calculated using an average of weekly activity, quizzes, and exams.

Parental involvement: varies based on child, but time each week may require more assistance depending on your child since some experiments/builds require more detail and focus. For parents of children who like to skip steps, your attention to detail may benefit your child greatly. For example, SAVE YOUR EXPERIMENT MATERIALS because some of them will be used in future lessons (just ask me how I know).

WorldviewĀ ā€“ Text is written from a neutral worldview.

High School Credit: one high school credit can be awarded for this class. Approximately 150 hours with 40 hours of labs.

Perfect for grades 7-10.

Something for ALL Age Levels

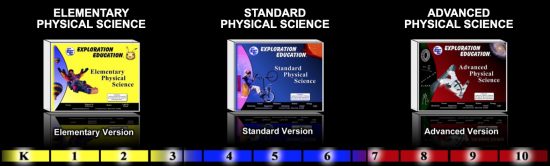
Exploration Education offers three levels of science programs: Elementary (K -3rd), Standard (4th – 6th), and Advanced (7th – 10th). Learn more about the different levels HERE.

You can purchase any of the programs from Exploration Education on their website. Additional logbooks or kits can be purchased for students if you are working on the program with multiple children.
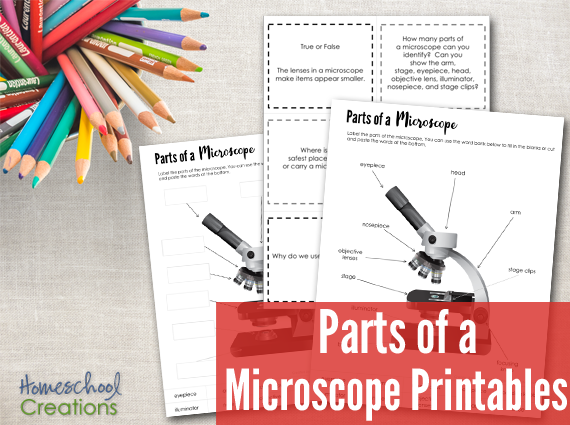
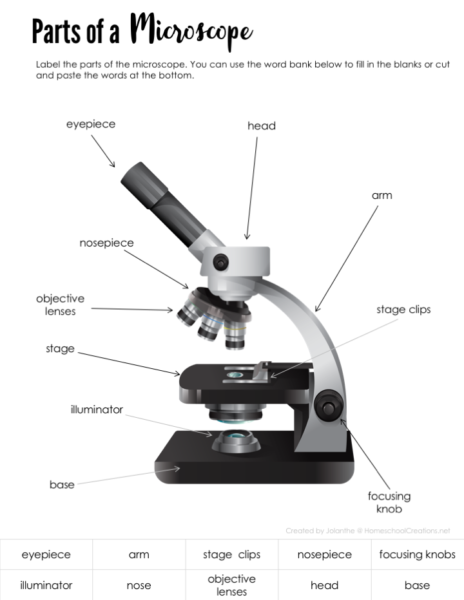
21 Winter Science Experiments for Kids

If you’re looking for some fun experiments to do at home, you won’t want to miss this FREE collection of hands-on learning ideas for both indoor and outdoor science time!

Here are a few of the activities included in the download:

  • Ice-cube-sized Igloosā€”whatā€™s the special ā€œglueā€ that holds them together?
  • Rock Candy Sticksā€”what role do ā€œseedā€ molecules play?
  • Bath Saltsā€”why do they improve the effectiveness of soap?
  • Crystal Snowflakesā€”how do they really form?
  • Snow Globesā€”why do the ā€œflakesā€ sink in water?
  • Sugar Scrubā€”how does the sweet stuff clean your skin?

Take a few minutes to download your 21 Winter Science Experiments guide now by clicking the image below!

Learning About Circuits with Q the Robot

EEME is a blog sponsor and we received this product free for the purpose of reviewing it. All opinions expressed are my personal, honest opinions. You can read my full disclosure policy for more details. 

One of the hardest things about receiving something fun to build is having the patience to get to the finished product. 

Especially when it’s going to be something fun. Like your very own robot. 

A few years ago Zachary had the opportunity to build Q the Robot from EEME and Kaleb is such a hands-on, STEM-loving boy, we wanted him to have the same opportunity. The process of building Q isn’t just snapping a few pieces of wiring together – it’s a chance to learn about breadboards, building circuits, how motors work, and so much more! 

Q the Robot is a project kit that guides your child through the process of building a 3-wheeled robot who follows light. He is the first in a series of robotics projects from EEME ā€“ and there is no coding required to get started! Once completed, Q follows light around using two sensors, or photo resistors. When light is shined directly onto the sensors, Q turns to follow the light. 

Building our Robot

Because there is so much to learn with Q the Robot (and even more kits build on this one base project), we’re going to share a little bit about what we learned in the first half of our building – the bulk of the steps needed to get Q moving and rolling, but before the entire body is constructed: circuits, the breadboard, motors, and transistors – and how they all work together. 

One of the things I love about EEME is that they offer FREE online lessons for your kids to view. If you don’t know a thing about electronics, don’t worry. There are step-by-step videos that will walk your child (and you) through the process, and that includes explaining all the various parts and exactly what they do. 

(Ask me how I know.)

Since we have worked on Q the Robot before, one thing I will note is there have been some upgrades that make the entire process simpler for kids to work on. Rather than having to strip any wires, they now provide a few different components, such as wires with pre-installed plugs, that are easier for kids to manage (thank you!!). The overall project functions the same, but for kids who may get frustrated easily, these changes are perfect. 

Step one was sorting all of the pieces and making sure we had the correct number for everything (we did). We also gathered any additional supplies we might need (Phillips head screwdriver, a piece of paper, and scissors). 

Each of the 35 video lessons for the Q the Robot project are 5 minutes or less in viewing time, some even around the 2 minute mark. We broke up our lessons over the course of three days and spent on average about half an hour to 45 minutes working each day. 

After sorting all the pieces, Kaleb took a few minutes to build an LED circuit (lesson 6) so he would know when Q was on or off. One thing that is great about this lesson is learning how to essentially mark points on a graph (find hole 4e, etc…). 

Kaleb next learned about breadboards and how the various holes are connected (lesson #7). For example, everything you see above in row 2 (2a, 2b, 2c, 2d, and 2e) are all connected. There are also four buses (two on the top and two on the bottom between the blue and red lines). 

A metal bar under each hole grouping in a row connects them together. You can connect Row 1 on the bottom half of the board to Row 1 on the top half of the board by inserting one half of a prong into each half and completing the circuit. 

One thing that I think is fabulous about this program are the intermittent ‘quizzes’ that are given to make sure kids understand the concepts they are learning. 

After learning the basics of the breadboard and hooking up our battery pack to make our LED light work, we moved on to motors and how they work (lessons 10 & 11). 

Initially our motor didn’t spin, so Kaleb was able to rewind the video, double check his wiring (which was wrong), and fix the problem so his motor would work correctly. In this lesson we also learned how to make the motor spin in opposite directions based on how the wiring was done. 

EEME Dad explains magnetism and how it affects the motors when electric current flows through – and how flipping how the motor wires changes the direction causes the magnetic field to flip as well (it’s fun to learn these things!). 

Our second day we looked more into how the motor gearbox works, and while this is something Kaleb was a little more familiar with, it was a great review in understanding both of the motors. 

Next step: transistors (lesson #14) and adding them to the circuit. Once the prongs were splayed they were placed on the breadboard. 

He then added a few resistors to the board (learning how to make L-bends), gradually adding the motor wires as well to complete the circuit and get one of the motors turning. 

And rather than just telling the kids to use the transistor, EEME Dad explains exactly how they work (somewhat similar to a mechanical switch). He also explains how the transistor is turned “on” and “off”, allowing the current to flow through. 

Our last few lessons covered how the transistor turns the motor (lessons 17 & 18) and why the transistor gets hot. This was another great stopping point for us since Lesson 20 gave Kaleb the chance to summarize what he had been learning. 

Kid that are able to can type and submit their answers in the lesson. Since I was with Kaleb, he summarized the process to me and any part he wasn’t quite sure on, we quickly reviewed.

One of the things I appreciate about the lessons are the metaphor examples EEME Dad provides for kids – for example, comparing the resistors to a water dam, with the water levels represent voltage. He walks kids through the circuits and explains it in ways that are easy for them to understand. 

Next week I’ll be sharing the rest of our Q the Robot project, but in the meantime, I’d encourage you to take a look around the EEME site. If you have kids in the 7-10 range, they have a monthly subscription option where each project focuses on a different electronic concept, but otherwise – go for Q!

What Mom’s Need to Know…

  • Everything’s included – parts, wires, batteries are included in all every kit
  • No experience needed – our online lessons to mentor, guide, and teach your kid (seriously, this is a lovely thing)
  • Safety first – no soldering required, low voltage projects (the mom in me rejoices)

Meanwhile, kids are learning solid concepts and being challenged by building projects using REAL components. They may make mistakes, but in doing so, they learn to review and discover what they can do to make it better and work correctly. 

Perfect for ages 10+

Time Required: 1-2.5 hours

Parental involvement: varies based on child

Start Learning With EEME

There are 3 ways to learn with EEME – FREE online lessons, their robotics kit series, and their electronics kit series.

  1. For free online lessons – families create a free account with EEME and use their web browser to interactively build and learn about electronics circuits.

2. Robotics series – The first kit of the series, Q the Robot, is a project where your child builds a 3-wheeled light-following autonomous robot. The online lessons associated with Q teach how robotics circuitry works.

You can purchase Q here.

3. Electronics series – electronics kits are purchased as electronics kit monthly subscriptions. A new bite-sized kit ships every month complete with all the electronic components needed to build a new project.

Each month’s project builds on the previous month’s knowledge and interactive quizzes, questions reinforce kids’ understanding of the why’s and the how’s. 

Learn more about the electronics monthly subscriptions here.

Past EEME Projects

Weā€™ve worked on several other projects from EEME. If youā€™re interested in learning more about their monthly subscription program, be sure to check out the below posts for more information:

The Scientific Method Printables

The last bit, Kaleb and I have been reading through the Zoey and Sassfras series by Asia Citro based on a young girl named Zoey, her cat Sassafras, and their adventures as they help care for magical creatures. The books are so very sweet, and they have been a great help in getting Kaleb back into the reading groove as we’ve started our school year. 

One thing that has Kaleb’s interest more than a normal book is the scientific processes that are included in the story. In each book Zoey is presented with a scenario where she has to make a hypothesis and follow through with an experiment and discover a solution to the problem: a sick dragon, a  monster with an embarrassing problem, and a stream being polluted. Throughout the stories we see Zoey’s notes as she asks questions, figures the steps in the process of her experiment, and draws her conclusions. 

Scientific Method Flipbook

Because Kaleb truly loves science, I thought it would be fun to create a few printables to go along with the book series – and the great thing is they can also be used to go along with any experiment we work on!

The printable flipbook focuses on the six steps of the scientific method: 

  1. Question
  2. Hypothesis
  3. Materials
  4. Steps/Experiment
  5. Notes & Data
  6. Conclusion

This free printable prints off on four pages. Once printed, simply cut along the outside edges of the rectangles, stack in numerical order, and staple along the top to create a flipbook. 


Scientific Method Poster

If you’d like a quick glance and reminder of the steps in the scientific method, be sure to grab a copy of the Scientific Method Poster as well. It prints off 8.5″ x 11″ and lists the various steps along with a short description. 


Additional Free Printables

I hope these two printables are a help to you all. If you’d like to find some more that tie into the Zoey & Sassafras series (and learn more about the books), be sure to visit the Innovation Press page


Parts of a Microscope – Free Printable

So our youngest is all about science anything. Experiments. Microscopes. It’s all stuff he soaks up like a little sponge and asks to do all.the.time. 

Over the past two weeks we have been learning about microscopes and spending time examining things on slides. Two of his siblings are also studying similar topics in their science lessons, so it’s been fun to work on together – especially when one project went a little south and we had mold instead of the culture we were growing. We happened to later talk about the accidental discovery of penicillin and the Noble Prize that was given for that, and Kaleb is now convinced he will be the next Nobel winner thanks to growing mold.

(I’m not as certain on the mold part in my house.)

Anyway, as we are learning about microscopes in our Nancy Larson Science 4 program (which we love, love, love), we have been working through some extra helps to make sure he is catching all the facts. I put together the Parts of a Microscope sheet for him and 12 trivia questions to go along with our lessons and he is loving it! 

The Parts of a Microscope Printables include the following worksheets:

  • a completed parts of a microscope worksheet
  • a fill-in-the-blank (or cut/paste) parts of a microscope worksheet
  • 12 trivia questions about the parts of a microscope
  • an answer page (just in case you need it)


You can read more about the Nancy Larson Science programs here (we highly recommend them). 


A Reason for Science Level D Review

Educents is a blog sponsor and we received this product free for the purpose of reviewing it. All opinions expressed are my personal, honest opinions. You can read my full disclosure policy for more details. 

A Reason for Science - a homeschool science program review from Homeschool Creations

This year I thought we would try something different for science. Instead of using a curriculum of any type, I pulled a bunch of science experiment books off our shelves and marked various activities to do with Kaleb over the course of the year. No real aim or direction, other than keep the 4th grade science lover in our home busy with fun projects. 

It seemed like a fabulous idea, but there’s one thing that continues to be a hangup of mine: preparation (aka gathering) of materials. While I am fabulous at earmarking pages and having the overall idea of what to implement, sometimes I neglect to remember the inconvenience of finding every single item needed for the activities (and with science it can sometimes be a little more tricky). Translated, that meant that up until December we did a whopping TWO experiments of the ones I had a planned and the books just sat there staring at me. And Kaleb kept asking when we would do more. 

Because science is something that makes Kaleb LIGHT UP like crazy and gets him motivated, I did a little digging in December and we decided to use A Reason for Science (Level D) from Educents with him for the second half of the school year. Complete with a teacher’s manual, student book, and a shoebox full of go-along supplies, there may have been some excitement from both of us when the box arrived. If there is anything I know about myself at this point in homeschooling, the easier I can make it for myself, the more likely it is to be accomplished. 

A Peek Inside A Reason for Science

We were able to immediately begin using the program the day after we received our box (I took a quick look through the teacher guidebook to get my bearings). Since then we have been working through the lessons and I would love to share a few of our thoughts and what we are enjoying about the program. While this has been a bit of a shift from the traditional textbook approach of other science programs we have used, I am loving the focus on having Kaleb actively learning and understanding concepts as he works through the various processes.  It’s slightly more informal, but in a structured way – if that makes sense!

Reason for Science D - Homeschool Science-36

Each level of A Reason For ScienceĀ® Homeschool Pack includes a materials kit, a student worktext, and a teacher guidebook and is designed to teach a variety of concepts over the course of the year: basic life, earth, and physical science. 

Reason for Science D - Homeschool Science-13

The lesson pages are broken down in the teacher guidebook showing the category of science covered, lesson focus, objective, materials needed from the kit (and home), any safety concerns, and what to do. Images of the pages in the student worktext are given as well, along with possible answers to questions, as well as additional learning ideas and a full walkthrough with teacher insights. For me personally it took a little bit of getting used to the format (since we have used different programs in the past), but it is overall very simple to implement. 

Reason for Science D - Homeschool Science-32

We jumped right in with the first lesson – seed germination – and had to wait for our first results since it obviously required a little patience while the plants began to grow. During the week, while we waited, we worked through the questions in the student worktext, and kept an eye out for any developments in our seeds. 

Reason for Science D - Homeschool Science-29

Meanwhile, we moved on to the next lesson and talked about animal classification – snakes (a line from Indiana Jones may be going through my mind now). This lesson had a hands-on coloring and creating project – snake puppets. We talked about venomous and n0n-venomous snakes and used bulb syringes (along with one of my hubby’s socks) to show how a snake’s venom works.  

Reason for Science D - Homeschool Science-17 

Lessons also include an extended teaching section if the topic is one your child enjoys and wants to go deeper into a specific area of learning.

In the last few weeks we have worked through five lessons, but the average pace for the program would be one lesson a week – very easy to fit into the schedule and also extend learning throughout the week as well. Other than the above, here are a few additional things to love:

Reason for Science D - Homeschool Science-60

  • materials kit – hands down one of the best parts of the curriculum. So far we have had to provide very little (a sock, water, and a paper towel) – and the less I have to do, the easier it makes it to start a lesson!
  • minimal prep work – open the teacher’s guidebook and look at the materials required, pull them out of the box, and start
  • variety of lessons and topics covered in short/succinct manner, but with plenty of means for the student to learn 
  • student worktext is also full color, making it very visually appealing (teacher’s guidebook is a black/white version)
  • Scripture is added at the end of each lesson (a little food for thought) and journal space as well
  • discussion questions are a part of each lesson in the student worktext, allowing lesson review
  • lesson quiz/wrap-up is also included at the back of the teacher’s guidebook (optional)


One reader recently emailed asking how this has compared to other science programs we have used in the past. The short answer is –  a bit. :) The longer answer is we have used programs that were more scripted from start to finish (teacher says ___ and student answer would be ____). In comparison, A Reason for Science has more wiggle room and while information is provided for learning, the focus is more on the student arriving at their own conclusions through the learning process. A Reason for Science also (so far) has been a bit more hands-on for us. The full-color student text also is very visually appealing – which I love! 

10% off Educents Coupon!

Educents is offering my readers a discount code until January 31, 2017. 

Save 10% SITEWIDE with promo code STOCKUP at checkout!
Purchase A Reason for Science here!


Are You Familiar with Educents?

homeschool_ad300x250Educents is an online marketplace where you can find  affordable educational products. They provide daily deals to students, parents and educators by working with established educational suppliers. Whether it is a science kit, curriculum pack, books or art supplies, they make sure that Educents has the lowest price – helping more than 300,000 teachers, homeschoolers, and parents gain access to affordable educational materials.

Click here to browse and discover all affordable deals at Educents.