20 Best Tips

House of Cards ~ Science Sunday

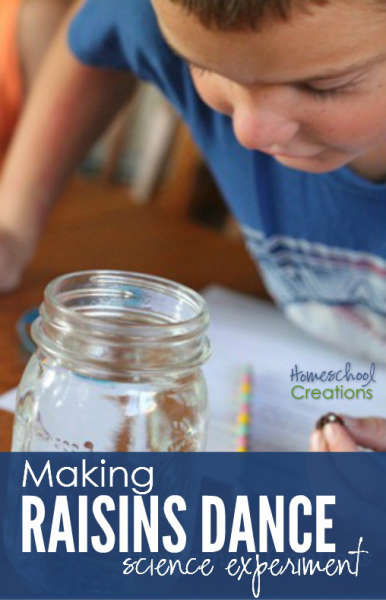
Apparently, I’m picking some real winners of experiments to try with the kids. I figured building a house of cards wouldn’t be that difficult.

I was wrong.

We were able to make a few ‘teepees’ out of the cards, but before we could get much farther, they would all collapse…however, it drove home the entire point of the experiment overall, so in that sense it worked out perfectly!

Question of the Week… What will happen if a key card is removed from the card house?

Items we used for this experiment:

~ deck of cards

~ brainpower and patience {the latter sadly lacking in our house}

Predictions and Experiment…

Each of the kids made a prediction about what would happen…which wasn’t too difficult, considering we couldn’t even get a card house built! Their prediction was that it would fall ~ and that it did!

Before we started the experiment, we talked about force {pushing or pulling on an object}. We tried putting our fists together in front of us and seeing what would happen when the force from one arm was more than the force from the other. I also demonstrated force by having Zachary try to stand up from his chair while I pushed down on his shoulder.

The kids each took about 7-10 cards and tried to build a card house with it {two teepees on the bottom, a card laying on top of them and another teepee on top}.

house of cards

Mommy tried rather unsuccessfully to build just one. Every time I tried to build the second part of the house, the first one would fall. Zachary was the only one who managed to get two standing up together.

house of cards building

Eventually we tried creating different styles of card houses and Laurianna was able to make one that was a little more square in style {notice the tongue concentration with both her and Zachary ~ grins}.

IMG_6723

The Nutshell Reason…

Force {push or a pull} can put an object in motion or change speed or direction of a moving objects. Objects also put force against each other and can balance if the forces are equal. Obviously the stronger force wins and will push the other object in the direction that it is going.

After the Experiment…

Once we finished our experiment and talking about why things were happening the way they were {force, balance, etc…} the kids answered a few questions on their observation sheet from the book and illustrated what happened during our experiment.

How to Do Science Experiments with Children Resource: How to Do Science Experiments with Children is available from Amazon and you can also check it out {and do some of the experiments} using Google Docs! The experiments use easy-to-find objects and also include record sheets for kids to fill out with their predictions and experiment results. Each experiment also includes teaching tips and explanations…which are rather handy! :) Don’t forget to check out some other great science ideas at Science Sunday hosted by Ticia at Adventures in Mommydom.

 Jolanthe Signature affiliate button

Making Raisins Dance ~ Science Sunday

Making raisins dance science experiment from Homeschool Creations copy
This experiment almost ended up being a total flop. I thought we had all the needed materials, but didn’t take into account the fact that the soda had been shaken by a certain 5 year old and therefore was missing a key part needed for the experiment.

Carbonation.

Fortunately, I have some children that have been paying attention during these experiment times and came up with an alternative idea that WORKED. Hallelujah…something is sinking in!

Question of the Week…What will happen to raisins dropped into a glass of clear soda?

Items we used for this experiment:

~ two clear glasses

~ clear soda {Sprite, etc…}

~ raisins

~ water

OR if you have a 5 year old who can’t keep his hands to himself….

~ two clear glasses

~ baking soda

~ vinegar

~ water

~ raisins

Predictions and Experiment…

Each of the kids made a prediction about what they thought would happen when the raisin was dropped into a glass of soda ~ would it melt away to nothing, sink to the bottom, move up and down, or float and stay at the top? We marked our answers on our record sheets and started experimenting.

First we tried putting some raisins in a glass of plain water. They sank to the bottom of the glass and sat there.

raisin experiment

We poured the soda into the glass and then dropped some raisins in.

Nothing.

Our soda was highly non-carbonated and offered little support. Before mutiny began we talked about WHY the experiment didn’t work and what we could do to change the results. The kids all suggested using baking soda and vinegar together, so we put some water in another glass, added some baking soda, poured some white vinegar into the glass and added our raisins.

And the raisins danced!!

raisin experiment

The Nutshell Reason…

Raisins will sink because they are more dense than water. The soda has carbonation {carbon dioxide} and forms bubbles of the gas. Some of the bubbles attach themselves to the raisins and float to the top of the water/soda. When they pop, the raisin will fall to the bottom of the jar.


After the Experiment…

When we were finished, each of the kids drew a picture of the experiment. In case you can’t read it, McKenna’s little girl watching the experiment is saying ‘Cool’ and ‘Wow’. {grins}

raisin experiment

Note to self…do not turn your back on your 5 year old for a split second when the container of baking soda is left on the table. Or your house and your child may look like this:

baking soda mishapbaking soda mishap

How to Do Science Experiments with Children Resource: How to Do Science Experiments with Children is available from Amazon and you can also check it out {and do some of the experiments} using Google Docs! The experiments use easy-to-find objects and also include record sheets for kids to fill out with their predictions and experiment results. Each experiment also includes teaching tips and explanations…which are rather handy! :) Don’t forget to check out some other great science ideas at Science Sunday hosted by Ticia at Adventures in Mommydom.


Cohesion and Surface Tension {Science Sunday}

This week we talked about molecules…and cohesion…and surface tension. Water, soap, and newspaper were involved. Did I mention water and a squeezable bottle of dish soap?

And Mommy only wanted to bang her head on the table once.

The question to find the answer to: What will happen when two ‘men’ made out of newspaper are put into water ~ one in soapy water and one in plain water.

Items we used for the experiment:

  • 2 plates
  • water
  • dish soap
  • newspaper men

The kids made predictions about what would happen to the little man dropped into the soapy water ~ would he sink? sink faster than the man in plain water? sink slower? same speed? All the kids thought he would sink faster ~ and they were right!

We put water on both plates and added dish soap to one of the plates. We gently put the newspaper guys on each plate and watched to see which guy decided to sink first.

 surface tension experimentsurface tension experiment

After the experiment was finished, each of the kids answered several questions about what had happened and the why behind it and then drew a picture illustrating what the results were. This has really been fun to see their interpretation of the experiment.

surface tension drawing

The Nutshell Reason…

The dish soap reduces the surface tension of the water. The water molecules, instead of sticking together, attach themselves to the other material in the water {dish soap}. When the newspaper is put on to the water, the water immediately makes it wet and it sinks. The paper put in the plain water will take longer to get wet.

How to Do Science Experiments with Children Resource: How to Do Science Experiments with Children is available from Amazon and you can also check it out {and do some of the experiments} using Google Docs! The experiments use easy-to-find objects and also include record sheets for kids to fill out with their predictions and experiment results. Each experiment also includes teaching tips and explanations…which are rather handy! :)

Don’t forget to check out some other great science ideas at Science Sunday hosted by Ticia at Adventures in Mommydom.

Jolanthe Signature affiliate button

Penny Baths ~ Science Sunday

This week our experiment together was all about chemical reactions. We have plenty of dirty money around our house {pennies that is}, so we decided to give them a bath in a few different solutions and see what would happen.

If you’d like to try this experiment at home, you’ll only need a few simple things to try it yourself:

penny experiment 

  • salt
  • white vinegar
  • dirty pennies
  • a glass jar
  • a Tablespoon to measure
  • a plastic spoon
  • paper towels
  • bowl of water

Before starting our experiment, the kids made a prediction about what would happen when pennies were washed with a mixture of vinegar and salt. Would they sizzle, turn black, bounce up and down, or become shiny? Predictions varied with our three ~ black, bouncing and shiny {only McKenna guessed correctly}.

We also tried putting just salt on one penny and just vinegar on another to see what would happen. The salt just rubbed off and the vinegar started brightening the penny, but didn’t do a very good job.

The kids measured and mixed 6 Tbsp. of white vinegar with 2 Tbsp. of salt. They took turns stirring and stirring, meanwhile peeking to see what was happening inside the swirling mix.

penny experiment penny experiment

Each of the kids drew a picture of what happened during the experiment ~ I LOVE seeing their interpretations of what happened! The result? Here are the before and after pictures of Laurianna’s two pennies.Penny Experiment June 2010

The Nutshell Reason…

Pennies become dull looking because the oxygen atoms in the air combine with the copper atoms on the pennies. When we mixed the salt with the vinegar, a chemical reaction took place. Together the two different items formed a new chemical called hydrochloric acid. When hydrochloric acid meets oxygen atoms on the surface of the pennies, it makes them shiny and looking new.

How to Do Science Experiments with Children Resource: How to Do Science Experiments with Children is available from Amazon and you can also check it out {and do some of the experiments} using Google Docs! The experiments use easy-to-find objects and also include record sheets for kids to fill out with their predictions and experiment results. Each experiment also includes teaching tips and explanations…which are rather handy! :)

Don’t forget to check out some other great science ideas at Science Sunday hosted by Ticia at Adventures in Mommydom.

Jolanthe Signature affiliate button

Ping Pongs and Air Pressure Experiment – Science Sunday

Ping pongs and air pressure experiment Homeschool Creations

We had much fun with a quick and easy experiment this week that helped us all learn a little bit about high and low air pressure. I found a lovely book of science experiments {see below} hidden in a stash of my teaching books while I was cleaning and sorting books for next year.

If you want to try the experiment yourself, you’ll only need a few things:

~ a blow dryer

~ ping pong balls

~ electricity

ping pong experiment 1

Before we started our experiment we made a prediction about what would happen to the ping pong ball resting on the nozzle of the blow dryer. when we turned the blow dryer on. Would it blow away? Stay in the column of air above the dryer? Be sucked into the hair dryer? Melt? The kids were mixed in their predictions and Zachary ended up being the one to guess predict correctly.

Each of the kids took turns trying it out, moving the hair dryer from side to side and up and down so that the ball traveled along with the air stream. McKenna wondered if two balls would be able to stay in the air stream ~ and they did for all of 3 seconds {but the look on her face was hilarious!}.

 ping pong experiment 2   ping pong experiment 3
We sat down afterward and recorded the experiment results on our journal sheet, drew pictures of what we observed and then I asked the kids to tell me why they thought the ball stayed in the air stream.

Zachary ~ the ball is light and air is heavy so the air was lifting the ball up

McKenna ~ the ball was light and the air force was so strong it floated

Laurianna ~ because the heat rose straight up and didn’t spread out

The Nutshell Reason

The pressure in the column of rapidly moving air shoots upward and is lower in pressure than the air around the column. The ping pong ball is ‘pushed’ back into the center column by the higher pressure of the air particles around the column ~ air moves from areas of higher pressure to areas of lower pressure.

How to Do Science Experiments with Children

Resource: How to Do Science Experiments with Children is available from Amazon and you can also check it out {and do some of the experiments} using Google Docs! The experiments use easy-to-find objects and also include record sheets for kids to fill out with their predictions and experiment results. Each experiment also includes teaching tips and explanations…which are rather handy! :)

Don’t forget to check out some other great science ideas at Science Sunday hosted by Ticia at Adventures in Mommydom.


Science Sunday ~ Our Worm Jar

The kids were thrilled with the prospect of bringing a big ol’ handful of worms into the house. The purpose? To see how {and if} worms compost, dig tunnels and mix soils.

Mommy? Perhaps not as thrilled as the kids were at the prospect of there being worms on the loose should a certain 5 year old manage to get ahold of the jar. But she persevered…

worm jar 1

Want to try this at home? Here’s what you’ll need:

  • a quart size canning jar
  • a lid with holes in it
  • dirt/soil/hay/grass
  • worms
  • dark colored felt or paper

First we layered dirt into our jar ~ rich soil from the garden, some lighter sand, some mulch {layering soil, sand, mulch, soil, sand…}. When we had filled the jar, we had fun digging for worms and added them to the top of the jar. We also added some food {teeny tiny chopped carrots, celery greens, chopped apples, etc…} for the worms to mix into the soil ~ we hoped.

IMG_4448

We made sure the soil was slightly damp, put the lid on our jar and wrapped in a piece of dark brown felt so that the worms would have some darkness to work in. We even put the jar inside one of our cabinets so that it was good and dark.

Every few days for the next two weeks we continued to check on our worm jar to see how our little underground friends were doing ~ and if they were doing their jobs.

worm jar 3

We filled out a simple science notebooking sheet with our predictions and observations to track our worm’s activities.

Worm Jar Click on the image to download the pdf.

Some fun facts we learned about worms:

~ The only place where earthworms don’t live are in the desert or where the ground is frozen.

~ Earthworm poop is called ‘castings’.

~ Worms have two layers of muscles ~ one that runs lengthwise and one that runs around, helping its body stretch and contract.

~ Worms have a coat of slimy mucus that helps them glide through the dirt.

~ Sunlight can kill a worm because they are sensitive to the UV radiation.

~ Worms are sensitive to temperature and touch.

~ Worms do not have ears, rather they ‘hear’ by sensing vibrations. 

worm jar 2

Here is a peek at our jar after 3 days. Can you see one of our worm friends near the top of the jar? See how our soil is already mixing? We had to add a little water/moisture to the jar to help out our worm friends.

After two weeks there were no obvious layers anymore. Our worms had been hard at work mixing and composting our soil. After we observed them, we took them back to our garden and let them do their work around our vegetables. :)


Don’t forget to join Homeschool Creations on Facebook!

This post is also linking up to the OHC Spring Series #9: Earthworms at Handbook of Nature Study. :)