20 Best Tips

How to Choose Homeschool Curriculum for a Child with Special Needs

As a former special education teacher, children with special needs are very dear to my heart. Today I am excited to have Kathy Kuhl, author of  Homeschooling Your Struggling Learner, share her insight and advice to families on choosing homeschool curriculum for a child with special needs.

 How to Homeschool Children with Special Needs

Choosing Curriculum for a Child with Special Needs

Folks often ask me to recommend homeschool curriculum for their child with special needs. But it’s like asking me to recommend shoes. I have questions: what size, width, and activity? Any color they can’t stand? What have they tried and how did that work—or not?

Every child is unique, but here are my steps to shopping for curriculum.

1. Study your child first, and make a short list.

With a child with special needs, we parents are tempted to focus on weaknesses in basic skills and academics. List them, but also notice strengths. Passing math or spelling is something to celebrate! Being able to explain 27 kinds of horses, rocks, or locomotives is a strength—even if you hear way too much about it. Note those passions. If your child loves music, drawing, storytelling, or talking to people—even if they aren’t good at it yet—write that down.

Build your plans around their passions, strengths, and weaknesses. When you’ve got that written (keep it short), you are ready to:

2. Set goals for the year.

  • Not too many. One friend showed me her goals for 3 months. But I couldn’t do them in a year. You might hire a special education consultant to help you be realistic.
  • Don’t neglect basic life skills, whether it’s learning to wash hands, fix dinner, balance a checkbook, or deal with a disagreement with a friend. If the child is doing something that drives you crazy, like not putting away shoes, even that is a candidate for your list.

3. Network with other families.

Now that you know what you want to focus on, ask friends with kids with similar issues what they use. Don’t know anyone homeschooling a child like yours? Join Yahoo lists and online forums. Search the groups’ archives, in case someone asked your question last year.

If you aren’t on any Yahoo lists yet, search Yahoo groups for “homeschool” plus whatever special needs you are working with; e.g. “homeschool deaf,” “homeschool dyslexic” and also more general lists, like “homeschool special needs.”

4. Get a hands-on look at curriculum.

If you can go to a homeschool convention, go. Handling the materials, you learn things a catalog or website won’t tell. How big is the type and spacing? How colorful? How many practice problems? Are there alternate versions of quizzes and tests? (Some of us need second and third chances.) Talk to the representatives—many know plenty.

Remember, these are often small businesses and homeschool families, so support them by purchasing from them. If you need time to go home and think, ask if they’ll extend that convention discount a week.

5. Watch for bargains.

Sometimes you’ll find something marvelous that doesn’t fit your plans. Perhaps you had other plans for science, but then you saw something you know your child would love. Does it fit your larger goals?

pinkshoe

Image courtesy of Kathy Kuhl

Last month I was looking for a pair of ivory pumps. I never imagined I’d buy pink slings. But I saw a cute, well-made pair, marked down. I realized they fit my wardrobe. I changed my plan, but kept to my goal, and kept under budget.

By studying your child, setting goals, networking, handling the merchandise, and thinking creatively when you find unexpected bargains, you can turn the chore of shopping for curriculum, into—if not fun, at least a satisfying shopping experience.

imageKathy Kuhl, the author of Homeschooling Your Struggling Learner, helps parents help kids who are gifted, discouraged, challenged – or all three. Kathy is a veteran homeschool mom and former classroom teacher. Visit LearnDifferently.com to sign up for her newsletter and find great resources.

Homeschool Basics

This post is a part of the Homeschool Basics series. Be sure to read the other posts if you are just joining in. For the record, I am not an expert. I’m a homeschool mom who is sharing what she’s learned so far along the way with her own family.

Jolanthe Signature

How to Navigate Homeschool Standardized Testing

Homeschool Standardized Testing


Pages of unfilled little circles can seem overwhelming. For many homeschool families, the words ‘standardized testing’ might strike a chord of fear. Although the tests are intended for the students, they can be a bit of a challenge for the parents as well.

Homeschool standardized testing was something that scared me to death at first. I was worried that our children would somehow massively fail the test and red flags would begin going up all over the county school offices and our children would be brought in for further evaluation. {For the record, that didn’t happen – grins}.

We live in a state where one of our yearly assessment options is submitting results from a standardized test beginning in the first grade. After reviewing the different testing options, we elected to use the IOWA test – it wasn’t as intense as some tests, but also covered a bit more than some other tests we reviewed. For consistency, we have used the same test each year to gauge our children’s progress. While our state only requires us to submit test results for three specific areas, we work on the entire test.

Are You Required to Use Standardized Tests?

Some states require yearly testing starting with younger children, other allow more relaxed testing standards, and other states require no testing at all. Remember that testing requirements vary from state to state, so be sure to check your state laws and know what is required from you and your children {check HSLDA for current information}.

There may be options for end of the year assessment other than standardized testing that can include a yearly portfolio, assessment by a certified teacher, etc. Again – know your state laws and do what you feel is right for your family based on the options available in your state.

For additional help, be sure to visit this post: Know the Homeschool Laws of Your State.

The Process of Standardized Testing

Choose a test that works for your family. Once you have determined the type of testing that is required for your state, you’ll need to find a test that will work for your family. Things to consider when choosing a test: Are you able to be the test administrator? What is the cost of the test? What areas are you required to test?

There are a multitude available, and below you’ll find a quick link to several of the most common test choices. Tests are available to order through various companies, so be sure to look around before deciding on the vendor.

    • IOWA Test of Basic Skills {ITBS}
    • Stanford Achievement Test
    • California Achievement Test {CAT}
    • Comprehensive Test of Basic Skills {CTBS}
    • Peabody Individual Test (PIAT)

HSLDA has a great resource page for families listing various testing choices as well as vendors that carry various tests.

Administer the test. Depending on the test you choose to use with your child, you may be able to administer the test yourself {be sure to get certified in plenty of time before the tests}. Some tests will allow you as the parent to test your child, while other require someone else do the testing for you. In our area there are private schools that will administer the test for a fee.

Testing time usually take 2-3 hours a day over the course of several days. Depending on your child, you may be able to squeeze more into a day. Our older children are now at the point where they don’t want to drag it out, and they request to get it done over the course of 1-2 days.

For some great test taking tips, be sure to check out this article from HSLDA: 7 Test Taking Skills to Teach Your Child

Return completed test. Once the testing period is completed, you’ll need to gather your testing materials and return the test and any additional testing materials to the vendor for grading. We typically send our results via certified mail so that we can verify they were received by the vendor.

Interpret and submit testing results. Trying to decipher all the numbers and norms can be a bit tricky. Here are a few articles to help you navigate the number maze:

Tips for Standardized Testing

Be prepared! Spend some time the week before you begin testing reviewing the materials yourself {if you are the administrator} and preparing your child for what is coming.

Choose a testing environment that works for you. While some of your children may do well with lots of noise and action going on around them, quiet may be needed. You know your child better than anyone, so be sure to remove any distractions from the testing area {maybe a pet is a favorite distraction or your child is distracted by external noises}.

We’ve had different scenarios each year, but typically try to find a quiet spot away from other children to work on testing. There have been years we’ve had additional help {i.e. I tested a friend’s child while she watched my other ones} or we’ve had a fun movie marathon for the other kids to ensure some quiet time for testing.

Have lots of pencils, erasers, and necessary tools on hand. While super sharp pencils are wonderful, slightly dull pencils work a bit better to fill in those circles. Inevitably our children manage to break numerous pencils, so we keep a supply on hand along with the large erasers to help with any mistakes.

Some tests may allow for scratch paper or calculators, so be sure everything is in place before you begin. That way you won’t need to go scrounging for things at the last minute.

Take lots of breaks and make it fun. Before testing begins, I pull out snacks {as well as a few fun treats} and plan some break activities for the testee so s/he is ready to go. Every few sections of testing we take a quick break to grab a quick treat, take a bathroom break if needed, and then get back to work. After a good chunk of testing has been completed, we take a fun break to play Wii or something similar.

Hint: Be sure to avoid snacks that are messy and/or greasy – they could stain testing materials!

Get plenty of rest the night before. This pretty much goes without saying, but sleep {or lack thereof} can make a big difference in how your child will perform on the test. Don’t forget that mom needs to get some rest too!

Watch your attitude. This is just a test. If you are showing anxiety or hovering over your child, it can affect how your child responds to the test. We have one child who gets very emotional when she doesn’t fully comprehend something that is being asked on the test. Before testing I always remind our children that they do not have to score perfectly, know every answer – and it is ok if they don’t! They just need to do the best that they can.

CELEBRATE!! Our testing time typically marks the end of our school year – take a night to celebrate with an ice cream party, a special dinner out, or something unique to your family. Make it a night to remember!


Things to Remember for Before and After Standardized Testing

  • Know your state’s deadlines for turning in testing results. Our school district has a date for submitting testing results that differs from a few other key dates we need to remember {submitting our letter of intent, etc…}.
  • Leave ample time for test taking, returning the tests and receiving test results. Typically turnaround time is between 6 to 8 weeks, depending on the time of year that you test. Be sure to order and schedule your testing and leave yourself some wiggle room for sick kiddos so the testing results will be received in time to submit them to the appropriate offices.
  • Keep a copy of the testing results on file for your records. Several years ago we switched school districts and the school district we moved from refused to forward any of our testing and school records on file to the new district. Every year I made duplicate copies of the letters and testing results that were submitted, so I was able to quickly copy those and mail them in.

How Much Does Standardized Testing Cost?

If you are administering your own test, you can expect to pay between $20 to $50 on average. Some families choose to have someone else proctor the test, which can add an additional fee. The cost will vary based on the test that your family chooses to use for testing and also on the age/grade level of your child.

For example, we use the IOWA test {ordered from BJU Press} which actually dropped in price for our older children this past year. Part of this is due to the materials that are provided for testing. Because I am able to administer the test to our children, we do not pay any other fees other than return mailing to the company for scoring.

Keep Your Perspective

Standardized testing is simply a tool to assess your child’s progress. This isn’t a pass or fail test. For our family it has been a way to also look at the homeschool goals that we set at the beginning of the year and compare how those areas match up with what they were tested on. There have been years where one child has struggled in certain areas, and then the next year that child improved remarkably.

Remember that standardized testing is only a ‘snapshot’ of the progress your child is making. There is so much more to your school year than what is summed up in a few pages of a test!

Does your state require testing? What test has your family used for standardized testing? Do you have a helpful tip to help make standardized testing easier? Leave a comment and share!

Homeschool Basics

This post is a part of the Homeschool Basics series. Be sure to read the other posts if you are just joining in. For the record, I am not an expert. I’m a homeschool mom who is sharing what she’s learned so far along the way with her own family.

Jolanthe Signature

Homeschool Basics Series

Over the last few months I’ve been running the Homeschool Basics series and answering some of the most frequently asked questions I’ve received about homeschooling. There are still more posts planned in the series, so stay tuned over the next two months.

Are you enjoying it so far and finding it helpful?

In case you are newer to this site, here’s a quick sum up of what we’ve covered. Just click on the graphic to go directly to that post.

Have a question that you don’t see answered? Please feel free to leave a comment and ask! I’d be happy to squeeze in a post or two.

What are the homeschool laws in my state What Age Should I Start Homeschooling Homeschool Teaching Styles and Philosphies.png
Identifying Children's Learning Styles copy Goals and Purpose in Homeschooling How to Choose Homeschool Curriculum
How to Plan Your Homeschool Day Homeschooling in High School When curriculum isn't working - www.homeschoolcreations.net
How to Homeschool on a Limited Budget How to Homeschool Multiple Ages copy Weekly Homeschool Planner 300 FTF copy


A Few More Posts You Might Find Helpful…

  • Creating a Homeschool Binder
  • Organizing Homeschool Paperwork
  • A Homeschool Classroom


    Jolanthe Signature

  • How to Homeschool Multiple Ages

    How to Homeschool Multiple Ages copy


     Chances are, if you are homeschooling more than one child, your children are at different ages and grade levels. Right now, the grades of our children range from kindergarten up to sixth grade. Obviously, there is a wide range of learning and comprehension that goes along with the ages of our children.

    Which brings us to another question I get asked frequently…

    How do I teach more than one child?

    Does it require a little more work because of the age levels? Yes. Is it possible to teach a range of ages? Absolutely! Will you be able to spend adequate time with each child? Again, yes.

    We’re gearing up for our eighth year of homeschooling and while we are tweaking and adjusting our schedule each year, there are few key things that make the process of homeschooling multiple ages and children easier.

    Have a Plan in Place

    Before you start your school year, it is important to know what subjects and concepts need to be covered during the year for each child. I recently shared some tips on how to plan your homeschool day and believe that being organized in this area first helps tremendously. When you know what needs to be accomplished and have a rough routine outlined before you start your school year, it helps ensure that you aren’t forgetting something.

    Don’t be afraid to deviate from the routine and reevaluate during the year either. You may need to put something aside for a bit or add something in – and that’s ok!

    Combine Subjects When Possible

    One of the core things that has helped our family is working together on multiple subjects. While we don’t do this for every subject in our school day, there are several subjects that we work on together as a family. Our mornings begin with us working together on Bible, history, read-alouds, and calendar time.

    Poppy Art Project from See the Light-9737

    Much of this will depend on the ages of your children, but you can always adapt a subject and make it easier or more difficult for other children by incorporating extra assignments. We use the same history text for the entire family, but extend the learning with the older children using books that they can read independently or having the work on short papers based on the topic, etc.

    When we did a bird unit for science, our oldest had additional assignment that included choosing a bird that was native to our area and writing an in-depth report on that one bird and working on an art assignment to go along with it. Essentially you can make a subject easier for younger children or more intense for older children and target it toward their age/grade.

    Work Around Nap and Feeding Schedules

    Admittedly, one of the hardest times for me as a mom was juggling school with all the naps and feeding times of little ones. It took a bit to work into a routine of doing school during some of those coveted nap times and taking advantage of the quiet time to focus on what needed to be done. Life at home was definitely more hectic, and there may have been a few ‘me’ things that needed to be put aside for a season, but working around our family’s natural routine was a big help.

    Feeding times became times that we would sit on the couch reading together  {don’t think I didn’t nod off more than once!}. During that stage of our life, quite a bit of our curriculum was literature based and we completed the hands on projects while the little ones napped {or were otherwise occupied}.

    Let Older Children Work with Younger Siblings

    There are points in our day where one of the older kids has a bit of a lull or can take a moment to help out a younger sibling – maybe reading a short book aloud or listening patiently to a story. The past few years our oldest two have had fun pulling out a puzzle to work with their little brother, playing a game on the iPad with him, or helping another sibling in answering a math question when I was busy with another child.

    Homeschool Week 20 -0211
    Don’t underestimate your children’s ability to help out. This doesn’t mean teach it all, but there are definitely times during the school day where they can assist!

    Help Your Children Learn to Work Independently

    There are several subjects that our children eventually begin to work on independently and over the years we have used the weekly workbox grid to help our children visualize what subjects will be covered each day. Subjects that they are able to work on independently are easy to see – and focus on.

    20120125-IMG_4156

    Our older three work on their math curriculum independently {Teaching Textbooks}, handwriting, independent reading and book reports, vocabulary, Spanish, typing, etc… There may be times that they need some quick assistance from me, but once they ask a question, they move on and continue their work. If they get to a subject that they need my full attention {and I am not able to give it at that point}, they know to move on to another subject area until I can help. See our full curriculum list here.

    At the start of our school year I organize each child’s paperwork by week and subject so that I can easily slide their weekly papers into folders for them to grab and use. Books they need are located in a convenient spot, making it easier for each one to work on their own for specific subjects. You can get a peek at our classroom here.

    Meet with Each of Your Children Daily

    Each day I  have focused 1:1 time with each child to cover subjects and give instruction in areas they cannot work independently. After we work on our group subjects, each child heads to his/her own area to begin independent work. Typically, the subjects they can work on independently increase as the children get older, so I begin working with our youngest child on subjects first.

    To give you an idea of what this looks like, Zachary might be working on handwriting, math, or a hands-on game while I am helping Kaleb with math, science, or reading. As soon as Kaleb and I are done, I move over to Zachary’s area to help him with subjects such as writing, spelling, and reading.

    Our joke is that I ‘work my way up the food chain’, meaning I start with the younger kids and work my way up to the oldest. When our younger ones are finished, they can work/play quietly with the many manipulatives we have in the room or pull out toys in their room and play there {usually the younger ones are finished first}. There are times when a few children have to come back a bit later in the day to work on another subject 1:1 with me depending on how much time we had in the morning, but they enjoy a break for a bit after their initial bit of 1:1 time with me is done.

    Consider Using Curriculum That Doesn’t Require a Lot of Prep

    http://lh4.ggpht.com/_doy4w-COXFo/TJlUrf093rI/AAAAAAAAOaE/wANLQat5lgc/image1_thumb.png?imgmax=800There are many subject areas that I can spend a lot of time planning and prepping, but sometimes my sanity stays a bit more intact when I do not have to come up with detailed lesson plans, scour the internet for craft ideas and experiments, and invent worksheets to go along with a subject.

    Over the years there have been several pieces of curriculum that our family has started to use, and one of the key components is ease of use. Having lesson plans laid out with all of the materials ready to go can be a huge time saver for me {and our kids}. Our spelling program and science curriculum are two areas that have benefitted greatly from this. All of our supplies and books are in a box and I simply have to open up the book and begin teaching the next lesson {phew}.

    There are still areas that I like to pull things together on my own, but it is not a weakness to use a program that has already put things together for you. Yes, the programs may be a little more of an investment on the front end, but typically the time and stress you save are worth the extra – and you can most likely resell and/or reuse it with another child.

    Keep Little Ones Busy

    When your younger ones are awake more often, they may want to be included in your school time. They may not be able to participate to quite the level of the older ones though.

    While we were in the thick of toddlers and preschoolers, I pulled out special toys each day for the younger ones to play with and rotated through them so they were ‘fresh’ and fun – not just the same old toys. During the summer months I worked on ‘busy bags’ that had simple activities for toddlers and were fun to swap with other families. Keep it simple and uncomplicated.

    Avoid Interruptions

    Let’s face it – we get distracted {I’m not the only one, right?}. Over the years I’ve had discover and learn my limits during our school time. With caller ID is easy to not answer the phone when my mom calls {don’t get me wrong…I love my mom, but she can ramble and seems to forget that we’re doing school}.

    Limit things that you know are time stealers for you and will distract you from what you should be doing. My laptop typically does not come into the classroom with me because it is too easy for me to hop off on a bunny trail with email…or Facebook…or start this ‘one little idea’ for a printable. Our iPad has helped quite a bit – we can watch videos on YouTube or use educational apps, but it is much harder for me to get sidetracked {just keeping it real here!}.

    Stay Organized

    Our house is far from perfect and there are piles that grow from time to time, but I do try to keep things organized in a way that makes sense to me. For me that means having a homeschool binder to keep my mommy brain on track.

    Another thing that has helped me over the years is color coding our kids {each child has a different color that is theirs}. I am able to quickly pull any papers needed from the shelves from their folders or identify what belongs to which kiddo {we even go as far as putting color dots on their markers so there is no arguing about clean up!}. Our Weekly Workbox System is also color coded and the visual schedule helps the kids and I stay on track each day.

    The same organizational system won’t work for everyone {and that’s ok}, but find one that works for you and stick with it.

    Enjoy the Time You Have Together!

    Each year has brought different challenges and changes to our day, but as our children have gotten older, balancing the teaching has also become easier. Part of that may be due to our past experience, but as our children grow and mature they are also able to work more independently {most days} and have developed patience to wait their turns {again…most days!}.

    For you moms with little ones, those early years can be rough and there are days that seem so very overwhelming. Hang in there.

    Trust me – it will get better. You CAN do it and homeschool multiple children together. Give yourself and your kids some grace. It won’t likely happen overnight – all good things take time, but your family will find a groove that works.

    Most importantly, this time you have together is a blessing – be sure to take the time to enjoy each other. There will always be one more thing that you ‘could’ do, just make sure that you are focusing on the things that are most important – each other.

    What has helped you in teaching multiples ages and stages? Is there a tip that you would give a family new to homeschooling? Share it in the comments!

    Homeschool Basics

    This post is a part of the Homeschool Basics series. Be sure to read the other posts if you are just joining in. For the record, I am not an expert. I’m a homeschool mom who is sharing what she’s learned so far along the way with her own family.

    Jolanthe Signature

    How to Homeschool on a Limited Budget

    The following is a guest post from Jamerrill, author of Free Homeschool Deals. Jamerrill is frugal homeschooling mom and is passionate about sharing deals and helping other families save money while homeschooling.

    How to Homeschool on a Limited Budget

    How to homeschool with a limited budget is a question that I receive often. Homeschool moms are always looking for ways to cut costs and stretch resources.

    The year that my husband lost his job mid-year we ended up homeschooling for under $50. We were already on a tight budget before his job loss. I had felt challenged the summer before to not purchase the must-have items on my curriculum want list. I wanted to see just how far I could get without making any big purchases.

    The main resources we used that year were the Bible, library card, internet, paper, and our cheap printer. I even learned how to refill our printer ink cartridges that year.

    Since that time we’ve continued to homeschool for free and extremely frugal. This has led to my site, FreeHomeschoolDeals.com, which daily shares the best homeschool freebies, deals, and resources to help families afford the homeschool life. Below are some of my best tips for homeschooling on a limited budget. You can also receive a free copy of my eBook, Homeschooling for Free and Frugal.

    Wait on Buying Curriculum

    Go ahead and circle up all of your favorite curriculum catalogs. Then on a sheet of paper make two columns. Under one column write a list of everything you want. Then under the other column write a list of your needs.

    There is a difference between your wants vs. needs. Are there any items that you have to have for your children? When really assessing your list, what items do you think look like a lot of fun, but may not be what you really need?

    Read Curriculum Reviews

    Of the items that you feel you will definitely need for your children a good place to start is by looking for curriculum reviews online. Google the name of the curriculum that you’re looking for and the word “review.” As an example “All About Spelling Review.” You may find reviews like Jolanthe’s All About Spelling review.

    Read reviews from other homeschool moms to learn from their experience. Also, read curriculum review sites, like the Curriculum Choice. The Curriculum Choice offers a variety of reviews and many types of curriculum. The Happy Housewife has a growing page of homeschool curriculum reviews from preschool through high school.

    Try Before You Buy

    Another smart idea is to ask your homeschool friends if they have the curriculum that you’re looking for. If they do, you could possibly borrow it for a week. Try it out and make sure it’s a good fit.

    Use Resources You Have

    If I only used all the resources on my bookshelves and home we’d have a full homeschool year. You can always take a challenge to use what you have already. You may discover treasure tucked away on your bookshelves!

    Websites to Help You Save on Homeschool:

    eBay – I have bought two curriculum packages that I felt I simply must have off of eBay. I have also bought lots of Newberry Award winning books and books from reading packages. Search for the curriculum that is on your list on eBay before you look to buy it new. Many times families use curriculum for a short season and then list it for resell.

    • Homeschool Buyers Co-op offers curriculum at deep discounts. It’s a community that is free to join.
    • Currclick.com offers deals on digital curriculum and online classes.
    • CurriculumShare.com is a site where you can list curriculum that you’d like to give away, and you can get free homeschool curriculum there too.
    • Homeschool Creations hosts an annual Curriculum Clean-out where you could possibly get your favorite curriculum for free. This is a good way to clean off your shelves as well.
    • Homeschool Classifieds on this site you can find listings of homeschool curriculum for sale.
    • Yellow House Book Rental this site is run by a homeschooling mother who gathers curriculum and offers it for rental or inexpensive purchase. Here’s a post with more information about Homeschool book rental.
    • Educents is a new daily deal site that was created and owned by homeschool siblings and graduates. They are just getting started and grow and continue offering discount curriculum.

    Websites to help you homeschool for free and frugal

    Some families homeschool exclusively by piecing together curriculum resources online. There are many families who also supplement their favorite curriculum from these sites. These are just the tip of the iceberg of helpful resource sites. Please share your favorite sites in the comments!

    Free Online Homeschool Curriculum

    If you are looking for free curriculum online, be sure to visit the following sites to find out more of what they offer:

    Homeschool families are some of the most resourceful people that I’ve ever met! Please share your tips for homeschooling on a limited budget in the comments.

    __________________________________________________________________

    Jamerrill StewartJamerrill is a Christian frugal homeschooling mom of six children who has been homeschooling for the last ten years. Throughout their homeschooling years, her family has had to homeschool for free or extremely frugal, which inspired her free eBook Homeschooling for Free and Frugal.

    Visit her on her site FreeHomeschoolDeals.com or follow her on Facebook, Twitter, or Pinterest for the latest deals.

    __________________________________________________________________

    Homeschool Basics

    This post is a part of the Homeschool Basics series. Be sure to read the other posts if you are just joining in.

    Jolanthe Signature

    Homeschooling in High School

    The following is a guest post from Kris of Weird, Unsocialized Homeschoolers, a woman I consider a good friend.  Kris is walking the homeschooling high school journey and has some great tips and encouragement for you today.

    Homeschooling in High School

    There’s nothing that can strike fear in the heart of a veteran homeschooling parent like the thought of homeschooling high school. Despite what may be years of successful homeschooling, thinking of high school can bring all the fears and doubts of the early years resurging in a homeschool parent’s heart.

    Standing on the other side, with one child preparing to graduate, I feel a bit more confident as I prepare to head into the high school years with my younger two. Are there things we could have done better or that I wish we’d done differently? Absolutely.

    Overall, however, I feel good about our first attempt at homeschooling high school and I’m happy to share the benefit of our hindsight with you.

    Use 8th Grade as a Trial Run

    One of the things we did right – and that I plan to repeat next year with my son – was to use 8th grade as a practice year. Before the official record-keeping begins, this last year before high school is the time to:

    Start keeping transcripts.

    Eighth grade is the time to learn how to record high school transcripts. This allows you to work out all the kinks before it really matters. This is also when you should figure out how to determine high school credits.

    Try out classes.

    If you’re thinking about using online classes, have your student take a similar course in 8th grade. If you’ll be using a co-op or other outside classes, see if they offer middle school classes. This provides the opportunity to see if the class is a good fit for your student before you need it for your high school transcript.

    Use the curriculum.

    If you’re planning to change curriculum for high school, use something from that publisher at the middle school level. You can even use a high school level course if your student is ready for it and give him credit on his high school transcript if your state or prospective colleges allow it.

    We lost some valuable time with my daughter when we had to abandon a poor-fitting curriculum mid-year and seek a different route.

    Let College Admissions Provide the Framework

    I like what Lee Binz (The HomeScholar) says about providing a college prep high school education for homeschooled students: “Rigorous academics could benefit children even though they are not planning for higher education. Without college, a homeschool education could very well be the only formal education a student will be given.”

    If your child isn’t planning on attending college, his homeschool education will be the highest level of formal learning he will complete. Therefore, by making the education you provide be the best it can be, you’ll be giving your child the tools he needs to succeed in the workforce. And, he’ll be ready for college if he changes his mind and decides to attend.

    If your child has a specific college in mind, find out what their admissions requirements are and let that be your guide for planning his high school classes. Otherwise, find out what your state’s graduation requirements are. I’ve discovered that our state no longer offers different types of diplomas (i.e. college prep or vocational). Every student has the same academic requirements. I don’t necessarily agree with that, but it is something I’ve taken into account when planning for high school.

    Let Your Student’s Interests Guide You

    One thing that I really regret is waiting so long to allow my daughter’s interests to guide our choices for high school. I was trying to fit her into the mold, rather than figuring out how to work her interests into the framework on which we were building. Once I let her interests take the lead, her whole attitude toward school changed – well, except for algebra. She still hates math.

    The World Wars were a huge area of interest for her. With some great spine books, we were able to pull in some fabulous literature to create quality interest-led high school courses.

    Don’t forget electives. Electives provide a chance for your child to explore hobbies, talents, and natural bents that could ignite a passion and give him direction for a future career.

    Have a Plan for Algebra and Chemistry

    Algebra and chemistry can be scary words when you’re a homeschool parent wondering how to teach upper level math and science to a homeschooled high school student. There are a variety of teaching options, though if these {or any other} subjects intimidate you.

    Find a tutor.

    Hiring a tutor doesn’t have to be expensive. Look for a college student or a teacher looking to earn a little money on the side. You might even find a slightly older friend or relative who would be willing to help. I still remember my daughter asking a friend to help her with a difficult algebra problem. It had been a lot less time since he’d taken algebra than it had been for my husband and me!

    Learn together.

    I’ve had many homeschooling moms tell me that some of the courses they struggled with in high school came to them much more easily the second time around as they learned alongside their student. A teacher’s manual and an answer key can go a long way toward making hard subjects a little easier.

    Consider a co-op.

    When we do lab-based sciences with my younger two kids, we’ll look for a co-op setting. It may be an online co-op, local homeschool classes,  or a group of friends who get together once a week. Whatever it looks like, though, we’ve learned that science labs need a partner or two – and careful planning ahead-of-time.

    The thought of homeschooling high school can be overwhelming, but with some careful planning and detailed record-keeping it’s not as stressful as it sounds. And, when done well, homeschooled students can have one distinct advantage over their public-schooled peers: They have the opportunity to learn time management and self-motivation skills that a traditional high school setting doesn’t encourage.

    I’ll leave you with one final truth about which I keep reminding myself (God has reminded me a time or two, also): Homeschooling is about much more than academics. We need to provide the best academic foundation for our students that we can, but graduating a student of strong character who has learned how to learn is just as important as what’s written on his or her transcript.

    Kris has written a series on Homeschooling in High School that you will want to check out. The series covers topics such as figuring out coursework, determining credits, dealing with transcripts, sports, diplomas, and more.

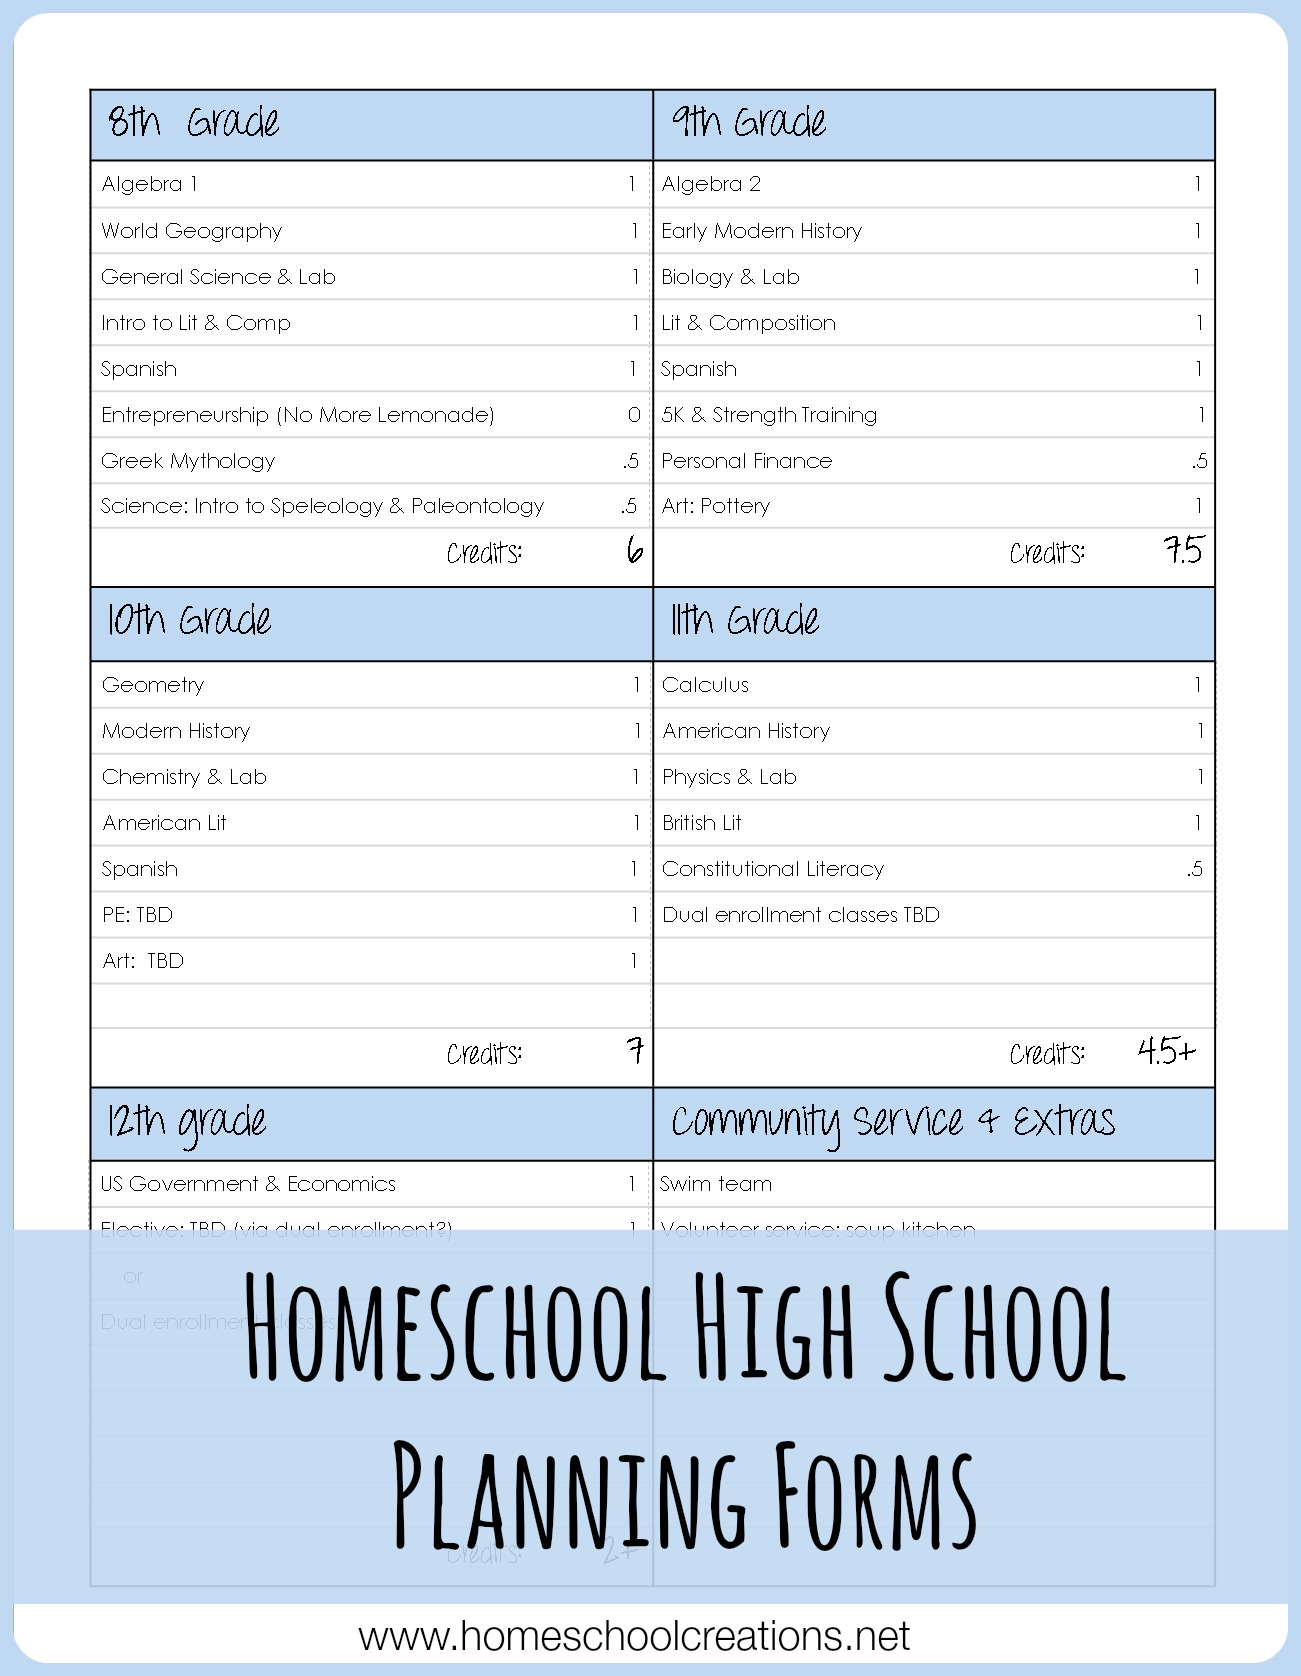
    Homeschool High School Class Planning

    Need some planning help? Be sure to download a copy of the free homeschool high school planning forms to help you out!

    ___________________________________________________________________

    Kris Weird Unsocialized HomeschoolersKris is the classically eclectic, slightly Charlotte Mason homeschooling mom to three amazing kids, the Christ-following, sweet tea addicted wife to one unbelievably supportive husband, and the formerly obese, couch-potato-turned-healthy runner of a bunch of 5K races and two half-marathons. She blogs at Weird, Unsocialized Homeschoolers.

    You can find Kris engaging her social media communities on Facebook, Twitter, Google+, and Pinterest.

    ___________________________________________________________________

    Homeschool Basics

    This post is a part of the Homeschool Basics series. Be sure to read the other posts if you are just joining in.

    Jolanthe Signature