20 Best Tips

Blog Planner Printables ~ Organize Your Blog Planning

Blog Planner


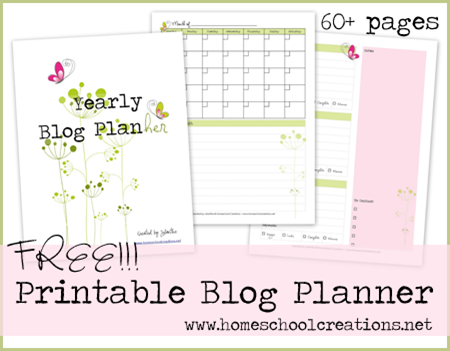
Maybe you need a little help organizing your blog with upcoming post ideas, reviews, and all the expenses that can go along with running a site. Years ago I created a free blog planner that has been a huge help to me and many other. The planner itself is undated so it can be used year after year, but recently I updated the yearly calendar page for my readers as well and thought it would be great to reshare.

Would you like a peek inside my blog planner?
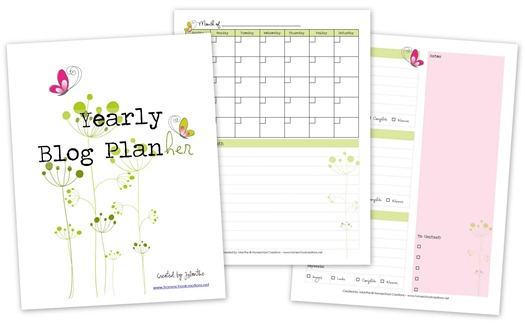
Printable Blog Planner To make a blog planner similar to mine you will need the following supplies:
      BlogPlannerCollage

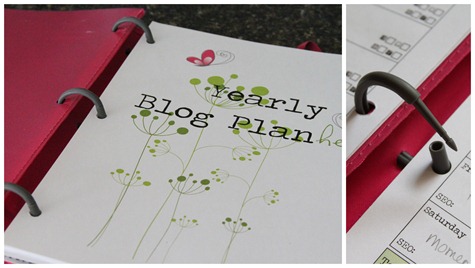
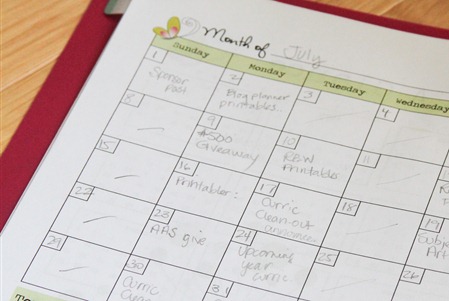
I use a Mead flexible binder that is a cross between a 3 ring binder and a plastic covered composition notebook. The binder gives me plenty of room to expand and can also use pockets and dividers that fit in a typical 3 ring binder. The planner is set up to print front/back and is not dated, so you can use it from year to year. Each month there is a month-at-a-glance calendar with room underneath to note the most important things to do.
Blog Planner photos-1-3

I use monthly calendar to give me a quick snapshot overview and see if there are things I need to move or add in. The facing page has room to track giveaways and/or reviews. I like having all of the company info in one spot {contact info, important links, due dates, etc…} along with space to check off when it is completed. I typically try not to schedule more than 2 reviews or giveaways in a month, but have room for three…just in case!
Blog Planner photos-3

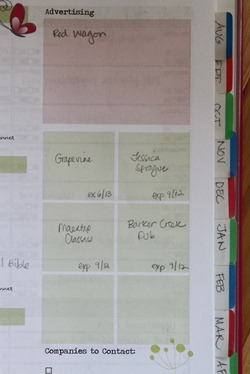
There is also additional space to jot down extra notes {Note: I custom divided this area in mine to keep track of any sponsors/advertisers that I have for the month}. Along the sides of the planner, I use Avery Write-on Tabs to label the months in the planner, so I can quickly flip to those months if needed.
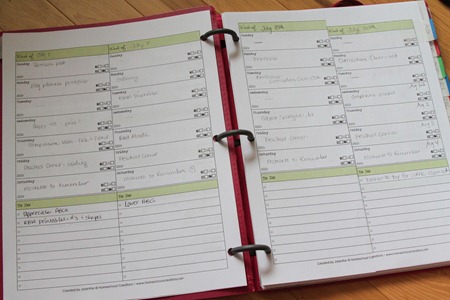
Weekly Blog Planner Layout-1

Having the weeks at a glance is also really helpful to me, so I have two pages that lay flat and give me space to track posts and see them laid out weekly. Each post area also has social media reminders for me to check off {Facebook, Twitter, Pinterest, and Google+}. Sometimes my brain just needs a few added reminders!
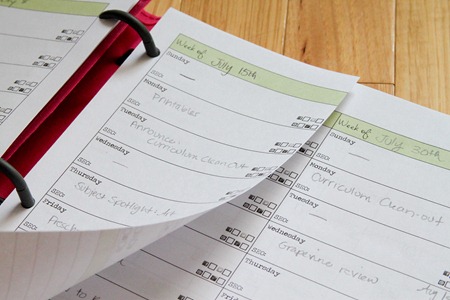
Blog Planner photos-1-2 There are a few months that need more than 4 weeks of layouts, and for those weeks, I printed a few extra sheets of the weekly layouts, cut them in half, 3 hole-punched them and added them into those months that needed them. Blog Planner Extras Toward the back of the blog planner there are planning pages to help you with any additional details you may want to track {and maybe even a few you hadn’t thought of yet!}. Overall, this 66 page blog planner includes:
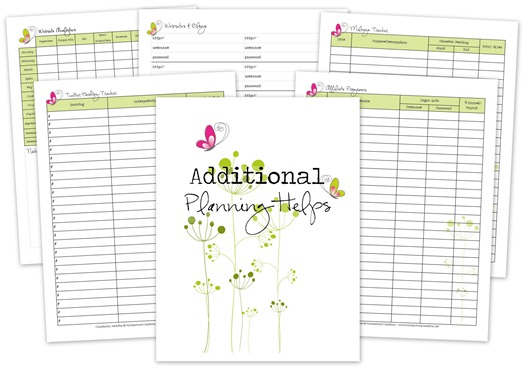
  • 12 month-at-a-glance pages with a monthly focus list
  • room to track reviews and giveaways
  • space to jot notes and ideas
  • weekly post trackers, including social media reminders
  • yearly goals and objectives
  • monthly website analytics tracker: RSS, Facebook, Twitter, etc…
  • a place to keep track of affiliate program info
  • a Twitter hashtag tracker {because there are lots!
  • Google communities and hangout tracker
  • Pinterest Group boards tracker
  • Periscope users and scopes to follow tracker
  • Instagram hashtag tracker
  • weekly blog meme tracker
  • mileage sheet {who thought blogging might involve driving?}
  • website username & password sheet {I can’t remember them all!}
  • and room to jot down all those wonderful post ideas
Blog Planner


Ready to get started printing your own blog planner?


Need more planning and organization help?

Two choices of student planners from Homeschool Creations - help get your student on track

Check out these additional organizational printables:

~ Yearly Planner for the Home

~ Daily To-do List printable

~ Main Dish Menu Planner

~ Editable Monthly Menu Planner

~ Weekly Homeschool Planner


Free Blog Planner – It’s a New Year! (Updated)

Blog Planner


With the new year starting soon, it was time to update the yearly calendar on my free blog planner! In case you are interested in grabbing a copy, I wanted to let you know that it’s ready to go. Thee are a few new pages included toward the back as well for those of you that have downloaded it before, include Periscope, Instagram, and Pinterest tracking. Here’s a quick peek inside too!

A peek inside my blog planner

Blog Planner photos-1-3

I use monthly calendar to give me a quick snapshot overview and see if there are things I need to move or add in. The facing page has room to track giveaways and/or reviews. I like having all of the company info in one spot {contact info, important links, due dates, etc…} along with space to check off when it is completed.

Weekly Blog Planner Layout-1

Having the weeks at a glance is also really helpful to me, so I have two pages that lay flat and give me space to track posts and see them laid out weekly. Each post area also has social media reminders for me to check off {Facebook, Twitter, Pinterest, and Google+}. Sometimes my brain just needs a few added reminders!

Blog Planner photos-1-2

There are a few months that need more than 4 weeks of layouts, and for those weeks, I printed a few extra sheets of the weekly layouts, cut them in half, 3 hole-punched them and added them into those months that needed them. Blog Planner Extras Toward the back of the blog planner there are planning pages to help you with any additional details you may want to track {and maybe even a few you hadn’t thought of yet!}. Overall, this 66 page blog planner includes:

  • 12 month-at-a-glance pages with a monthly focus list
  • room to track reviews and giveaways
  • space to jot notes and ideas
  • weekly post trackers, including social media reminders
  • yearly goals and objectives
  • monthly website analytics tracker: RSS, Facebook, Twitter, etc…
  • a place to keep track of affiliate program info
  • a Twitter hashtag tracker {because there are lots!}
  • Google communities and hangout tracker
  • weekly blog meme tracker
  • mileage sheet {who thought blogging might involve driving?}
  • website username & password sheet {I can’t remember them all!}
  • and room to jot down all those wonderful post ideas


Blog Planner
  Ready to get started printing your own blog planner? Download the printable Blog Planner here!

Need more planning and organization help?

Check out these additional organizational printables:


Tired of Being Anonymous?

Several many of you like to enter giveaways or ask questions…but I can’t get ahold of you to reply to your comment. There are several of you who have actually won a giveaway that I’ve held, but because you didn’t leave a comment, someone else won some lovely prizes.

Sad, but true.

You do not need to have a blog in order to have a blogger profile. Your profile can include two simple things ~ your first name and an email address.

If you have either a Gmail or hotmail email account, the set up is SUPER easy and quick {and if you don’t have a Gmail account, it is really easy to create one of those too!}. Go to the Blogger home page {blogger.com} and log in using your Gmail/hotmail email address and password. You will see a page that looks like this:

image

Click on the Edit Profile link and look for the part of the Profile page that says ‘Email Address’. You can change this email address to ANY email address that you would like to ~ meaning the one that you use on a daily basis {yahoo, aol, etc…}.

image 

Scroll up the page just a little bit and make sure that these two boxes are checked {the ‘share my profile’ and ‘show my email address’}.

image 

SAVE your changes!!

This is how your profile will look to others when they click on your name if you leave a comment on their blog.

image 

Now, whenever you leave a comment asking a question, your email address will be directly linked to that comment for only the blog owner to see so they can quickly reply to you!

On a side note, I have tried installing Disqus on my blog in the past, but had some major issues and got a little burned out trying to get it figured out. I love the ‘interactive’ feature that it allows in the comments and really hope that someday I can get it working..but that’s a project for another day!

Jolanthe Signature affiliate button

Blogging Tips: Search This Blog

A few months ago I added a little something to my sidebar and it has been a HUGE help to me personally.

The search box. See it over there on the side?

image

If you are looking for something in particular, try typing in a keyword for what you need and see what you come up with. I have the search set to look on this blog and links that I have on the blog.

I’ve found more things that I forgot that I posted about, and it’s been a quick way for me to find posts rather than digging through my categories tag or even the archives.

Have fun looking ~ and hope you find lots of useful things! Let me know if you find anything really exciting. :)

Jolanthe Signature affiliate button

Blogger Widget Title ~ Making It Blank

There’s a glitch in Blogger lately. If you edit or add an html widget {or any widget}, it’s requiring you to add a title.

Which really messes with my sidebar and how I want it to look.

BUT there is a quick {and easy} work-around if you happen to need one! In the title area type in this coding and it will allow you to save the widget and no wording will appear in the title area and mess up your pretty sidebars.

Ready?

<h2></h2>

It’s that simple! You’ll have to re-enter it whenever you edit your widget, but it’s a quick and simple way to fix it without pulling any more of your hair out. :)

Jolanthe Signature affiliate button

Are You Using Windows Live Writer?

If you aren’t using it for your blogging, let me just tell you that you SHOULD be! Windows Live Writer has made blogging/posting so much easier for me and I am truly in love with the program! It is compatible with several blogging platforms {Blogger, Windows Live, WordPress, LiveJournal, TypePad, and more}…but sorry to those of you who are Mac users. It isn’t compatible with Macs. :(

image 

Why do I love it so? Let me give you a few {or more} reasons:

1. I can blog anytime, anywhere without needing to be connected to the internet. All those post ideas swimming around in my head are saved as a draft in Live Writer and I can edit and add things when I think of more to add. This was a HUGE help to me when I was traveling and didn’t have constant access to the internet. I was able to write my posts and get them ready to go and then ‘publish’ them when I did have internet access.

2. I can post from multiple accounts. Live Writer allows me to create posts for all of my various blogger accounts. I don’t need to log into blogger, and with a simple click of a drop down menu I can switch accounts.

3. I can create template posts and use them as needed. There are certain posts of mine that use the same format. I love that I can click a button to pull a template that I’ve created/saved and all the same information pops up quickly without my needing to redo it all.

4. Photos and formatting is SO much easier! All it takes is a quick click of a button to add a photo, quickly resize it and even add watermarks and other special effects. When I publish a post, the picture automatically uploads to my Picasa account. This part alone has saved me so much time!

5. I can preview my posts. Live Writer offers the great feature of previewing your post so you can actually visualize what it will look like on your blog. This helps me see if there are any odd spacing issues before I actually post.

6. Editing after a post is up is simple! Live writer lets you ‘recall’ a post even after it has posted to your blog. Should I notice a spelling error {ahem} or anything else that needs to be fixed, I can do it quickly…and you all never even know!

7. My kids can also use it as part of their writing ~ without needing to be on the internet. Laurianna and McKenna both have blogs that are a part of my Blogger account. If they are online, they have access to my Blogger dashboard {and that could cause some unintentional problems!}. I have Live Writer set up on the kids computer so that they can blog away and publish to their own blog without even needing to be on the internet.

8. It’s FREE! Did I forget to mention that? When you download the program it comes with extra ‘add-ons’ that are unnecessary, so be sure to uncheck all the extra boxes when you download it.

9. I can add links quickly and easily to photos, text…anything. I can even specify that the link opens up in a new window.

If you’d like to see a video tutorial, Remarkable Blogger has a great Windows Live Writer tutorial.

What are you waiting for? I promise you it is a lovely, lovely thing…go check it out and have fun playing around with it! It is definitely something that Works for Me! If you are already using it, what are YOUR favorite features of Windows Live Writer?

Jolanthe Signature affiliate button