

I’ve had several people email me asking how to put a link in their sidebar so their readers can contact them directly. Having an icon link is helpful because it prevents spammers from ‘seeing’ your email address, but provides a quick, easy way for direct contact.
Somehow that question managed to get me off on a bunny trail search of cool icons and I figured it would be just as fun to post some fun buttons for you all to grab and use on your own sites and explain it all to you as simply as I can. Because really ~ icons are so much more fun that just a plain old ‘Email Me’, right?
Are you ready to put one on your blog?
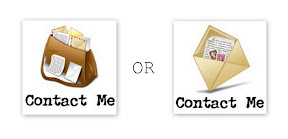
Step 1: Choose the icon below that you like the best ~ mailbag or envelope? Each of these will fit into your sidebar (150×150).
Step 2: Depending on which button you want to grab copy and paste the html code below. Be sure to replace the red text with the email address that you would like to direct your readers to.
Mailbag html {with white background}:
<center><a href=”mailto:youremailhere@wherever.com“>
<img src=”http://i678.photobucket.com/albums/vv146/homeschoolcreations/EmailMeMailbagcopy.jpg”/></a></center>
Envelope html {with white background}:
<center><a href=”mailto:youremailhere@wherever.com“>
<img src=”http://i678.photobucket.com/albums/vv146/homeschoolcreations/ContactMegeneric.jpg”/></a></center>
Mailbag html {with transparent/see-through background}:
<center><a href=”mailto:youremailhere@wherever.com“>
<img src=”http://i678.photobucket.com/albums/vv146/homeschoolcreations/Email-Me-Mailbag-gif.gif”/></a></center>
Envelope html {with transparent/see-through background}:
<center><a href=”mailto:youremailhere@wherever.com“>
<img src=”http://i678.photobucket.com/albums/vv146/homeschoolcreations/Contact-Me-gif.gif”/></a></center>
Step 3: Paste the code into your layout. If you use Blogger, log into your Blogger dashboard. Go to layout ~ add a page element ~ choose ‘html/javascript‘ ~ paste the code above and click ‘save the changes‘. Make sure that you changed the email address to your own! :)
I’m not sure how other blogging platforms work, but you should be able to copy/paste the html codes above. {Amended: Thanks to Liz for letting me know the WordPress routine! Go to Dashboard – Appearance – Widgets – Choose left or right sidebar – Add Text – Save Changes – Edit Text – Enter html code and change to your email address.}
Step 4: View your blog and admire your handiwork…and wait for all your readers to bombard you with questions.
There you have it. Either four easy steps to make you feel like an html queen…or four steps to driving you html crazy. If you are having problems just click on my ‘contact me’ mail bag or leave a comment here. Have fun!

Just wanted to pass along a little something that is Working for Me!


 The printables shared on this site are FREE of charge unless otherwise noted, and you are welcome to download them for your personal and/or classroom use only. However, free or purchased printables are NOT to be reproduced, hosted, sold, shared, or stored on any other website or electronic retrieval system (such as Scribd or Google docs). My printables are copyright protected and I appreciate your help in keeping them that way.
If you download and use some of my printables and then blog about them, please provide a link back to my blog and let me know - I'd love to see how you are using them! Please be sure to link to the blog post or web page and not directly to the file itself. Thank you!
The printables shared on this site are FREE of charge unless otherwise noted, and you are welcome to download them for your personal and/or classroom use only. However, free or purchased printables are NOT to be reproduced, hosted, sold, shared, or stored on any other website or electronic retrieval system (such as Scribd or Google docs). My printables are copyright protected and I appreciate your help in keeping them that way.
If you download and use some of my printables and then blog about them, please provide a link back to my blog and let me know - I'd love to see how you are using them! Please be sure to link to the blog post or web page and not directly to the file itself. Thank you!