20 Best Tips

Our Favorite Homeschool Writing Curriculum

There was a time period many years ago where both of our girls hated writing. All the joy, fun, and creativity had been sucked out of that subject thanks to me and the belief that writing could only be done one way (thank.you.very.much), and there was no wiggle room allowed.

(I was desperately wrong, in case you were wondering).

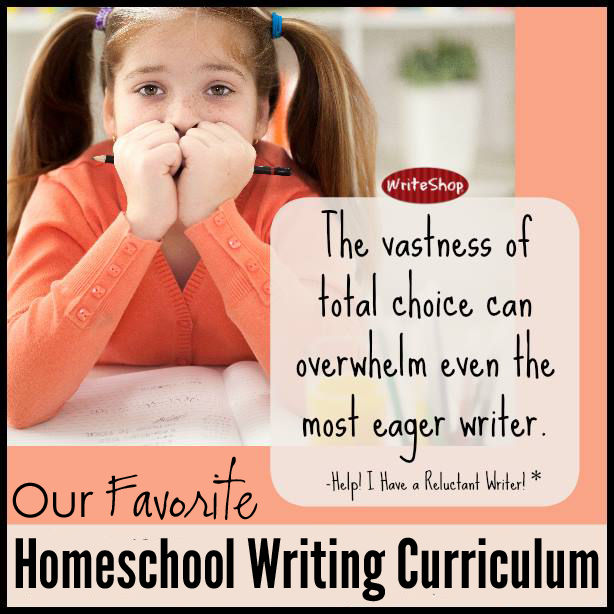
Many of us get caught up in the ‘right way’ to teach something (or maybe that’s just me), and in the process we often forget that learning should be fun and something our kids desire to do. When the creativity literally shriveled up in our girls, it was a moment when I realized we needed to stop and bring the life back into a subject that was dry, dry, dry – and make it fun!

Enter WriteShop…

We picked up a set of holiday StoryBuilder cards from WriteShop before one Christmas break and suddenly, based on three little prompts, the writing floodgates opened and stories began to pour out of our girls. Notebooks were filled (and kept going and going) in just a short timeframe. The love for writing returned.

Ironically, we already had one level of WriteShop on our shelf, but I had put it aside for something else (hello, shiny). We pulled that book back off the shelf, ordered additional levels, and haven’t looked back since! WriteShop has become the writing program of choice for our children, and one that I wholeheartedly recommend to other families.

A Solid Writing Base

writeshop-features-1and2-b

This year, Laurianna (11th grade) has been taking dual credit English classes at our community college that require a lot of detailed writing assignments. I’ll admit that at first I was nervous – would she be able to handle the requirements? 

In her sixth and seventh grade years, she completed both WriteShop I and WriteShop II and went on to work through three years of a high school literature program in which I based the writing rubrics off our time with WriteShop – and you all, she has been SO prepared! The foundation those two years gave her were truly the core of her writing.

Not only did the WriteShop I and II programs prepare her, they prepared me as a teacher to truly instruct her in the writing process (from essays to research papers), evaluate her work, and offer constructive feedback. As I mentioned before, the grading rubrics were highly instrumental in our high school literature program as well and helped in various co-op classes when needing to provide instruction and guidance to those students.

Really truly, the one thing that I keep repeating to my high school lit classes – being able to write a strong paper is one of the most important things in education. Choosing words carefully, writing a persuasive argument, proper spelling – writing is a part of almost every facet of our lives!

A few words written poorly can make all the difference, and I want our kids to have a strong writing background, which I know they will thanks to WriteShop.

I’ll also admit that the teacher’s guides in the WriteShop 1 and WriteShop 2 levels have greatly spoiled me. The grading rubrics and instructions are very clear – such a huge help to a busy homeschool mom, and the step-by-step program is easy to follow for both students and teachers.

Something for EVERY Grade Level

While I’ve shared much of our love for the WriteShop I & II programs, they truly have a writing program or tool for every grade level, and it’s never too late to jump in and start. Our younger children are also using their programs (Junior and now WriteShop I), and we have worked through all the levels of their programs in recent years. We really love it that much!

From grades K through high school, there is truly something for each of the children in your home to use. 


FREE Writing Prompts

WriteShop

Don’t miss their FREE writing prompts either! These are a fantastic way to get a peek into the WriteShop programs – and get hooked as our family did! From elementary through high school, there are mini-lessons, story prompts, word prompts, and programs to encourage and help even the most reluctant writers! Here are a few reviews that’s I’ve written in the past:

Writing doesn’t have to be another chore you add to your homeschool day. It can be fun and productive – and inspire your family to creative writing for years to come.

A Beanbag Your Family Will LOVE!

In our home I’m not much for clutter, knick-knacks, or items that do not have a specific purpose (or dual purpose). If it’s something that will just take up space, it’s likely that item will find another home quickly.

More recently something was introduced into our home, and while it takes up a little more space, it has become so very well loved – dare I even say, coveted. Every time I turn around, it has moved because one of the kids has claimed it for the day or week. 

We have been thrilled to have a CordaRoy’s convertible bean bag in our house the last two months. Not only has it provided much comfort all over (it’s been dragged from the basement to the schoolroom and everywhere in between), but it serves a dual purpose – a queen-sized guest bed! It may also hold a special place in my heart since it is the perfect place for a certain 10 year old and me to curl up and read together. 

You all – the people who put this beanbag together are genius. It has been such a wonderful addition to our house and I have been telling everyone how much I love it, especially because you can use it in multiple ways. 

Before we received our CordaRoy’s bean bag, we had purchased a trundle bed to slide under our boys bed when friends came over. Let’s just say, the next morning I found the kiddo sleeping on the floor because the trundle was so uncomfortable. To be fair, we invited this same boy over again to test out our convertible bean bag – he was thrilled to test it out and LOVED it. :) 

Needless to say, that trundle bed is now considered taking up unneeded space and is leaving the house. We have a much better alternative with our bean bag! 

Here’s Why We Love Our CordaRoy’s

It can be used multiple ways – beanbag or bed. I mentioned that I’m not one for clutter. The fact that the bean bag is easy to move around the house and be used as a bean bag some days or opened up to make into a bed, makes it so worth it to us. Our kids are getting bigger, so having the queen-sized option is great, especially for visiting guests. We were able to use a standard set of queen sheets without any issue (bed side is 60 x 80 x 10”). Check out their size comparison chart for a visual: youth, full, queen, and king.

Additionally, there are multiple cover options. We have the charcoal chenille queen sleeper and the color blends in all over the house and is also a soft, plush fabric. Corduroy, velour, faux cowhide and other cover choices are also available. 

It is super comfortable.  Our kids don’t quite fight over the bean bag (other than they each want it in their own room), but this is a bean bag you just sink into and don’t want to get out of. Don’t worry adults – I promise you will be able to get up. Trust me. I’ve done it.

Packed full of memory foam, it envelops you and you will love it. We’ve recently switched to memory foam pillows and the comfort of both together is fabulous. There’s also another member of our house who loves it and won’t stay out – our pup, Addie. She’s rather hilarious in it, curling up whenever she has the chance.

It will LAST. We’ve had other beanbags in the past and hands-down this one feels different and doesn’t compact after a lot of sitting, jumping, or sleeping. Besides that, it has a LIFETIME Guarantee. This may seem insignificant, but after many a flat bean bag, this is a big deal for us. 

Setup is super-easy. When you want to convert the beanbag to a bed or vice versa, it will take only a few minutes (we may have timed ourselves at just over two minutes). One of the kids and I were easily able to do it together (their demo on folding it like a taco is very helpful). Take a quick 30 second peek at the video below to see how easy it is. 

A Special Discount for You!!

CordaRoy’s has offered my readers a 10% discount on any purchase they make. Use the code PXQU during checkout and you’ll save. 

Right now bean bags start at just $99 (youth size), so it’s the perfect time to shop. Additionally, any order over $250 receives free shipping – so double savings for you!

Truly you all – this is something your family (and friends) will use and enjoy for years and something our entire family recommends to yours. I am beyond thrilled with this beanbag and know you will be as well! 

Click HERE to learn more. 

Robotics for Kids – Building Q the Robot

EEME is a blog sponsor and we received this product free for the purpose of reviewing it. All opinions expressed are my personal, honest opinions. You can read my full disclosure policy for more details. 

robotics-for-kids-building-q-the-robot

Over the last year Zachary has learned so much about circuits, and this past month he was able to dip his toe into a bit of robotics thanks to EEME. When you add in his curiosity of robots thanks to movies like Star Wars, the opportunity to create his own robot was something he couldn’t wait to do. I am beyond thrilled with the new line of robotics products coming from EEME – and I think you will love them too. 

Q the Robot

robotics-for-kids-q-the-robot-project-from-eeme-14

Q the Robot is a project kit that will guide your child through the process of building a 3 wheeled robot that follows light. He is the first in a series of robotics projects from EEME – and there is no coding required to get started! Once completed, Q follows light around using two sensors, or photoresistors. When light is shined directly onto the sensors, Q turns to follow the light. 

building-q-the-robot-robotics-for-kids-from-eeme-4

Included in the kit: 

  • 4 AA batteries (if you accidentally leave your robot on, you’ll need to replace these – *cough*) 
  • 2 large wheels and a caster wheel
  • 2 motors
  • chassis platform for body of robot
  • a LOT of small parts (screws, nuts, capacitors, photoresistors, labels, velcro, brass posts, switch, resistors, transistors, wires, and LED light) 

Over the course of 34 short lessons, kids ages 10 and up will be able to build their own robot. For our 11 year old, it took a little over an hour.

img_6639

I managed to snap a few pictures of Zachary in the building process, but the truth is – he did the bulk of it on his own. Initially I walked into the schoolroom one afternoon and found him snapping his own pictures to show the building process. 

building-q-the-robot-robotics-for-kids-from-eeme-12

After snapping a few pictures, Zachary went to work on the body of the robot. With this project we did need to pull a few supplies from around the house, including a screwdriver, scissors, a pen, and a flashlight stronger than 300 lumens. 

robotics for kids - Q the robot from EEME project
All in all, it was a project that didn’t require as much wiring as some of the past projects we’ve worked on from EEME, a little more ‘building,’ and a lot more learning about how photo resistors work. 

Below is a short clip where Zachary explains the various components of the robot and how everything works. (Feed readers can watch here). 

Skills Learned from EEME

playing with Q the robot

One of the things I love most about the projects we’ve worked on with EEME is the independence Zachary has learned in the process. While I typically am around while he works on his latest electronic creation, and was very excited to see the Q the Robot project, I managed to miss out on the bulk of his newest creation because he has become so independent. Zachary pulled out the iPad, logged onto the site for the video tutorials, and completed the bulk of the project without me knowing he was working on it. I only knew he was done when Q started running on the floor behind me! 

building-q-the-robot-robotics-for-kids-from-eeme-10

He has learned to problem solve and review if he cannot figure something out – before coming to me with questions. When his robot didn’t initially work, he went back to watch a few short videos and see what he may have missed – turns out it was something he connected wrong. Although it was frustrating for a moment, he is also learning to pay careful attention and not try to skip ahead all the time (something he tends to do). Working with circuits and electronics has taught him there is a process to getting things done

Here’s another quick video showing how Q moves around in the house – just remember to turn the switch off when you’re done, or you may need to replace the batteries (wink). Fortunately, that was MY fault. There is a handy light to alert you the battery pack is still on. 

More Q the Robot to Come!!

robotics-for-kids-q-the-robot-project-from-eeme-17

EEME makes hands-on projects and provides FREE online lessons to teach kids electronics, fostering their curiosity for how things work and prepping them for the STEM opportunities of tomorrow. Each project kit is paired with online curricula to not only show your family how to assemble the kit, but more importantly, teach them how it works.

Continuing robotics projects are in the works (one level is already available) that will build on the base Q the robot – and the next step involves coding! Read more about the future EEME robotics projects on their blog

Monthly subscription projects and various project kits are also offered from EEME. Be sure to check out a few of our other project reviews: Project AmpProject DIY Light DisplayProject Attraction, Project Tentacle, and Project Genius

Don’t miss the FREE interactive online lessons to teach your family the fundamentals of electronics. Sign up for FREE to access EEME’s online lessons.

Follow the EEME blog or find them on Facebook, PinterestInstagram, and Twitter.


Perfect for ages 10+

Time Required: 1-2 hours

Parental involvement: varies based on child


Our Favorite Homeschool Math Curriculum

Almost seven years ago, in 2009, we were facing tears and much drama when it came to math time. One of our daughters knew her facts and could compute facts in her head with little problem, but when it came time for her to figure the answers and write them down on paper, it became a very long and drawn out process. She would second guess herself. Recheck her problems over and over. What should typically take little time, turned into tears and frustration, and led to one girl strongly hating math. 

It was at that point that we put the worksheets aside, turned to some friends for advice, and ordered Teaching Textbooks to try. It was a perfect fit, and we immediately ordered a level for our youngest daughter as well. The changeover was made to the program for all of our kids once they were able to work on the first level of Teaching Textbooks, and we have used it ever since. Truly, it’s a program that I recommend to all of my friends, especially those that dread teaching the upper levels of math. (You know who you are.)

While math was one of my favorite subjects in high school and college (there is something oddly satisfying to me to be able to work out a problem and have a tangible solution to that problem), I will admit my brain has a hard time switching between Algebra 2 and 4th grad math. Call me crazy, but having Teaching Textbooks has been a magnificent relief to my over-stretched brain. For this upcoming school year our kids will range from 5th grade math up through Geometry. The mere thought of that makes my brain hurt – yet happy, since I know we have a solid program in place to teach the kids. 

All Levels of Teaching Textbooks are Self-Grading

If you’ve ever had to grade endless papers, especially when you get to the high school level, you will be most thankful for this feature of Teaching Textbooks. (Pre-Calculus will be self-grading as of August 2016). A few years ago we had a non-grading version of Pre-Algebra, and OY! Let’s just say it was a huge headache. It was well worth it for me to upgrade to the self-grading version and take that hassle off my hands, especially when we took into consideration that three other kids would be using the program as well. As a parent, the gradebook is EXTREMELY helpful. For our high schooler, I can print off a copy of the gradebook to include with transcripts. 

The Kids Can Work on Math Independently

First-2-weeks-of-homeschool-August-2015-6.jpg

A laptop and a set of headphones, along with the program, is all it takes to get started. You don’t really need the headphones, but if you have kids that are distractible (or perhaps a parent who can’t focus – ahem), headphones are a wonderful addition. Each of our children can work on their math lessons independently, from third grade and up. The lessons are typically read/spoken to the children, and once they do the solving of the problem, they know immediately if an answer is correct/incorrect. 

For our children, this immediate feedback has been key for them in moving through lessons quickly – and quickly identifying areas they struggle grasping. Because I can see their grades as soon as the lesson is completed, I can also check to see what problems they may have answered wrong, and help them if needed. 

Continual Review and Second Chances

Each level of Teaching Textbooks includes continual review, so you can be sure your children are mastering an area. In addition, kids are also receive a second chance. There are times when our kids figure up the correct response, but type it in wrong, and other times when they get it entirely wrong. Receiving a second chance allows them a moment to look back over the problem, re-figure, and enter in the correct answer before moving on. 

We Can Use the Program With Multiple Children

With four kids, I want to find curriculum that makes sense for our family monetarily as well. While the upfront cost of the program can seem intimidating, when the cost is broken down between four children, it becomes very manageable. Once a level is purchased, we don’t have to re-buy the program (unless the kids use the workbook). 

Our kids work primarily on the computer, and refer back to the workbook, but do all of their figuring and writing on graph paper, making it a great way to pass the programs on to our younger children. 

Thorough Explanations and Understanding

Last year we let our oldest help choose her curriculum for the year and took her input regarding a few subject areas. She decided to try something other than Teaching Textbooks for Algebra 1. Within the first three months of the switch, she was growing increasingly frustrated, even though I was able to help explain concepts, and also find some video clips for harder concepts. By mid-semester she came and asked if she could switch back to Teaching Textbooks. She decided to go to the very start of the Algebra 1 program and work through each lesson. It wasn’t that one program was easier than the other, but the lesson walk-throughs and explanations of Teaching Textbooks gave her a solid understanding and were not as confusing to her as other programs (let’s face it, Algebra isn’t for everyone). 

The Program Travels Well

Although we do try to plan our vacations not during typical school weeks, there are times when we have doctor’s appointments or the kids are at their grandparents. The only thing they need to bring along is the CD-ROM portion of the level and then pop in a disk to complete their lesson. Now granted the kids may not be entirely thrilled about this part of the program, but it definitely is a benefit for me! 

Parental Override on the Grade book

Parents can also go into individual lessons and see how many problems were completed, marked wrong, and also if the solution to a problem was viewed. For several of our children, this is key. While a perfect score isn’t always possible, we do want to make sure the kids fully understand the concepts being taught (especially since math concepts build upon each other). When I look at the grade book each week, one of the key things I check is if our kids have viewed the solution. Each time they get a problem wrong (and after they have a second chance to answer it), they are given the chance to see the problem solved in front of them, and the ‘teacher’ walks them through the steps. 

As a parent, you can also choose to delete an answer to a problem or have a child redo an entire lesson. For one of our children (who gets frustrated with one or two problems wrong), I will delete the answers and let him go back in and retry it. It’s something little, but it makes a huge difference for him. The key is having him master the concept even though I’m not expecting a perfect score. 

When Your Computer Dies…

Over the last three years we have had TWO laptops bite the dust, one an accidental dropping and the other a complete fail. We were able to pull out the hard drive on both laptops, reinstall the programs onto our new laptop, and transfer the grade books over to the new computer with no problem (incidentally, the folks at Teaching Textbooks are fabulous to talk you down from a proverbial ledge should this ever be an issue for you as well). I’m rather adept at it now, so local friends, I’m happy to help if you need it. 

Not Sure Where to Start? 

Teaching Texbooks offers placement tests for your children so you can get a better idea where to start them off. Click here to take a peek. 


Learning How to Make an Electromagnet – Project Attraction from EEME

Learning about electromagnets with Project Attraction from EEME

One of the best additions to our homeschool time this year has been the projects from EEME. Zachary has absolutely loved the hands-on learning and put it well into practice. One could say he is ‘wired’ this way (and yes, the pun was definitely intended)!

Learning about electronics one project at a time and gaining the knowledge of the ‘why’ behind how things work has been encouraging and confidence-building for Zachary. He has since started asking his dad to help out with projects (or may have attempted some on his own – cough), but it has given him a much deeper interest in how and why things work the way they do. 

Learning How to Make an Electromagnet

IMG_7239

Using Project Attraction from EEME, Zachary learned how magnetism is related to electricity and built an electromagnet. The project taught about: 

  • reed switches
  • electric current and heat

Overall, Zachary was able to finish the project in about an hour and a half (build time is approximately 1.5-2.5 hours) because he had a little bit of a hang up on one portion of the process and needed my help. Typically, he is able to work through the steps without parental help (I love that), but the fine wire used in the building of the electromagnet was more challenging and  required a little assistance from me at that point in the project. 

As with all of their projects, there are short step-by-step video tutorials to follow along in the building process. All of the materials needed for the project were enclosed in the box and detailed in the first video:

  • a small magnet
  • an LED
  • a 2″ wire
  • a resistor
  • a reed switch
  • a metal bolt with tape around thread
  • a thin wire coil
  • sandpaper
  • AA battery
  • rubberband
  • paperclip

IMG_7253

The timing of this project from EEME couldn’t have been better. As part of one of our co-op classes for The Mad Scientists Club book, the kids participated in a science fair where they chose a short story read during the year and then worked on a project based on what they learned. They needed to explain the scientific principle behind the project and create a display to showcase their learning. 

The electromagnet project fit in perfectly with the story “The Voice in the Chimney,” and Zachary was able to base his entire science display on this project. (We won’t talk about the short detour he took after putting together the project when he considered creating a much larger electromagnet using his father’s riding lawn mower battery. Fortunately, someone caught onto the boy’s mind meandering and he lived to see another day.)

Science Fair Project electromagnet-3-2

On a much more sane note, Zachary put together a science board explaining how electromagnets worked and showed the one he had created using Project Attraction and then another he tried on his own following the same principles learned in the video clips from EEME. I love that he was able to use the one project as a jumping off point to create more and learn more!

One of the big things learned during this process was the heat generated when creating the electromagnet (the bigger one he created generated more heat, so THANK GOODNESS he didn’t get far on the one with the lawnmower battery). The current flowing through creates the warmth/heat and the battery can also quickly drain if left connected. 

Things to LOVE About EEME

Aside from the fact that all the supplies are included in each of the EEME project kits, the video curriculum is well put together and explain the building process in detail. Each of the videos is between 2 – 10 minutes long. In addition:

  • videos explain the step-by-step process AND the principles involved (how/why something works) – a huge help for parents who don’t know the answers themselves (cough)
  • shorter videos help those with limited attention spans
  • comprehension questions ensure kids are understanding what you are doing
  • videos can be stopped/paused if needed during the process
  • the videos are free to watch – check them out here and get a peek!

The projects would be wonderful extensions to current curriculum or even as after school learning – or even make a great gift! There are different purchase options available, including a basic monthly subscription, individual projects, and a 6 month Project Set. They have different purchase options, and we’ve completed the first four projects so far from the basic subscription.  You can find more information on the EEME website, or follow them on Facebook, Pinterest, Instagram, and Twitter.

Learn More About EEME

EEME makes hands-on projects and provides FREE online lessons to teach kids electronics, fostering their curiosity for how things work and prepping them for the STEM opportunities of tomorrow.

Each project kit is paired with online curricula to not only show your family how to assemble the kit, but more importantly, teach them how it works.

They also have FREE interactive online lessons to teach your family the fundamentals of electronics. Sign up for FREE to access EEME’s online lessons.

Project Attraction is one of the projects in the Builder Basic 6 Project Set and also the fourth project in EEME’s monthly subscription program. Zachary has thoroughly enjoyed all he has worked on (especially Project Amp) – a HUGE thumbs up from our family!

As I mentioned, we’ve worked on several other projects from EEME. If you’re interested in learning more about their monthly subscription program, be sure to check out the below posts for more information:

Building an electromagnet with Project Attraction - EEME

Project Attraction is perfect for ages 7+

Time Required: 1.5 – 2.5 hours

Parental involvement: varies based on child


We received this kit as part of a review campaign, and this review is our honest opinion. Our family has loved the various projects and highly recommends them. 

5 Reasons We Recommend Heirloom Audio Dramas

We are so excited to have Heirloom Audio as a sponsor of Homeschool Creations. Be sure to read through for some special savings just for readers of our site! Reasons we love and recommend Heirloom Audio dramas - a review from Homeschool Creations

Confession. Audio books and drama weren’t always high on my list of homeschool priorities. There was a time early on in our homeschool journey (until the last 3 years or so), that I considered it something akin to cheating if we listened to an audio book instead of reading the book. Then our family was introduced to Heirloom Audio and our perspective completely changed. We have grown to love a good audio book, and so far nothing can compare to the audio dramas from Heirloom Audio. I’d love to share five reasons we recommend that your family drop everything and pick up one (or more) of their audiobooks. 

5 Reasons to LOVE Heirloom Audio Dramas

Have a few minutes? (Hang in until the end of this post too, since I have a great coupon code for you to use when ordering! Email subscribers can view the video clip using this link.) 

1. The entire family will enjoy them. The productions from Heirloom Audio are something the entire family will enjoy – from younger children (ages 7 through adults), they are something to listen to and get caught up in, no matter what your age. 

2. They are incredibly well-produced. Unlike boring narrators and ho-hum story plots, Heirloom Audio productions will pull you in from the first few moments of listening with their full cast (a different actor for each character), music score, and stories that follow G.A. Henty books. From the actor voices of Kirk Cameron to Helen George (Call the Midwife), the directors have worked hard to provide a quality cast and drama you will want to listen to over and over again. 

3. Car trips become enjoyable and quiet. While this may seem like a silly reason, if you have loud kids and/or a lot of them, you’ll fully understand the wonderful thing that happens when children become enraptured in an audio drama. Squabbling stops and quiet reigns as everyone focuses on something they love!

4. History comes ALIVE (and you’ll learn a lot!). Aside from quality production, the audio drama Swords clash. Music soars. And listeners are drawn into the historical period and feel a part of the scenes. Each drama will teach your family little nuggets of history in a memorable way. These are perfect for auditory learners!

5. Each audio drama includes a full teacher’s guide. Expand your listening adventure with the discussion questions, activities, Bible study, and more that come along with each of the different adventures from Heirloom Audio. There is enough included to use the guide as a curriculum guide and talk with your children on how the lessons learned apply to their lives today – and the best part is, they’ve done all the hard work for you. 

 Latest Audio Drama from Heirloom Audio

Heirloom Audio Beric the Briton-6-2

As I mentioned in the video, there are five audio dramas available from Heirloom Audio, including their most recent addition, Beric the Briton

  • Under Drake’s Flag
  • In Freedom’s Cause
  • With Lee in Virginia
  • The Dragon and the Raven
  • Beric the Briton

IMG_7295

Our kids were ALL thrilled to see a new adventure arrive from Heirloom Audio (there may have been a literal squeal from McKenna when she saw it sitting on the counter). The only problem for our family is finding a time that everyone in the house can listen together. There is MUCH discussion on how the audio book may not, under any circumstances, move one iota of a second because a family member may miss crucial information. Thank.you.very.much. That family member may at times even be a parent. 

Personally, Beric the Briton has been my favorite of all the CDs we’ve listened to so far (granted, I’ve loved all of them). Beric takes place during the spread of the Roman Empire into Britannia and follows Beric and his friend as they are put in service to Nero and still long for the freedom of their own country.

“This tale of the Roman invasion of ancient Britannia remains one of G.A. Henty’s most popular novels of all time. Join Beric and his best friend Bodouc as they live the adventure of a lifetime – captured by the Romans, trained as gladiators, and placed in the service of Emperor Nero himself! When the story of a mysterious “Christus” begins to circulate the Roman Empire, Beric and Bodouc are forced to confront their pagan past. Will the two young prisoners be able to overcome their thirst for revenge and discover the source of true forgiveness?”

Adapted from the book, Beric The Briton, by G.A. Henty

One of the things most interesting to me in this story was the battle formations and the differences between the Romans and the Britons. Beric studied and learned from their battles, understanding that his tribe needed to change their methods in order to see different results. The kids and I talked about how battles have evolved over the years – different weapons, materials, and strategies – and it was a great jumping off point for more discussion!

Introduce Your Family to Heirloom Audio

Heirloom Audio Stories

Each CD set is normally $29.97 and available for individual purchase, but different specials are available including this special offer for my readers. If you are at ALL interested in these audio adventures, you’ll want to CLICK HERE  and view the special (includes eight total audio books – 2 of each, one to keep and one to share, at $10 each CD set). Note: Be sure to put “2” in the quantity field when you checkout to receive the discounted price.


Has your family listened to any of the Heirloom Audio adventures before? I’d love to hear your thoughts as well and what you most enjoy! 


We received Beric the Briton at no cost from Heirloom Audio to review. All opinions expressed in this post are our honest thoughts and feelings.