20 Best Tips

Student Planner PDF Download – TWO Choices! (and a SALE!)

Two choices of student planners from Homeschool Creations - help get your student on track_edited-4

Last fall I shared the student planner I had created for our daughters and after a full year of using it, both she and her sister decided they love it! It has been a perfect fit for our family, but several of you emailed and asked if there was another graphic option available – because a few sons felt it wasn’t quite for them. 

After some digging, we found one that our family loved, so another graphic choice for the Student Planner is now available – yay! To celebrate, be sure to read through to the bottom of the post because we are having a sale for one week only! 

About the Student Planners

FullSizeRender 64

The planners are undated, so you can save the file to your computer and reprint them year after year. At the back of the planner you’ll even find a link to a ‘secret’ page where you can download bonus pages to go along with the planner (and if you have a suggestion, feel free to email me and ask!). 

Want a peek inside? I promise it’s super simple – because we found we really didn’t need so much extra stuff, full of color, and ready to download and print. This is a look at our planner from last year (the circle graphic version). 

Email subscribers can watch the video here.

A quick note: I figured out that our printer will print BORDERLESS. It was one of the paper choices in settings. In the video you’ll see some of the pages that we experiments with (ones that were or weren’t printed all the way to the edge). Our front and back covers were printed onto cardstock and then laminated for extra durability. We use a heavy weight paper (24 lb.) to print the planner and make the pages a little thicker.

The Student Planner contains:

Weekly Student Planner layout from Homeschool Creations

  • 8 1/2” x 11” undated pages – use it year after year!
  • year at a glance dates
  • student information and schedule page
  • 12 blank monthly planning pages
  • weekly planning pages for 8 subjects
  • planning for every day of the week (smaller spaces for Saturday/Sunday)
  • goals, notes, and ‘what I learned’ section
  • tracking for books read
  • 2 layouts: August through July or January through December
  • link to a password protected page where you can download updated calendars and bonus pages for the planners
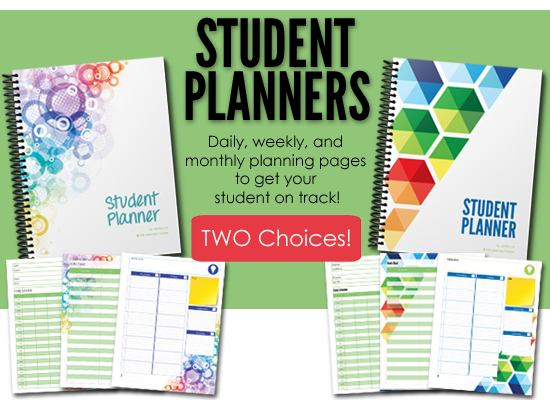
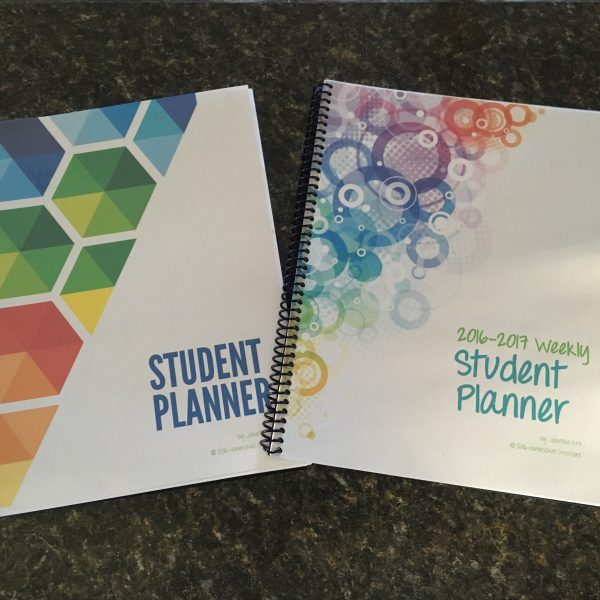
Two Great Designs

Choose the student planner that best fits your family’s needs – or choose both (there’s a special bundle price for purchasing two).

Student Planner collage_edited-1

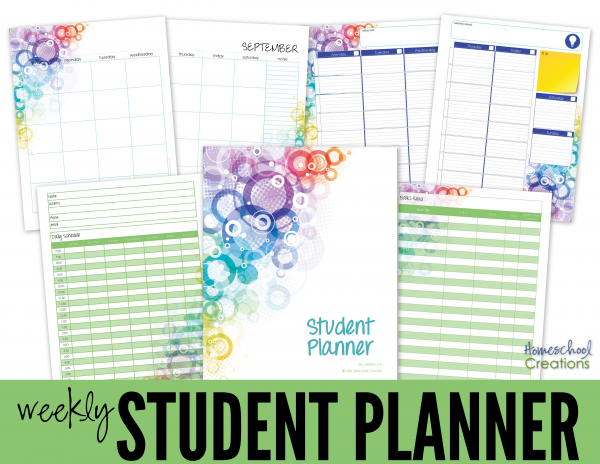
The abstract circle graphic student planner features the colors green, dark blue, and a turquoise blue color for the monthly layouts. 

Student Planner collage hexagon_edited-1

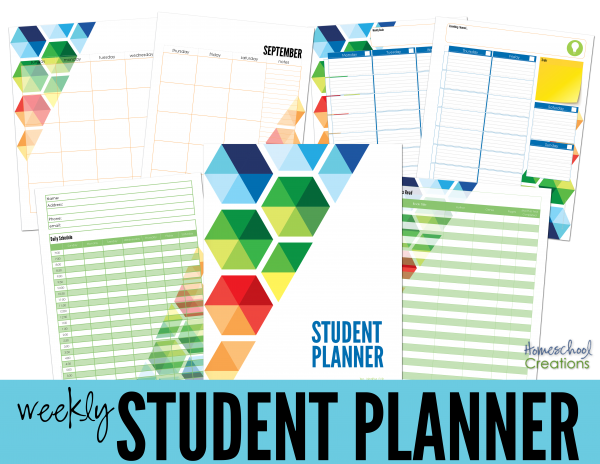
The hexagon graphic student planner features the same inside layout with the colors green, orange, and a medium blue for the weekly layouts. 

Purchase a Student Planner

Each student planner is undated so you have the option of printing off a new copy each year. Each planner is available for $10 and you are more than welcome to print off copies for each of your children – this year and in years to come. Purchase both planners together in a bundle and save even more! There are THREE different purchase options.

Memorial Day Printables – Free Printables

Slide01


Every year families around the country gather for parades and get-togethers to observe Memorial Day, but do we fully understand the history behind Memorial Day? Over the last bit, we’ve been talking about how the holiday first began. 

To go along with our learning, I put together a set of Memorial Day Printables to use with our kids this upcoming week, and I am more than happy to share them with you all!

The Memorial Day Printables include thirteen pages of copywork, trivia cards, a word find, and coloring pages – a little something for kids of all ages. 


Memorial Day printables from Homeschool Creations Memorial Day printables from Homeschool Creations-2
Memorial Day printables from Homeschool Creations-3 Memorial Day printables from Homeschool Creations-4


The below clip from the History Channel has a quick history of the holiday as well…

Books for Kids About Memorial Day


Ready to Download? 

Feel free to download a copy of the Memorial Day printables by clicking on the download button below! :) Enjoy!

Are you planning to do anything special to celebrate Memorial Day? Share your ideas with us in the comments below.


Download button


Don’t Miss These Printables

Constitution-Day-Printables.png

You may also enjoy these Constitution Day printables as well in the upcoming months. 

Egg Drop Experiment – #STEM Challenge for Kids

 Egg drop experiment #stem challenge for kids

For our final co-op class, the kids were all challenged to create a device that would keep a raw egg safe from a second story window drop. They have had a blast with their prior STEM challenges this semester, and this egg drop experiment was no different. Seeing the various creative ideas each came up with to protect their eggs – and the groans and cheers that resulted was equally as fun as the egg drop itself! 

The eggs were supplied when the kids arrived, but during the week prior there were a few guidelines to follow in creating a protective barrier for the eggs: the completed device could be no longer/taller/wider than 12 inches and they needed to use items they found around the house. This meant that if a parachute was added, it was also part of the 12 inch guideline, so it needed to fit within that parameter. And yes, I brought a ruler. A few kids had guessed beforehand and ended up making last minute modifications to have it fit. 

Egg Drop Experiment Ideas

Ideas from the kids varied and it was much fun to see if they worked and hear their theories as to why they thought it would. Some had tested their devices before coming (and had success), but many waited to see how it would work. 

Egg Drop #STEM Challenge for kids-2

Our first egg drop used an old plastic jar lined with cotton balls galore. The jar was surrounded by skewers and adequately taped. The intent was to drop it and have the skewers cushion the drop so the jar wouldn’t hit the ground. 

Egg Drop #STEM Challenge for kids-40

While the container flipped during it’s drop, the impact wasn’t enough to break the egg and the cotton balls did their job cushioning the blow. The only thing that did break the egg was trying to get it out of the jar. A success! 

Egg Drop #STEM Challenge for kids-4

A recycled dishwasher tablet container filled with popcorn was the second entry. The overall container was very lightweight. 

Egg Drop #STEM Challenge for kids-44

Another egg survival! 

Egg Drop #STEM Challenge for kids-16

A ziploc bag filled with marshmallows and the egg surrounded by a gallon sized ziploc bag with more marshmallows was another entry. Predictions were looking good for this submission. 

Egg Drop #STEM Challenge for kids-28

Unfortunately, the density of the marshmallows was enough to crush the egg and it made a fairly runny mess. 

Egg Drop #STEM Challenge for kids-9

The smallest entry in the egg drop was a little box cushioned with cotton batting, a single egg carton styrofoam piece, all topped with rubber bands, the lid, and secured shut with a few rubber bands. 

Egg Drop #STEM Challenge for kids-34

Even though it was so small, it worked beautifully! 

Egg Drop #STEM Challenge for kids-5

A single roll of toilet paper with the cardboard tube removed and wrapped in duct tape was a cozy home for another egg. 

Egg Drop #STEM Challenge for kids-48

The squishably soft goodness of whatever brand used was enough to cushion the drop – another survivor! 

Egg Drop #STEM Challenge for kids-15

Bubble wrap around a small box was a last minute pull-together from one of the boys who may have forgotten to work on his assignment until the last minute. A parachute was also part of the plan, but was nixed due to size limitations. 

Egg Drop #STEM Challenge for kids-20

Fortunately his last minute effort paid off and his entry made it! 

Egg Drop #STEM Challenge for kids-13

This next one was fairly simple: tissue paper surrounding an egg with extra cushioning inside a plastic baggie then placed in a paper bag with more tissue paper. It was tested several times at home with success. 

Egg Drop #STEM Challenge for kids-54

Unfortunately, the padding was not done the same as it had been prior, and the egg did not survive the official drop.

Egg Drop #STEM Challenge for kids-8

Someone’s dad might be a little upset this summer when he realizes a few car sponges are missing from the garage. Originally this creation had a parachute added, but it needed to be removed because of size requirements.  The sponges were glued together and a small space was hollowed out in the middle to house the egg. 

Egg Drop #STEM Challenge for kids-23

This one was a definite success, even after multiple bounces when it landed – and HIGH bounces at that!


Overall, this was such a FUN time with the kids and a great way to end our semester class together. Have you ever done an egg drop with your co-op class or kids at home? If not – have some fun and see who can come up the most creative idea! 


Additional STEM Challenges


Jellybean and Toothpick Structure STEM Challenge

Jellybean and toothpick STEM challenge - building a structure that supports weight

For one of our most recent STEM classes at co-op we took advantage of Dollar Tree jellybeans and an overabundance of toothpicks. The kids have had so much fun with our hands-on challenges and learning about the best ways to build structures that are weight bearing and can stand a little pressure.

IMG_6948

Initially we divided up into four teams of 2-3 students each but gave the kids the option of combining with one other team to build their jellybean and toothpick structure. The kids decided that was definitely the better option and quickly moved together. They also realized it provided them with more jellybeans for eating, should they not used two entire bags for their structure (smart kids).


IMG_6951

One of the BEST things I heard came immediately after the kids combined (and while I eavesdropped on their strategy talk). Both teams were discussing the best way to build a structure that would support the most weight and still have a good height. From each team, the words “a triangle allows the strongest support” was heard. (Yes, they are listening!!)

IMG_6952

KEVA Planks were used as a sort of ‘holding pen’ for one of the teams – they didn’t want to risk floor contamination of jellybeans that may possibly be edible later. The other team obviously had no regard for where their beans ended up.

IMG_6955

IMG_6947

Both teams worked with a triangular setup for their structures, although one took a more systematic approach, setting up an assembly line of sorts. Team members started the process of putting a toothpick into a jellybean and creating piles, while others created pre-made triangles for another team member to work into their structure.


IMG_6953

Overall both teams had a blast with this challenge.  One structure was definitely more organized and that may be the team that wasn’t distracted by eating jellybeans along the way. 

IMG_6954

While Team 1’s structure was taller overall, it came to a definite peak and would not support as much weight when added (we stacked file folders on each structure to see how many it would hold). Team 1 eventually lost their triangular structure as their building continued( see the note on jellybean consumption), lost focus, and that ended up being their downfall.

IMG_6960

Team 2 had a much wider and elaborate base design (neater overall) thanks to their assembly line process. While their structure didn’t reach quite as much height as Team 1’s design, it supported more than twice the weight since it was able to more evenly distribute the weight when stacked.

(And jellybeans were consumed by all).

Such a fun and sticky challenge. Incidentally, picking up a box of 500 toothpicks that are spilled can be pointy and painful.


Additional STEM Challenges


Bouncing Egg Science Experiment – Dissolving Calcium Carbonate with Acid

bouncing egg science experiment from Homeschool Creations

Before you go and think I’m crazy nuts, our bouncing egg science experiment involved a safe acid (grins). Zachary has loved all the hands-on projects to go along with his Christian Kids Explore Chemistry this year, and this one to see how acid interacts with calcium carbonate was no different.

That said – it was super easy to pull together and one that every family should do (did I mention it was easy?). Aside from learning about chemical reactions, what’s not to love about an egg that can bounce?!

Bouncing Egg Science Experiment

IMG_9595

The main purpose of this experiment was to test the reaction of a weak acid (white vinegar) with calcium carbonate (CaCO3 – an eggshell). If you’d like to try this at home, you only need a few items:


Here’s the quick science explanation:

An egg shell is made up of calcium carbonate, so when the egg is soaked in vinegar (about 4% acetic acid) a chemical reaction begins. Carbon dioxide is released (the bubbles you see on the shell) as the vinegar begins to dissolve the shell. The membrane of the egg will remain (the rubbery part of the egg).


IMG_9592

The egg was supposed to soak for 24 hours and then observations were to be tracked. Ours ended up soaking a bit longer (as in four days) because it stayed in the schoolroom over the weekend and we completely forgot out it. It was a lovely stink come Monday morning. (grins)

IMG_9606

The vinegar was carefully drained from the egg and GENTLY rinsed off under clean water. (May I stress gently again?)

IMG_9607

We pulled out another raw egg to compare and contrast to our experiment. The egg that had been soaked felt completely rubbery and could be gently squeezed (again with the gentle). The entire shell had dissolved thanks to the chemical reaction with the vinegar.

Size-wise there was a significant difference as well. When the egg soaked in the vinegar,  some of the vinegar and water in the vinegar moved through the membranes of the egg and into the egg. Egg membranes are semi-permeable so water can move through them (an example of osmosis).


IMG_9608

Trying to find the yolk now the shell was missing, we grabbed a flashlight as well to see how translucent the egg was. 

IMG_9616

The fun part came in the bouncing of the egg. To keep the counters clean, we pulled out a tray and tried dropping it from different heights to see if it would break.  You can see a short (and slightly blurry – sorry!) video here or below.


Once we were done bouncing and playing with the egg, we popped it with a fork to feel the membrane of the egg. (And yes, we all thoroughly washed our hands when we were done!).

IMG_9631

This is one of those experiments we would like to do again, but this time with several eggs in different jars and then try a few variables when we are done soaking them all in vinegar: moving one to plain water, one to cornstarch, and letting one sit out on the tray to see what happens to them all.

There’s so much more we could do, but this was a fun start to our egg experiments.

More Science Fun

If you have some time and need a few ideas, we worked on both of these projects this year and had a blast with them (especially the cookie skillet!).

Atomic Cookie Skillet Models – learn more about the Periodic Table and how what atoms consist of with this fun (and edible) project!

Building Atom Models – build simple atoms together and make chemistry hands-on for your kids with this easy activity.

Umbrella Challenge – STEM Activity for Kids

Umbrella STEM Challenge - create a shelter to keep a tissue dry

This past week in our co-op class we worked on another ‘instant challenge’ together, breaking up into four teams to create a structure that would keep a tissue dry. Out of all of the projects we have worked on so far, this one seemed to click with the kids.

Each week we have divided into groups, raced to finish a project using the few items provided, and at times there has been grumbling of “they copied our idea” or frustration when what seemed like a great plan literally crumbled to pieces. While not everyone was successful in their building endeavor, the umbrella project brought everyone together and helped the kids see the importance of teamwork.

The Umbrella Challenge

We brought a large Rubbermaid bin into class, 2 quarts of water, a colander, a tissue, and a container (to keep the tissue from touching the bottom of the bin).

Challenge: Create a structure that would keep the tissue dry when water was poured (like rain) over it with a set amount of materials.

Materials: 2 pieces of paper, 3 rubber bands, 4 pipe cleaners, 3 playing cards, 2 pencils, 2 paper cups, 4 pieces of tape, 5 cotton balls, and 3 rubber bands.

Also needed: water, colander, tissues, and a large plastic tub.


Team Results

The kids were broken up into four teams and given a short amount of time to chat with their teammates and decide on a design idea. As soon as they had an idea they set to work on their designs. The structures could be tested at any time by the students, but had to keep the tissue dry when the teachers tested it.

Team #1

Umbrella Challenge

One of the creative things this team did was use the cotton balls as the corner bases, attaching them to the pipe cleaners. While their structure was stationary on the carpet, when placed in the tub, it slipped around, so they added them to give stability, knowing when the water fell in the tub it would be soaked up into the cotton balls and give it a little more weight.

They also poked the pencils through the corners of the paper to give it a good arch and place the playing cards on the top so the paper wouldn’t soak through as quickly.

Umbrella Challenge-9

We poured the water over top and their design was successful – the tissue stayed dry. Out of all of the supplies, they didn’t use the cups or rubber bands, but did use everything else.

Team #2

Umbrella Challenge-14

This team didn’t use all of their supplies (rubber bands), but created a narrower shelter, using the pencils as the base and paper cups to provide a ‘run-off’ area for the water. Overall, they didn’t have a solid structure and needed to use the tub to support the ends of their shelter (while it was supposed to be free-standing).

Umbrella Challenge-19

When the water was poured over, the structure was too narrow, so the tissue did absorb some water. While in theory it did seem good, the overall design didn’t quite work.

Team #3

Umbrella Challenge-23

This team earned some points for creativity and strength. Their legs were very stable (good idea rolling the paper to create a stronger leg that wouldn’t get floppy when wet as quickly). They used almost all of their materials (they chose not to use the cups).

Umbrella Challenge-30

Although they had a great base to start with, their structure wasn’t wide enough to cover the tissue when the water was poured over it and ended up soaking wet.

Team #4

Umbrella Challenge-34

While team 4 didn’t quite use all of their material creatively (ahem – the rubber bands were dropped on the top so they could say they has included them), they did have a great base for their umbrella using two pencils as stability to the pipe cleaners looped through the corners to lift it up above the tissue. Their top was also thick so the water would stay off the tissue (using cards and two sheets of paper with the paper cups cut up inside to provide extra protection). Not a beautiful structure, but it stayed together!

Umbrella Challenge-39

When the water was poured over their structure, the tissue stayed dry!

The Importance of Teamwork

While the teams were busy working, there were a few complaints of ‘they are copying us’ (even though the other team wasn’t looking) and frustration when what seemed like a good idea, turned out to be a flop and plans had to be re-worked (and still flopped).

Umbrella Challenge-40

Although I had seen two of the teams beginning structures, I pulled out my own set of supplies and decided to put something together quickly. Ironically, my structure was very similar to one of the other teams (team 4) that I hadn’t seen until we all came together as a group.

Umbrella Challenge-42

My structure used the paper as the ‘umbrella’ with the three cards together underneath and held up the the pipe cleaners. The rubber bands were used to keep the pencils closer together so the paper would arch and not spread out too far when it became wet. Not too shabby for about 4 minutes of quickly building.)

As a class we had a great talk about how there are times when we may be working on an idea or concept, have the same supplies or focus, and each of us may have some similar plans, but may tweak it in a different way. It isn’t copying, but sometimes just happens. The process of discovering what does and doesn’t work often leads us to a better way of creating something.

Umbrella Challenge-47

Coming together as a group, we took the best ideas from each team and built a structure using those designs and had an even better structure. The cups were cut in half and we added slits to create addition ‘run-off’ areas and also provide a way to keep the paper in a tent style. The three playing cards were bent in half over the paper to create a more waterproof peak.

Note: We didn’t have enough time to fully build it, but would have added the pencil and pipe cleaner base from Team 4 to keep the paper up and out of the water.

While individual teams had good ideas, together, as a whole, the best one was created. It was really a great ‘learning’ moment and helped diffuse some of the frustration between the kids – team building at its best.


A Few Other STEM Activities You May Enjoy